How to Make conductive Paint

In this tutorial I will be showing you how to make conductive paint using some of the basic materials which is found in an around home and also additionally a small Science experiment which shows what a graphite inside pencil can do! which u never thought about.
This is an awesome science fair projects idea while you can make this as science fair projects for 8th grade, science fair project for 9th grade and also science fair projects for 10th grade as the process of making these is explained in simplest possible way so that even a beginner can understand and be able to make, as always i added video Link at the end
What is Electricity Conducting paint?
As we all know that one of the common method to transfer electricity from power station to our houses is by using wires made of aluminum and also the wires used for wiring harness in home is made of copper/aluminum, conducting paint is the one in which we can draw circuits on paper, plastic, wood and many other objects to transfer electricity and eliminate the use of wires, also switches can be made using this conducting paints, various researches are going on related to development of such paints
Electricity conductive ink is costly, So making it yourself would be a lot cheaper hence we will learn how to make conductive paint at home
Basics of conductivity
Ability of material to conduct electricity is called as conductivity other definitions include easiness at which electrical charge pass through materials, pure silver ranks number 1 in electrical conductivity followed by copper and gold.
WHY GRAPHITE makes good conductive paint?
Since Silver, Copper, Gold and other best conducting materials are expensive I chose Graphite because
It is easily available from pencils, Graphite also has free electrons
Easy to work with graphite unlike other hard metals
And It’s never an easy task to obtain silver and copper in liquid form in an safe environment(as it needs to undergo process which includes high temperature for melting or various other chemical process). Graphite is used as electrode in arc lamps too, so let’s start our process to make conducting paint using pencils
Note: Alternatively you can use .5mm or .9mm pencil leads which is found/used in mechanical also called as click pencils by making fine powder with it
Materials required to make conductive paint
Pencil, LED bulb, Pencil sharpener, Piece of paper, Water bottle cap or any small recycled container and Water
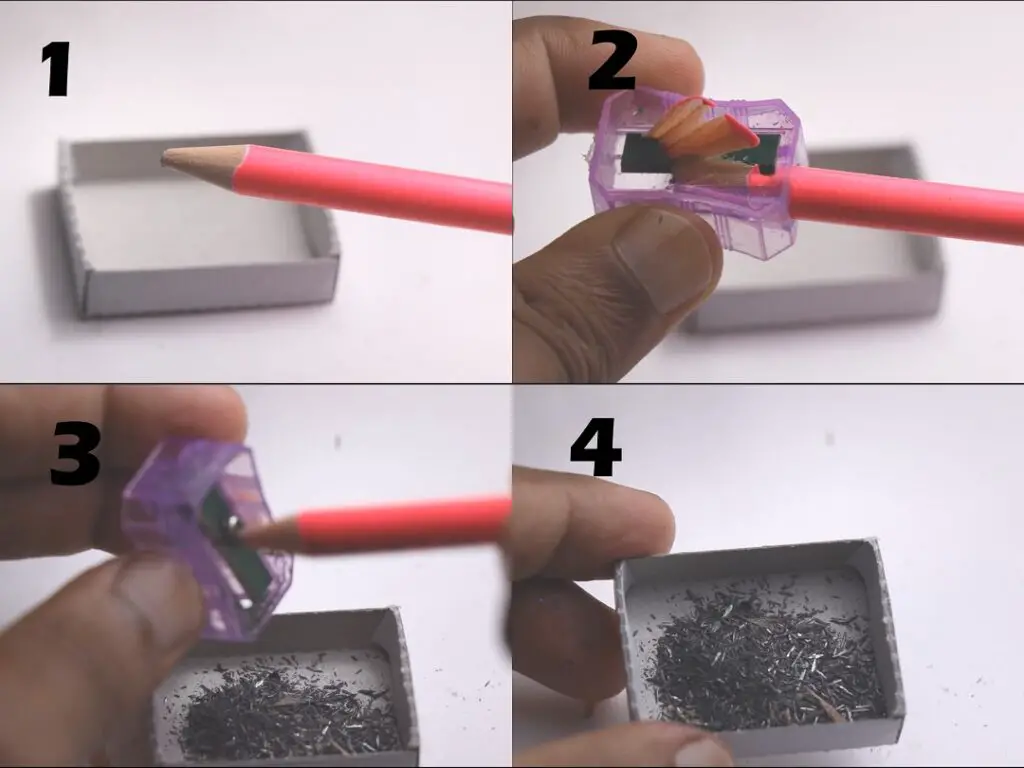
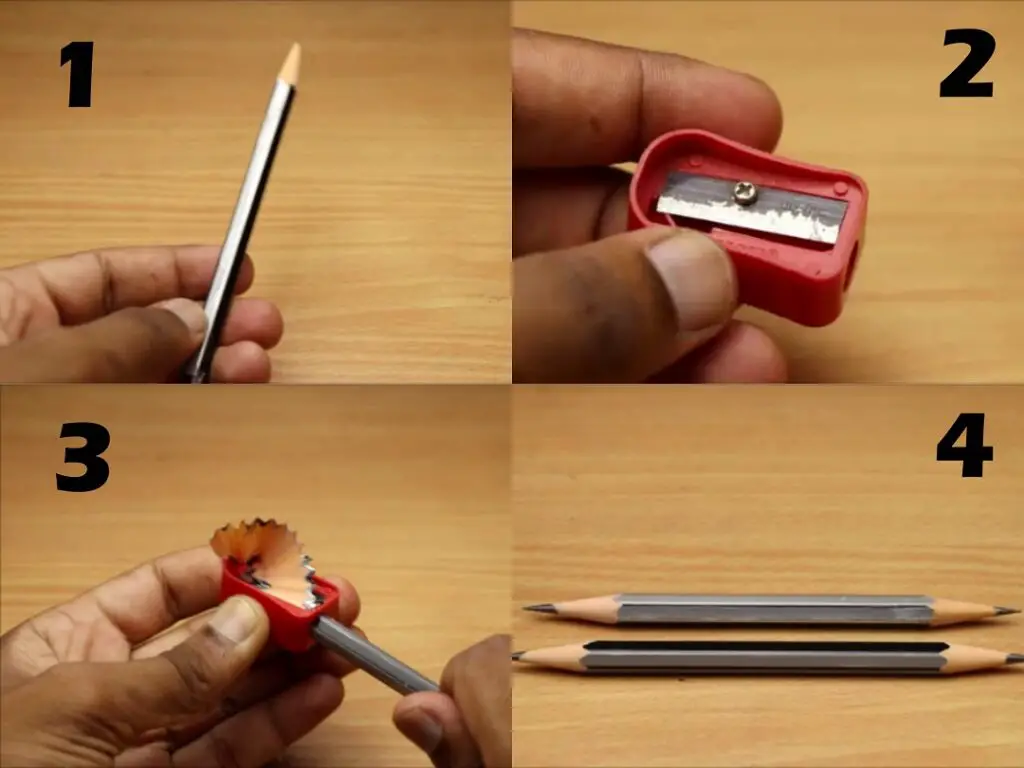
Let’s start by sharpening the pencil by using pencil sharpener and take some of the graphite powder out, this is the easiest method, one of the Other method which you can follow is just cut out the pencil wood using safety blade and take out the graphite lead, since second method is much difficult compared to the first, I recommend to sharpening the pencil using pencil sharpener (an instant method!) the sequence of steps is shown from images 1 to 4 please refer those if u need much clarified idea.
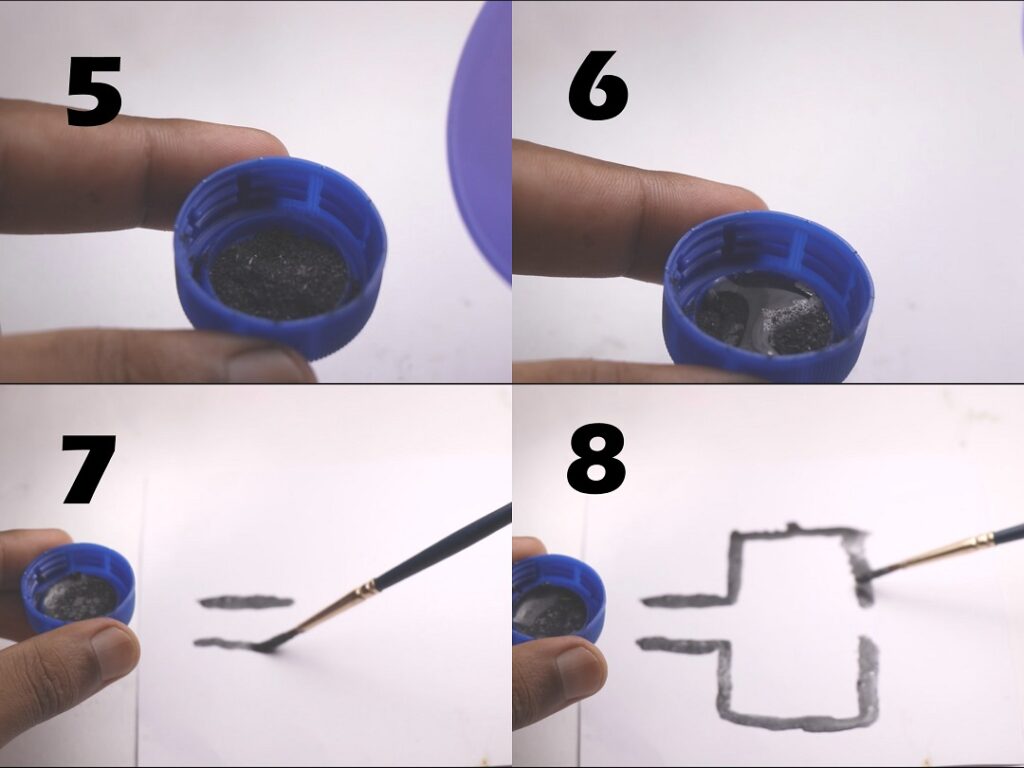
After collecting graphite make it more finer using small plastic hammer(hit it multiple times) once this is complete images 5 to 8 as shown below
collect powder graphite in a small container, I’am using recycled plastic bottle cap to collect powder
Add Few drops of tap water and make it smooth paste, Ink Conducting paint is ready for use
Use paint brush to draw your circuit on any surface like paper, plastic and wood
Circuit Design for conductive paint
Design your own path for current flow
Once Drawing is complete allow It for drying(usually takes couple of hours)
Tip: U can add salt water solution instead of tap water for improved conductivity!
Once everything is dry and ready to go, Provide DC supply to one end of paint using wire
I’ am using 5v dc supply
Other end I’ am using LED diode to check current flow, Switch on power supply, Bulb starts glowing
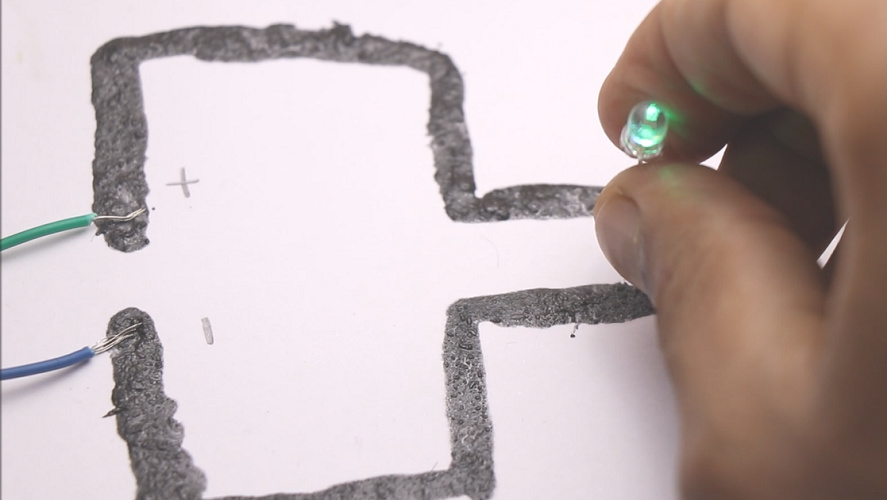
NOTE: Only use DC power supply(5v to 12v) as this is an experimental project
If you want much simpler version of this project and test conductivity of graphite, Here is another simple science experiment to prove that.
Materials required for second project
Pencil, Sharpener, Battery(9v), LED diode(any color of your choice)
Battery connector and Hot glue/normal glue
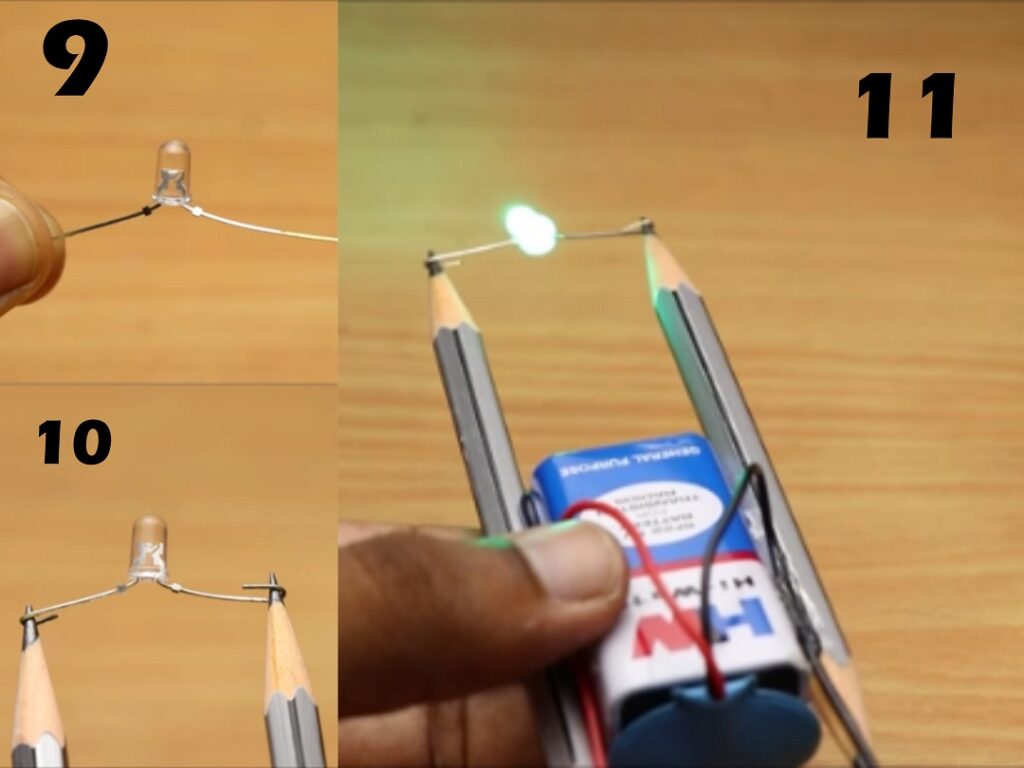
Just sharpen both the ends of pencil using sharpener refer images 1 to 4 for clear visualization
Note: you can replace bulb with small dc motor, but bulb is more suitable
Let’s Begin with steps to build this
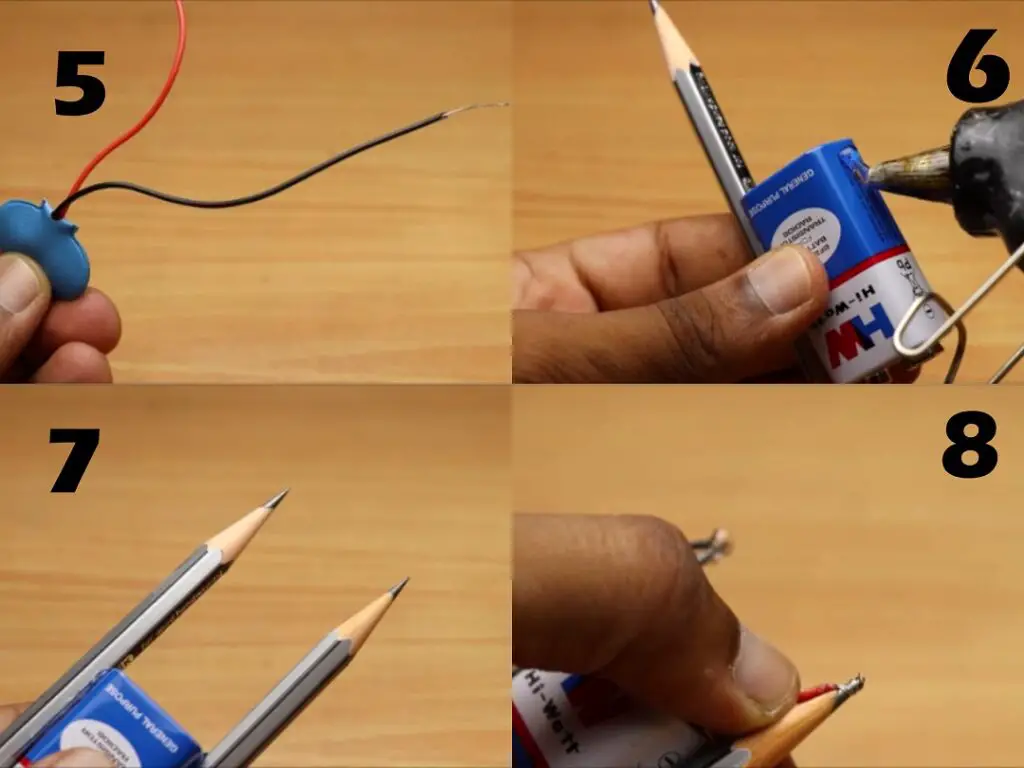
Once these steps are complete attach those pencils to body of battery using hot glue(Img6)
Now we have 4 ends of pencil, Trim off sharp edges as it shouldn’t poke during the process
For 2 ends we are connecting battery connector wires and insulating those areas using hot glue
Remaining 2 ends we are connecting/attaching LED bulb
Attach led bulb to pencil lead by just bending the positive and negative end of led bulb terminals and connecting to graphite leads (refer image 10)
Check out for proper connections
Positive of battery should be connected to +ve of LED bulb
Negative of battery should be connected to –ve of LED bulb, Please refer images from 5 to 10 for connections
We are not using any switch here because battery connector itself can be used as a on/off switch
Once everything is complete Our project is ready for use
Why 5v supply even though LED consumes 1.5v
As you have read tutorial of these 2 projects you might have thought LED bulb requires only 1.5v but you are supplying 5v and 9v respectively but still the bulb is glowing?
The reason is graphite is not a pure conductor like silver and copper hence there is loss during the process of flowing current so after the current is passed via graphite particles at the end we are able to tap about less than half of total supply,if we go to microscopic level the particles of graphite in liquid state will not be closely packed like in solids and hence conductivity will become very much less , hope you got to know the exact reason.
since this is a science project u might be planning to present this in science fair, so I will be concluding this with advantages and disadvantages
Advantages
Very easy to build
Materials are available in and around home, Encourages learning
Understand what conductivity is and materials possessing different conductivity levels
Disadvantages
Loss of power in the process and Needs much more advancement
Hurray! Our projects are successful and working absolutely fine, So our project of homemade electricity conducting paint is complete and a test which shows graphite inside pencil can conduct electricity is proved.
VIDEO on How to make conductive paint
Video shows working and how to make conductive paint tutorial
If you have any suggestions for improvements let me know in the comments box so that much improved version can be built in future!