Arduino Project with Touch Sensor
In this article we will see Arduino Project with Touch Sensor that will teach you using touch sensor with arduino.
Did you know that like normal switches you can also use touch sensors to control the light?
I doubt most of them never thought about this! these capacitive touch sensor modules are inexpensive and useful.
There are various ways by which you can use these touch sensors, like for example controlling the LED, Servos and many others.
Note – Complete video tutorial is available on Jeevan Jee YouTube channel.
You may also like my previous post on arduino garbage sorting machine
What is Touch Sensor?
Touch sensor by the name itself is a touch activated sensor that works on the concept of capacitance.
There are many version of these but i chose the one as shown in the picture below.
You can make various interactive projects using these inexpensie sensor.
Combining servos, LCD, LED and other components can help you understand the working of these tiny component.
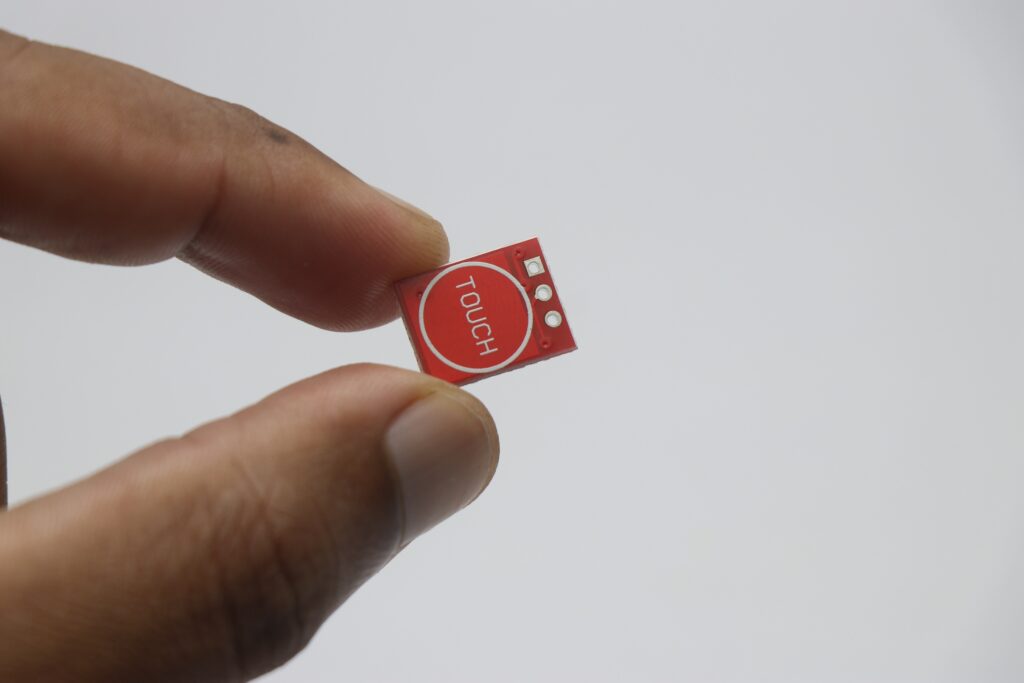
There is no need to physically touch these to act as a switch, just hovering your finger above 5mm will activate this.
One of the inexpensive alternative to those old booring switches.
Materials needed to make touch activated switch
- Arduino Uno from Amazon
- Touch Sensor
- LED
- Breadboard
- Jumper Cables
- Arduino IDE
- Programming Cable
Note that these are affiliate links and upon qualifying sales i may receive a small percent of sales at no extra cost to you.
Touch Sensor Arduino Circuit
After you gathered all the components prepare your breadboard to make the connections as said below.
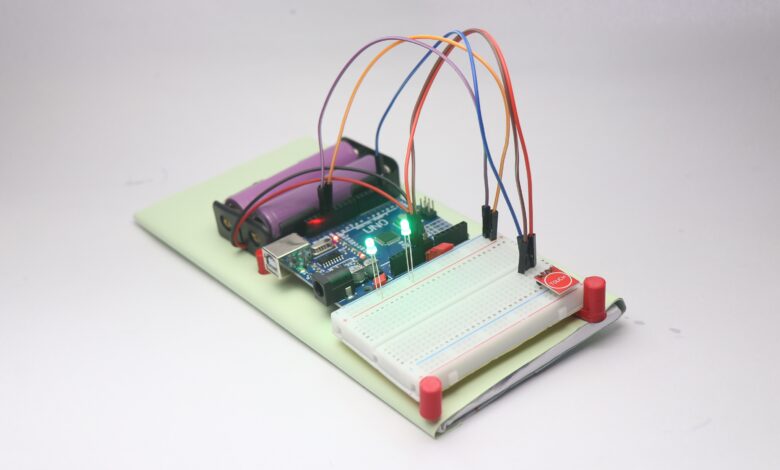
This is the breadboard circuit i have made to show the practical usage of this sensor module.
I was supposed to use single LED, But to make the project look brighter i used 2 of them.
Start by connecting the LED to breadboard followed by connecting jumper cables to the uno.
I will use D13 pin to conneect to positive terminal of LED and the gnd goes with Ground.
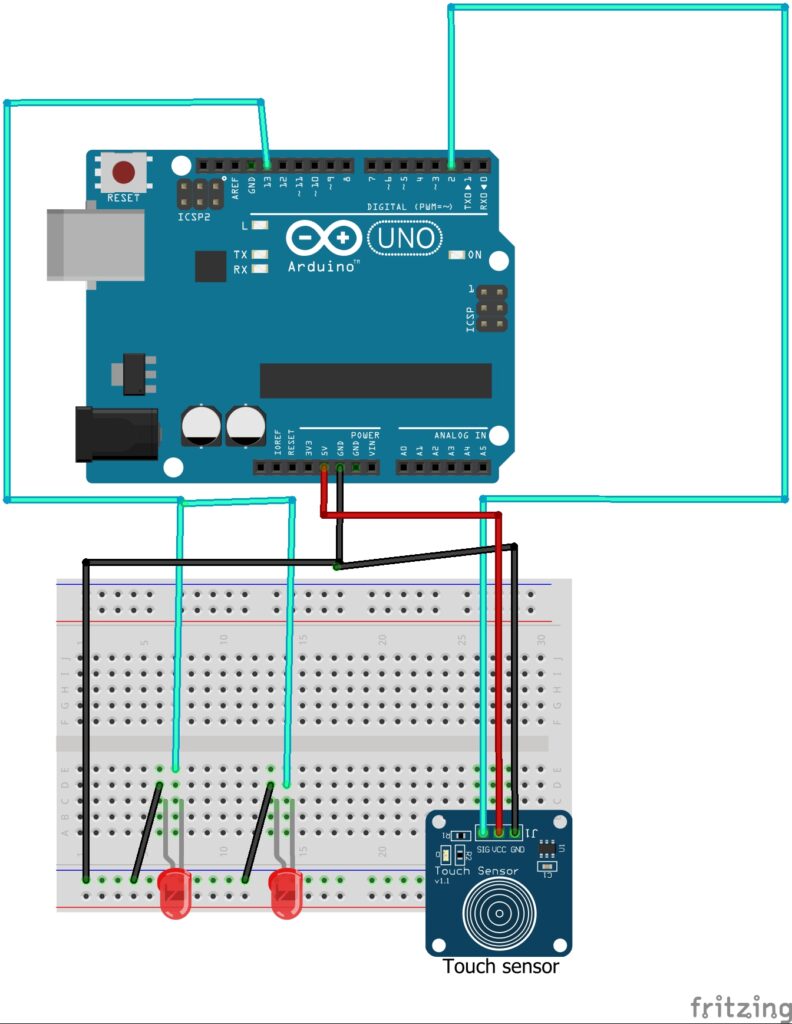
The Touch sensor has 3 pins, Signal, Vcc and Gnd.
Vcc and ground are connected to 5v and gnd on the uno board.
Signal is connected to D2 pin on the uno board, this completes the connection parts and now we can head over to the programming part.
Touch Sensor Arduino Code
This arduino program will help you to control the LED using the touch sensor.
There are multiple options or patterns of button touch options.
Long touch, single touch, double touch these are the patterns by which you can choose to control your LED.
#define touchPin 2   // Touch sensor signal pin
#define ledPin 13    // LED connected to digital pin 13 (or any pin)

unsigned long touchStartTime = 0;
bool ledState = false;
bool isTouching = false;

void setup() {
  pinMode(touchPin, INPUT);
  pinMode(ledPin, OUTPUT);
  digitalWrite(ledPin, LOW);
}

void loop() {
  int touchValue = digitalRead(touchPin);

  if (touchValue == HIGH && !isTouching) {
    // Touch started
    isTouching = true;
    touchStartTime = millis();
  }

  if (touchValue == LOW && isTouching) {
    // Touch released
    unsigned long pressDuration = millis() - touchStartTime;

    if (pressDuration < 1000) {
      // Short press → Turn LED ON
      ledState = true;
      digitalWrite(ledPin, HIGH);
    } else {
      // Long press → Turn LED OFF
      ledState = false;
      digitalWrite(ledPin, LOW);
    }

    isTouching = false;
  }
}
After you paste this program to arduino ide, check for proper port and board type.
Uploading the program to board takes few seconds and then the project is ready for using.
You can experiment with different values on this program to customise your needs.
Now to use this project all you have to do is connect uno to power supply and touch the sensor once.
One tap will activate the LED and long press will turn the led to off.
Well this is all about the touch sensor project, Happy learning.


