How To Make Radar system using Arduino
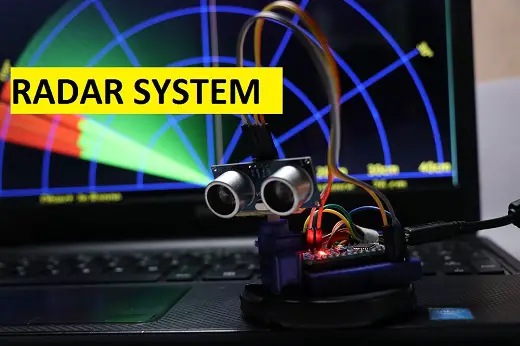
Hi readers in this article I will be showing you How To Make Radar System using Arduino which can detect distance and angle of objects within short range
Instead of micro waves we will be using ultrasonic sound signals from HC-SR04 , this is best Arduino projects and is ideal for mini engineering projects or for science projects related to Arduino, since the building process is explained in very detailed steps along with Circuit diagram and Codes.
What is Radar System?
General definition of radar is it is an object detection system to determine angle, velocity or range, the process makes use of micro waves, most common places of applications are in military and general transportation, Of course We can say especially for military purposes
Features of Homebuilt Radar system
Upto 25cm range and 180 degrees angle coverage, Detects Obstacles and angle Powered by USB
Built at very less cost Ultrasonic sound signals will be used instead of micro waves
Tip: Please check video description at the End of this article for buying links of all components, Video link is provided at End.
So let’s start with supplies/materials required to build this,
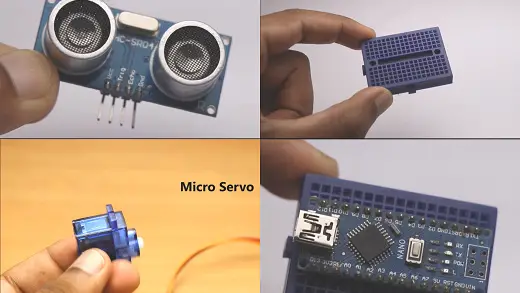
Materials used to build Radar system
( visuals only for beginners!)
Arduino nano you can also use Arduino Uno too all materials are available in amazon, list is given below
Ultrasonic sensor HC-SR04, Mini breadboard ( it can be replaced if wires are soldered directly to arduino board
Jumper wires-Piece of popsicle stick and Hot glue, Arduino IDE with Processing IDE (I used processing 3)
| Part name | Buy in India Buy in USA |
| Arduino Nano | https://amzn.to/3wUGJnn https://amzn.to/2NJkBLI |
| Micro Servo | https://amzn.to/3fMh0rM https://amzn.to/3pF5i3Y |
| Ultrasonic sensor | https://amzn.to/3gcmmLK https://amzn.to/2NjCLUw |
| Jumper wires and Breadboard | https://amzn.to/3cgcdwD https://amzn.to/2OPKmu6 |
Disclosure: These are affiliate links. As an Amazon Associate I earn some credits from qualifying purchases.
Note: Arduino IDE and Processing IDE both are open source softwares meaning anybody can use this free of cost.
Circuit Diagram for arduino radar system
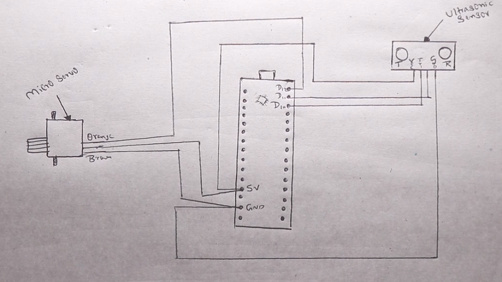
This Is the circuit which I will be using to make Arduino radar system.
Circuit Diagram for Arduino radar system Explanation
Micro Servo
Micro servo has three terminals 2 terminals are for positive and ground power supply while the remaining one will be for signal transfer, here in my case orange, red and brown are colors of wire.
Orange will be for signal transfer so it will be connected to digital pin D12 in Arduino Nano
Brown wire for negative power supply, Red for positive power supply
Here we are not using any external power source instead everything is powered from Arduino Nano
Note: Some micro servo may have different colored wires, please check before making connections.
Ultrasonic sensor
Ultrasonic sensor has four different terminals Vcc, Trig, Echo and Gnd. Vcc is for positive power supply and it will be connected to 5v pin of arduino board
Trig means trigger pin which means transmission of ultrasonic signals and here it is connected to Digital pin D10 of arduino nano
Echo means pin used for receiving ultrasonic signals after hitting the object and these signals will go for digital pin D11 of nano board, Gnd will goto Gnd of board.
Note : Ultrasonic sensor and micro servo positive power supply pins are connected to +5v pin of Arduino, Gnd (negative terminal) are connected to Gnd of Nano board.
Frame building
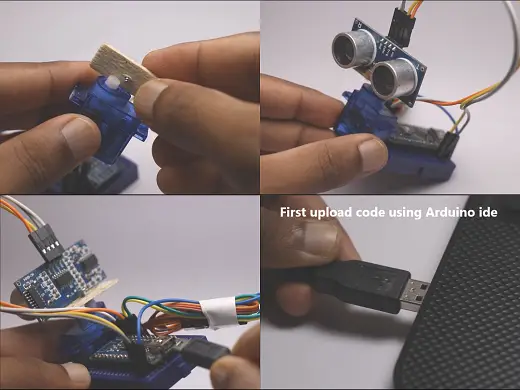
I used a piece of popsicle stick and made small hole at the center, Keep it upon micro servo shaft Fix it to Shaft using screw
Using hot glue stick micro servo to side of breadboard Later using hot glue couple Ultrasonic sensor on top of wood piece which was coupled to Micro servo earlier
Using Tape gather all the wires so that finishing will be neat and no messy wires!This was all about frame building
If u want much more interesting look u can make as per your taste using MDF Wood,cardboard or plexiglass
Once the body and circuit is complete using above circuit diagram at this time upload the code to Arduino nano using Arduino IDE
Codes for arduino radar system
Copy paste this code in Arduino IDE
Later copy paste this code in processing IDE
Steps for uploading Arduino Code
- Connect Arduino nano to computer using USB cable
- Open arduino IDE in your computer
- Download and open the above Arduino code
- Copy and paste the code
- In arduino Ide check for port number and type of board
- Take a note of com port number(we need it later)
- If you want to make any changes in micro servo speed and range at which sensor should sense objects you can do that in codes
- If you are a beginner recommending not to make any changes in code!
- Click on upload
- using arduino IDE(integrated development environment) for the first time it might take a while for the code to get upload
- Once the code is done upload successfully micro servo starts working
- Don’t panic! It’s normal
- Now Arduino IDE work done successfully now lets move on to next step
Process code uploading steps
Open processing IDE
- If u don’t have one get it from google its free!
- Download and install Processing IDE
- Open the software
- Clear all the pre written code if any by default
- Copy and paste the code given above
- Meanwhile use same port number which I have told to take a note while uploading set of instructions using ARDUINO IDE
- Edit the port number( 18th line of code)
- Click on upload
- Also It will take a while
- Once the code gets successfully upload in the end a pop up screen will appear
- Live Tracking will be visible
- To test if it’s working place your hand near working Ultrasonic sensor
- You can find Red colored lines in display screen
- Our Project Is ready for some action
Video for Arduino radar system
watch how to make Radar system using Arduino here
Hope you enjoyed this project, if any readers have queries regarding to any stage of building please let me know in the comments box definitely I will help on that, if somebody made this project let me know that too! Share this idea with your needy friends.
For all the links of components which I have used to make this project please refer description part in my video, Thank you and have a Great Day.


