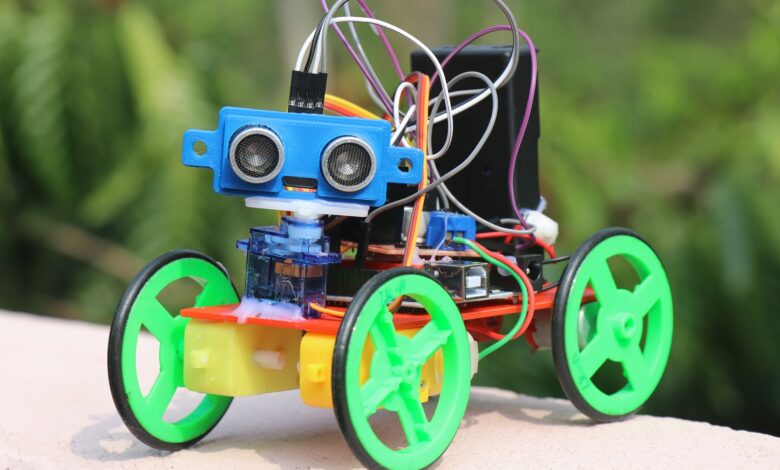
Make Arduino Obstacle Avoiding Robot
Hi in this project i will show you how you can Make arduino obstacle avoiding robot that is best choice for engineering projects.
When it comes to building robots we think of arduino and its sensors and yes wonderful projects can be made.
This robot built using arduino can sense the obstacles and change its course.
Not only we are building this project you will get a chance to learn lot of things about arduino and its components.
Also i have a video tutorial and complete working video for this project below.
Obstacle avoiding robot building materials
- Arduino Uno Kit (for making most projects)
- L293D motor driver
- HC-SR04 sensor
- Micro servo
- BO motor x 2
- DC motors
- Lithium-ion battery with holder
- Switch
- Jumper wires
- MDF wood or 3d printed base
Note these are affiliate links meaning upon qualified sales i may receive a small commission at no extra cost to you.
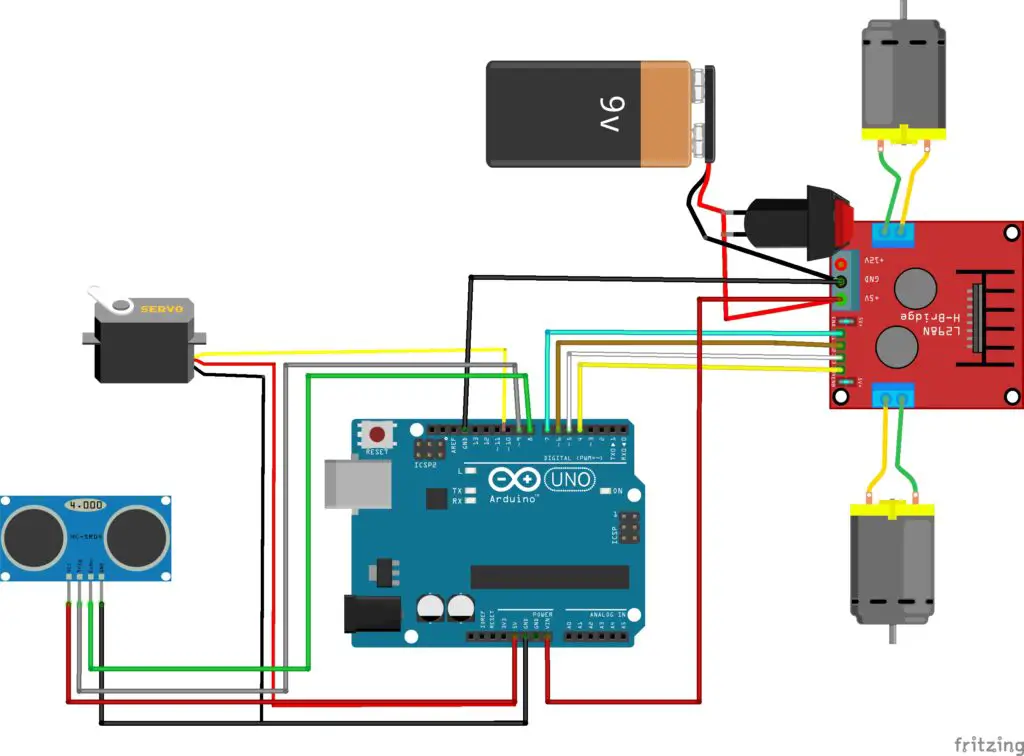
Obstacle avoiding robot using arduino circuit diagram
The circuit diagram used to make obstacle avoiding robot is given below.
If you are a beginner I will simplify this circuit with a circuit explanation.
There are 3 different components and I will explain them one by one
Ultrasonic sensor for obstacle detection
Echo to D8
Trig to D9
Vcc and Gnd to 5v then Ground pins
Micro servo for controlling hcsr04
As usual the servo has 3 pins the power pins go to gnd and 5v pin on the uno board.
Whereas the signal pin to D10 pin of Uno.
Motor driver
In1, in2, in3 and in4 are connected to pins D7, D6, D5 and D4 pins
The terminals of dc motor goes to the M+ and M- pins
Here keep in mind that the positive and negative pins to be connected considering the direction of rotation.
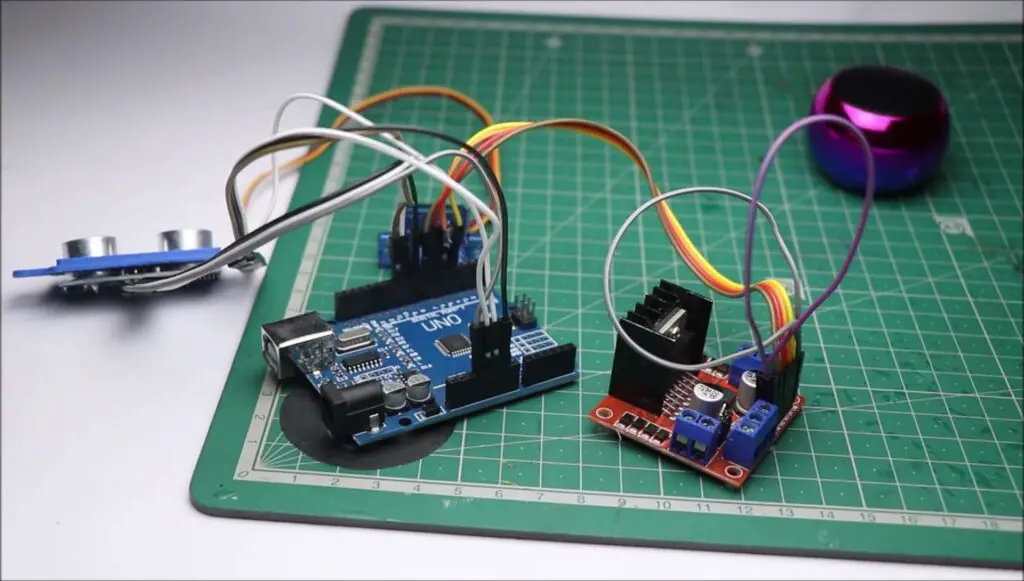
Here you can see the circuit without motors, You might be wondering is the USB power enough.
The answer is no, you need a separate power source for powering the]is robot.
Arduino obstacle avoiding robot code
The program for this project is given here, You can use this on your Arduino IDE
After you have this program just paste on the arduino IDE and select the proper port.
For the board you must select arduino uno and now you can press on upload button.
Building the Project
The basic step in the project is to make the wheel and motor mechanism.
I had a 3d printed frame to which i will be gluing the dc motors.
To save the power i will be using only 2 BO motors, The other 2 motors are there just for the supports.
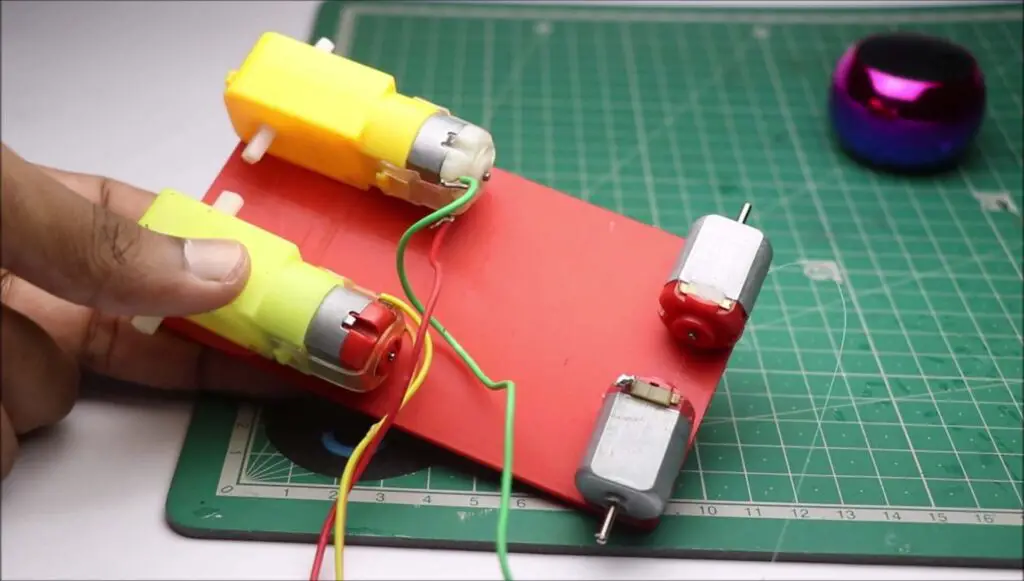
BO motor have torque and the power of 2 motors are more than enough to drive this robot.
Glue the motors like shown in the step and wait for the glue to dry, Later attach the wheels to the shaft of motor.
This is a simple step, Now as we already have the circuit ready we can simply just add to the base.
Follow this step to add all the components to this robot.
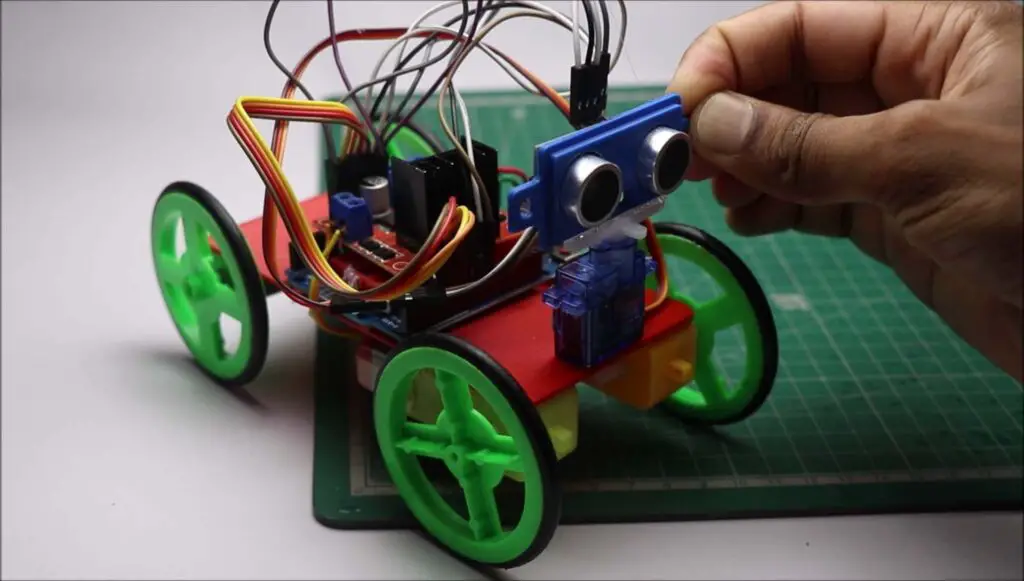
Here there is a little trick to do before adding the ultrasonic sensor to the servo shaft.
Power on the project and make sure hcsr04 is not pointed to any objects so that servo resets.
After we have the servo shaft rest to its position we can add the ultrasonic sensor, Simply use hot glue.
Adjust the wires such that when the servo swings no wires should touch each other.
Why Make arduino obstacle avoiding robot
There are many reasons why you need to build this project.
The main reason is knowledge you get hands-on experience with circuit building and understanding the arduino program.
You can also watch the building tutorial for this robot here.

You can also customize this robot in many ways, like for a rescue purpose.
If you add Bluetooth option you can also control various functions remotely.
Adding a buzzer would make this project noisy so i didn’t.
This was all about building this obstacle avoidance robot, if you have any questions ask us in comments, Bye.


