Make Arduino Sunflower Robot with live Sun Motion Tracking

Hi Readers in this project I will show you how you can Make Arduino Sunflower Robot that tracks the sunlight live.
This is a useful arduino project that you can make to harness the power of the sun at its maximum.
You can attach solar devices like solar panels instead of robot sunflowers.
If you are looking for a mini engineering project with arduino this is the best option.
To begin with, let me explain about this project in a simple way.
Bonus: Have a look at the award winning project idea Arduino Toll tax collection system
What is Arduino Sunflower project
You might know that the sunflower we have in nature always keeps its face towards the sunlight.
I wanted to create something similar but with the use of arduino, I went through some electronic components and found that LDR serves best for my purpose.
LDR or in other words, light dependent resistor is similar to an LED, Light emitting diode emits light whereas LDR receives light.
The light falling on LDR generates a signal that is sent to arduino and the codes help to run the micro servo.
I have made use of 2 LDR and each covers the 90degree and all the 3 servo works taking account of LDR module light exposure.
To begin with, I will list all the components to build this project.
Materials to make Arduino Sunflower project
I have listed the exact same materials I used on this project so you can complete your project faster without any hassle
- Arduino Uno on Amazon
- LDR x 2 link
- Micro servos x 3 from Here
- Small breadboard AND jumper wires Here
- Color paper of your choice
- Hot Glue
- Arduino IDE and programming cable
- Strips of cardboard
Note that with affiliate links I may earn a very small commission at no extra cost to you and this will help to support my projects
Arduino Sun Tracker project code
You can directly paste this Sunlight tracking Arduino Code on your IDE and upload it to Uno
Before uploading make sure you have the servo library installed if not you can get the servo library here
Arduino Sunflower Circuit Diagram
This is the circuit we will be using in our project.
The circuit is simple and with the use of breadboard it will be a lot more simple and easy even for a newbie.
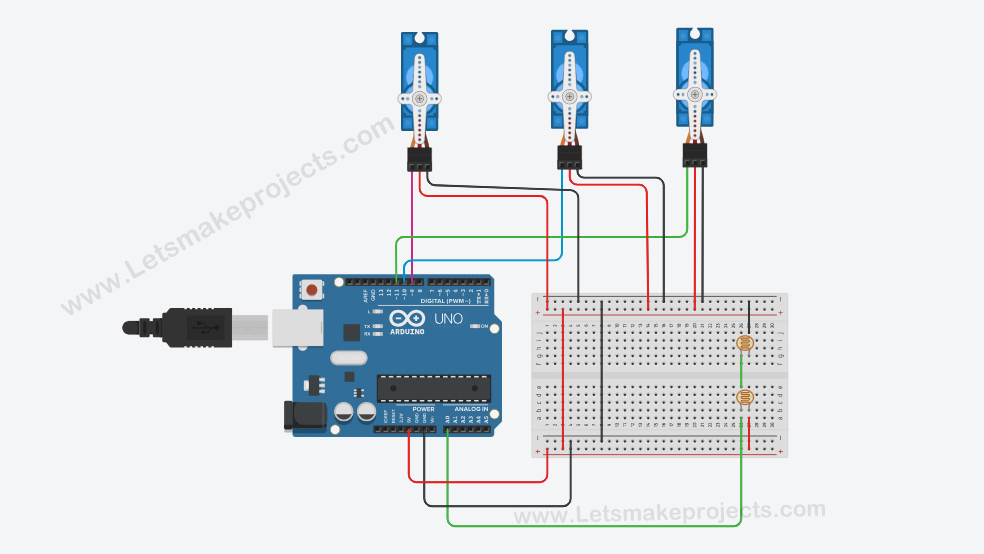
There are 3 servos and each servo has 3 terminals, 2 for power supply and one for signal.
I will connect the power points of the servo to the power rails on the breadboard.
The signal pins will be connect to D8, D9, and D10 pins on the Uno board and these are all digital pins.
Now the LDR is connect as shown on the breadboard and the signal pin is connect to A0 on uno.
To power this project there are 2 ways one is with the USB cable and the other is from the battery.
I coupled 2 lithium-ion batteries that gives out 7.4v dc power and connected to the Uno board.
The 5v and Gnd from uno is connect to the power rails so as to supply power to all other components.
Circuit Building for Sun tracking Sunflower
By following the above circuit instructions i have built this arduino uno circuit.
To keep all the components secure i made use of cardboard strip upon which i glued the micro servo and breadboard
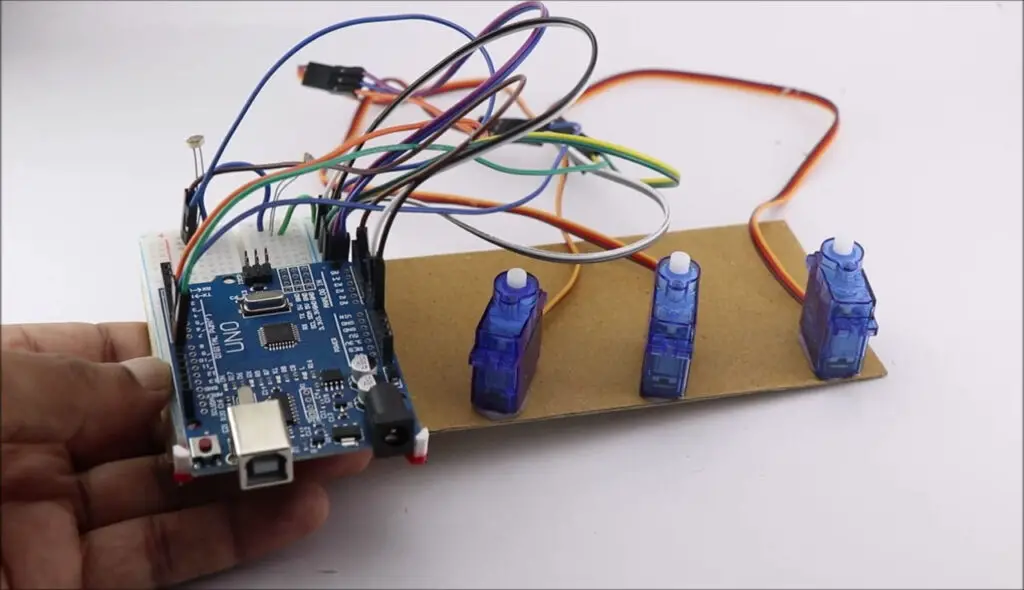
The LDR was kept on the backside part so it is free from any obstructions.
The circuit is messy so I will cover it up with a piece of cardboard into which all the jumpers will be kept.
Now the only thing pending is making the sunflower, Even I’m not a paper cutting artist but with a simple step i was able to make sunflower.
You can make your own or refer to the video given in the end of this article.
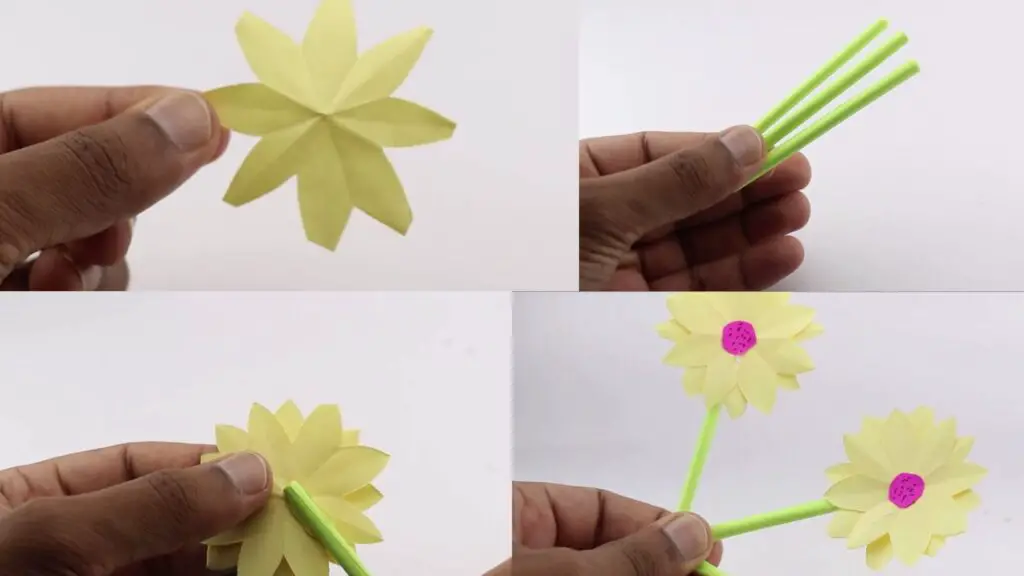
I need 3 sunflowers so i took 6 pieces of square paper.
After some folds and cut i was able to the flower shape, Later with use of hot glue and tube of paper i made the flower.
You can choose the color paper accordingly but i prefer using the colors similar to real flower.
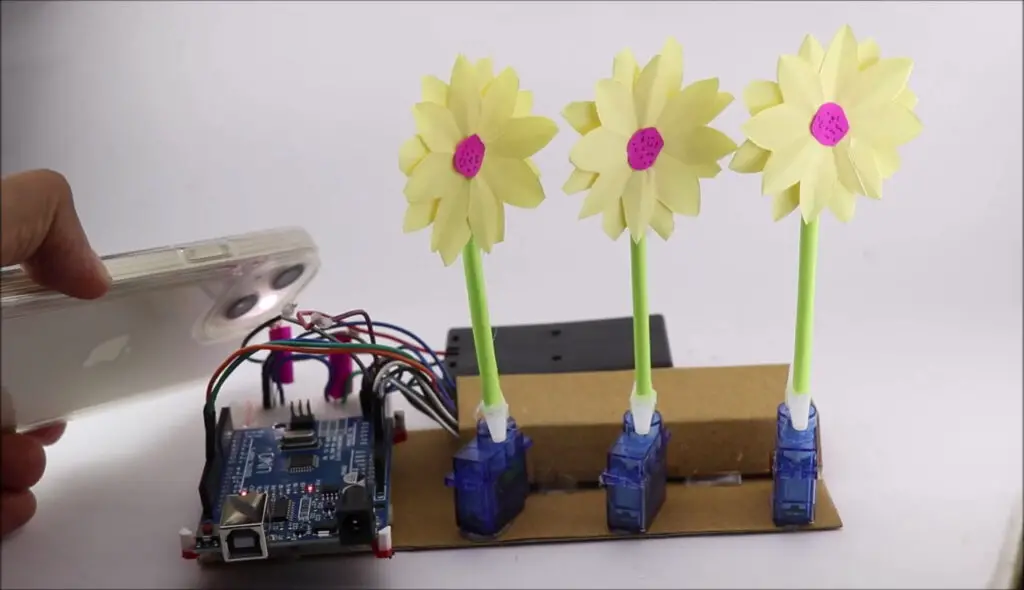
After this is complete glue to the horns of the micro servo, i recommend using hot glue instead of instant glues.
The final project will look like this.
Working video and tutorial to Make Arduino Sunflower Robot
Video of this project is here
Testing of this project was done indoors as well as in the outdoors.
There are 2 LDR, and i call it as left LDR and Right LDR and each can make the servo turn by 90 degrees
In the indoors, I flashed the light from my phone to the LDR and when this is done the flower should move toward the direction of LDR.
On the outdoors, if the light falling on both LDR is the same the flower becomes stable and as the intensity of light changes on any one the servo also moves.
This was how to Make Arduino Sunflower Robot project you can add the solar panel instead of the sunflower.
By exposing the LDR to mas intensity of sun we have the advantage of utilizing the power of sunlight on solar panel to the max.
Thank you for reading this article you might also like our project on RFID door lock System


