Arduino Laser Security Alarm Project
Hi, in this project, I made Arduino Laser Security Alarm, and it’s the best idea for a mini engineering project.
When you think about arduino projects the first choice of almost everyone is Arduino Uno.
There are lots of projects that can be made with uno and it’s cost effective too.
In this article, I will show you how to make a laser tripwire alarm for your project.
I will give all the details including codes and circuit diagram.
By the end of this project you will learn how do laser alarms work.
What is Arduino Laser Security System Alarm Project
To be simple it is just a security system that involves laser light.
The laser diode used here gives out red light and is continuously made to fall on LDR.
LDR or light dependent resistor is a photoresistor meaning it depends on light for its work.
When no light falls by the LDR the alarm makes noise and this mechanism set up to work as a complete system.
Here I will use multiple mirrors spread across a stand-like structure and from the base laser is shown.
After multiple reflections, the light is made to fall on the LDR and this forms net like structure.
When any obstacles come in the path of the laser the light falls to LDR is cut off and immediately the buzzer triggers.
Materials required
- Arduino Uno
- LDR
- Laser Diode
- Buzzer
- Lithium-ion battery and holder
- Popsicle sticks
- Hot glue
- Few jumper wires
- Mirrors
- Switch
Making the Stand
The main part of this project is this stand and I made it with popsicle sticks.
Popsicle sticks glued together to make it longer and were later add to the base.
Place the laser diode first and use glue if necessary to keep it at an angle of 45 degrees.
Now connect the laser to the battery and place the mirror in the area where the light falls.
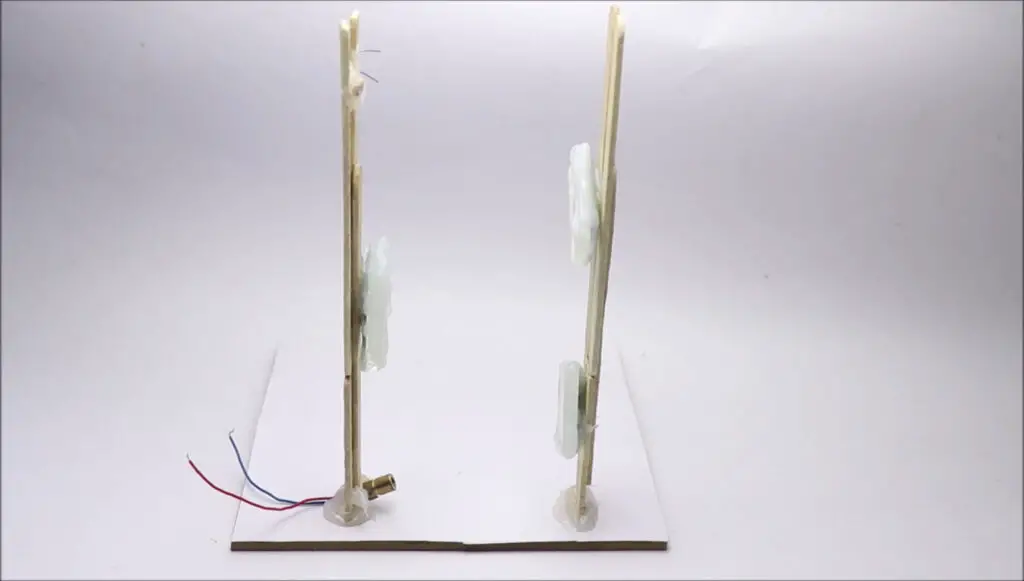
Stick the mirror to the stand and now place another mirror at the place where the diode reflection falls.
Now finally place the last mirror and mark the area where the light from the laser falls.
To that area place the LDR and this completes the door like structure for this laser project.
You can also understand it like a laser tripwire alarm but in another form.
Laser Security System using Arduino Circuit Diagram
This is the circuit that makes the laser tripwire arduino project.
The components used in this project are very easy to connect.
Arduino Codes for this project is Here
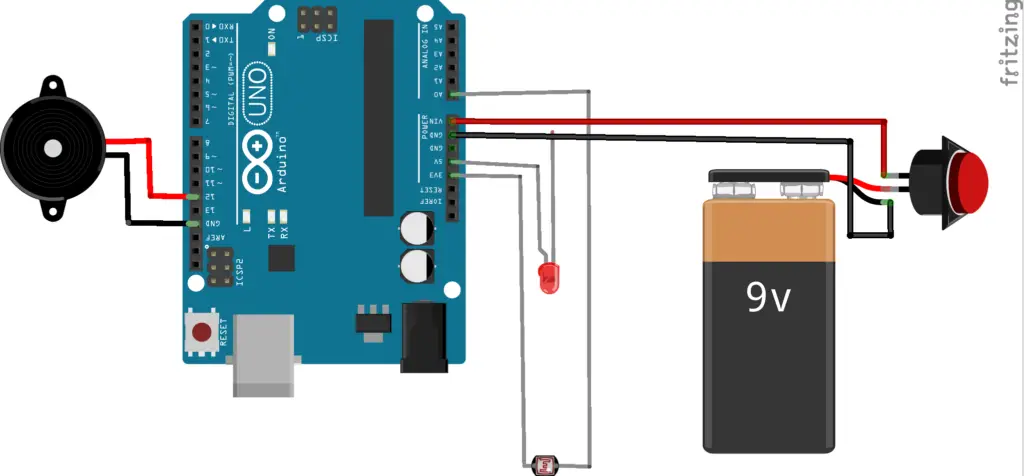
Circuit building steps, Start by connecting jumper wires to the LDR and laser diode.
If the buzzer has wire replace it with jumper wire.
Buzzer has 2 pins and here gnd to gnd and D12 is connect to the positive pin.
LDR will be connect to A0 whereas the laser is connect to GND and 5v pin of uno.
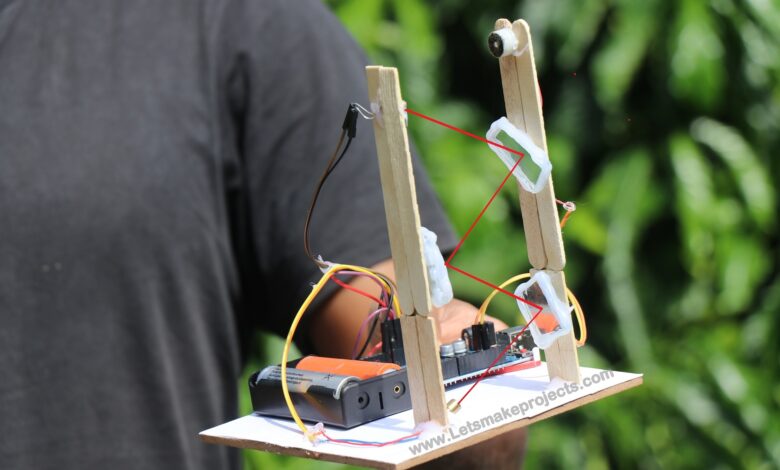
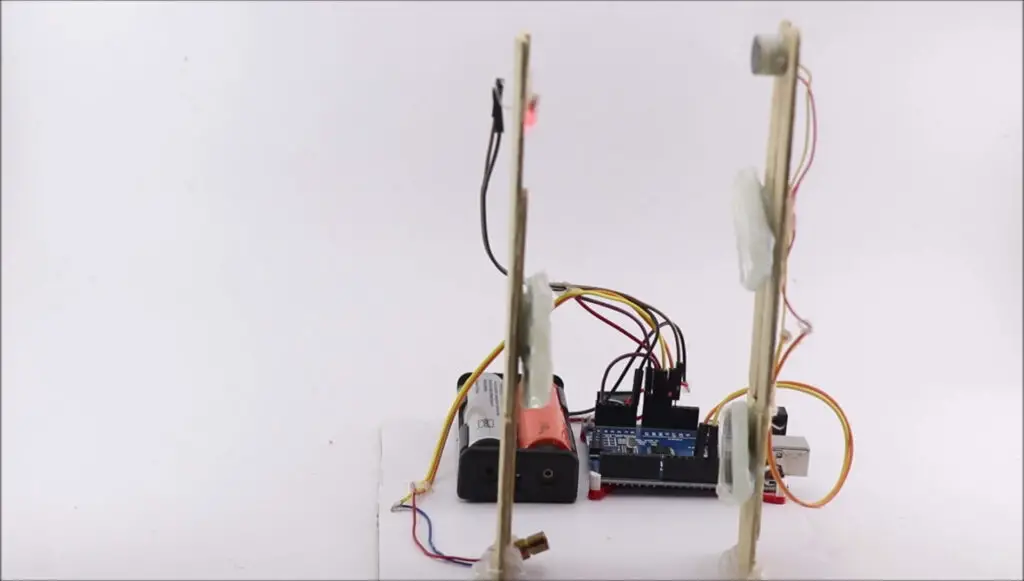
Final Circuit of Laser Security System using Arduino
You can see that the arduino laser module is pointing towards the mirror and the mirror reflects the light and reaches LDR.
The logic here is when the project is on the laser immediately points toward LDR
And if any obstacle comes in between then the buzzer makes a noise.
There should be no obstruction in the continuous flow of light to laser light and light-dependent resistor.
This was all about building this laser based security system using arduino.
You can make different versions of this using the same concept.
If you have any questions ask me in the comments.
Working Video of laser security system using arduino
Check this complete video tutorial of this project.


Hallo, ich möchte dieses Projekt als Uniprojekt machen. Könnten Sie mir den Arduino code zukommen lassen?
Vielen Dank im Voraus.
Wohin willst du mich schicken?