Social Distancing Alarm Making Using ARDUINO
In this Project we will be learning how to make wearable social distancing alarm, This is simple Arduino project and at less price you can make this fully functional gadget at home which provides industrial performance
Interesting thing here is, this DIY Project can be used in day to day life basis and can be a real life saver. All the circuit diagrams and codes are Provided also the video link is provided at end.
What social distancing alarm device does?
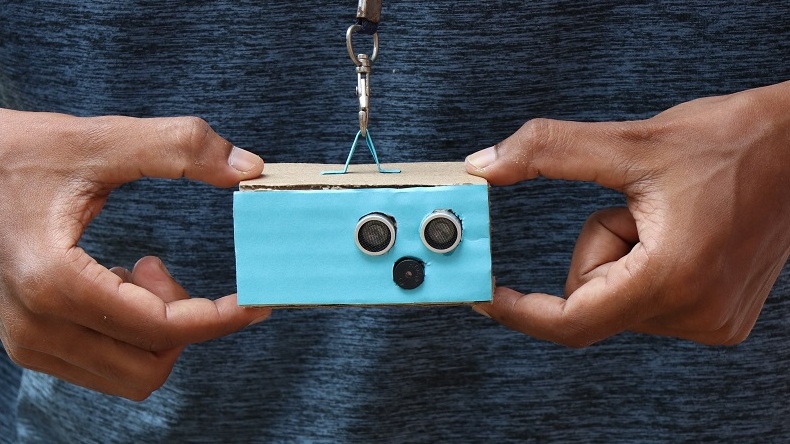
The answer is simple, Whoever is wearing this gadget gets alerted to maintain safe distance when he/she gets in close contact with any person by making beeeeep sound and hence reminding/alerting them to keep safe distance which is really necessary in this serious situation, this can also be made for science fair project and is a best science fair project ideas. After reading this you can also build various other designs of social distance alarm using same principle and gift your friends who forgets to maintain distance!
Working Principle
Ultrasonic distance sensor module transmits ultrasonic waves from one point and receives the signal from another, when the signal is being transmitted if it detects any object in it’s path, Signal will be sent to arduino board which in turn delivers power to small piezoelectric buzzer which makes sound/alarm/beep, here the distance which can be measured ranges between 2cm to 80cm and also this distance can be varied by making changes in Arduino code, So let’s head to building phase of this project
Note: I have provided video link at the End, Don’t Forget to check it out
Materials Required for social distance alarm
List of Materials to make Social distancing alarm, all materials are available in Amazon
| Product | Buying in India Buying in USA |
| Arduino Nano | https://amzn.to/3fwkq1w https://amzn.to/3uiHDJU |
| Mini Breadboard | https://amzn.to/3fzb9Wz https://amzn.to/3ucV0eG |
| Piezoelectric Buzzer | https://amzn.to/3p4TaKJ https://amzn.to/3qG62Xz |
| Ultrasonic distance sensor | https://amzn.to/3vA9N3B https://amzn.to/37z3BhY |
| Jumper wires | https://amzn.to/3fxiaHu https://amzn.to/3qIkC0R |
| Rechargeable battery | https://amzn.to/3fUqmR8 https://amzn.to/3dyLPQ0 |
| Hot glue | https://amzn.to/2TuwHv1 https://amzn.to/3dxigy8 |
Disclosure: These are affiliate links. As an Amazon Associate I earn some credits from qualifying purchases at no extra cost for you.
Along with these materials you need Arduino IDE and few pieces of cardboard for frame making
WHY Arduino Nano for social distance alarm making?
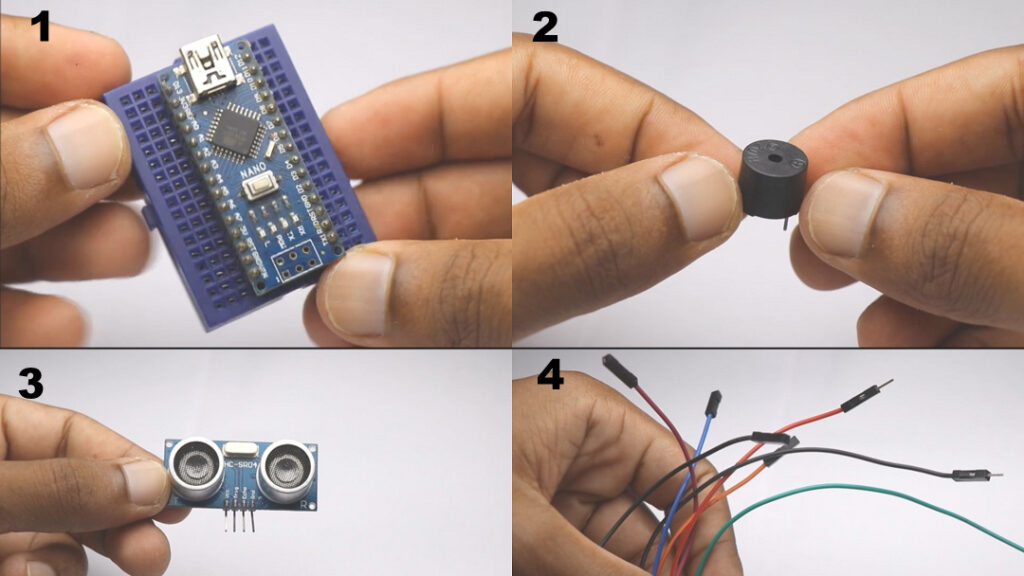
The main reason for using arduino nano in this project because of it’s smaller size(since this is wearable project), you can use arduino Uno also to make this, but the problem here is whole size of system gets much bigger, since the main aim of this project is to reduce size as much as possible(nobody wants wearables to be bigger!). since this is going to be a wearable gadget, For beginners the look of arduino nano is shown in image number 1, I’m using piezoelectric buzzer which is very small u can recycle this hardware from old alarm clocks or even from old toys as well, the size of buzzer which I’m using in this project is shown in image 2
Here the main part to be focused on is ultrasonic sensor which measures distance,Please refer image number 3 for reference and if u want this project to be much smaller you can eliminate jumper wires and solder the components to a PCB, making a customized PCB it’s not worth if we are making this as a hobby project for daily basis usage, So this was all about parts which we are going to use in this project now let’s head on to building circuit
Circuit Diagram for social distance alarm using arduino
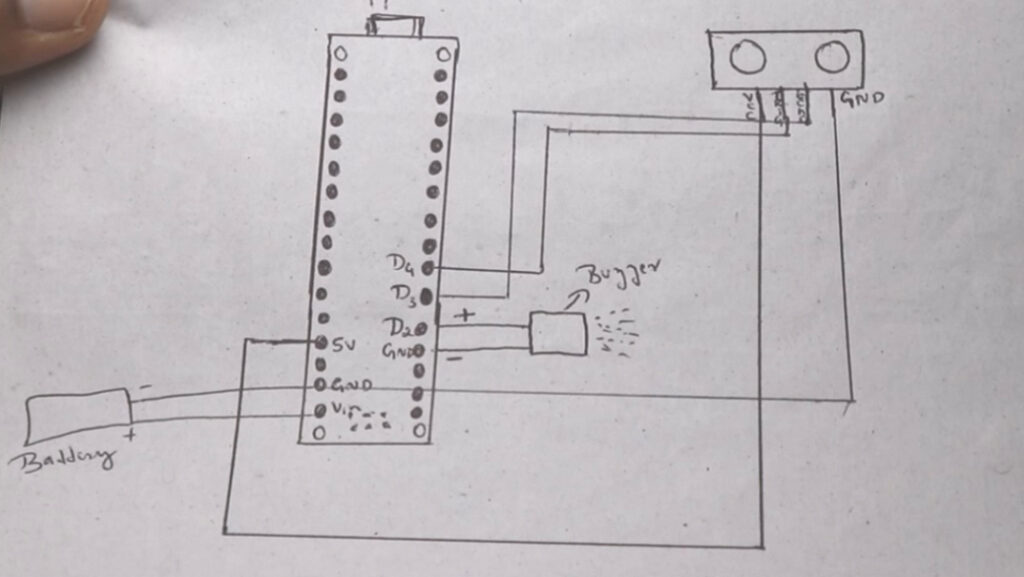
| Pins | Purpose |
| vcc | +ve power supply |
| trig | Triggers signals |
| echo | Receives signals |
| gnd | -ve power supply |
There are 4 pins in ultrasonic sound sensor vcc ->means power supply, Trig which emits/transmits signals, echo which is receiver part and gnd which goes to negative power supply , for signals I’m using digital pins d3 and d4 of arduino board which means I’m connecting trig and echo of ultrasonic sensor to those pins(you can also use other digital pins), whereas vcc and Gnd goes to 5v and Gnd of arduino board, for much details in depth please refer circuit image
Buzzer connection
Buzzer has 2 pins one positive and other negative which goes to d2 and gnd pins of arduino board, for power supply I’m using lithium-ion battery which gives much larger battery backup compared to other types of batteries available, so that it has long run without the need to recharge again and again, here the positive and negative terminals of battery goes with 5v and gnd in arduino board
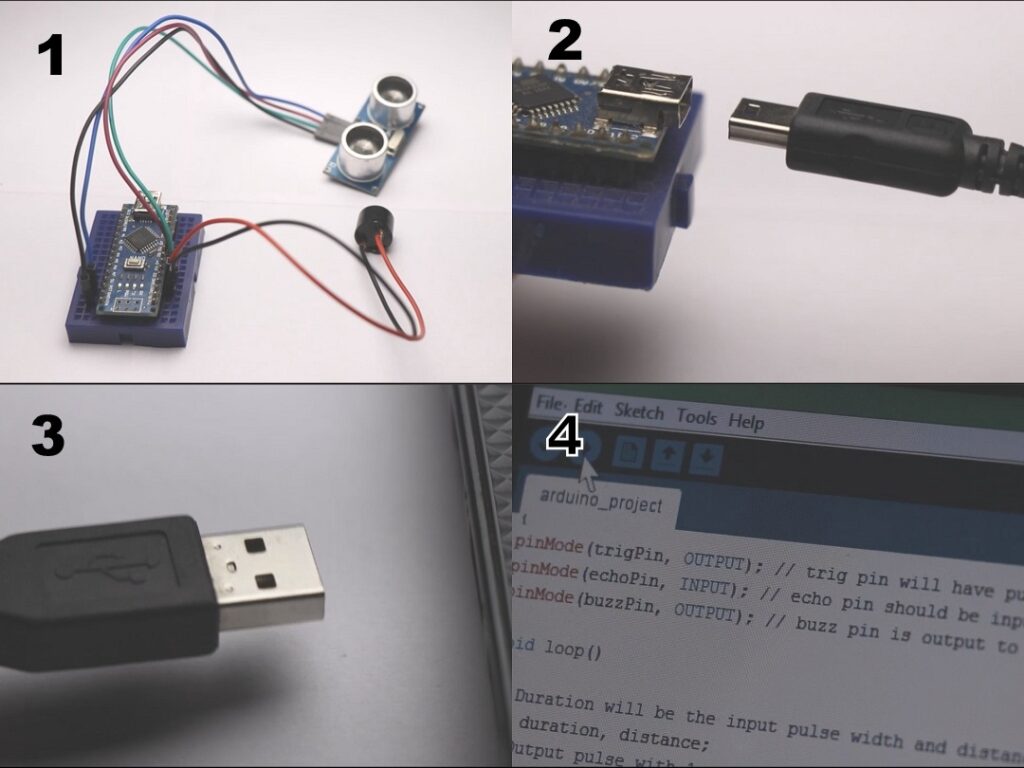
Once all the circuitry is complete it will look as shown in image 1.As I mentioned earlier using of Arduino Nano shrinks the size of our projects and you can see that too!
CODES
Steps to upload code
Connect your Nano board to computer using USB cable
USB a type cable holds good for Nano
Open Arduino IDE in your computer
Later copy paste the code or you can write one for yourself
Adjust the distance in code at which your buzzer should make sound
Check for type of board and port in software, Later upload the code
Once the code gets done uploading de-attach your board from computer
Finishing
Our project is ready for use but it needs an outer frame to look beautiful! So let’s build that too
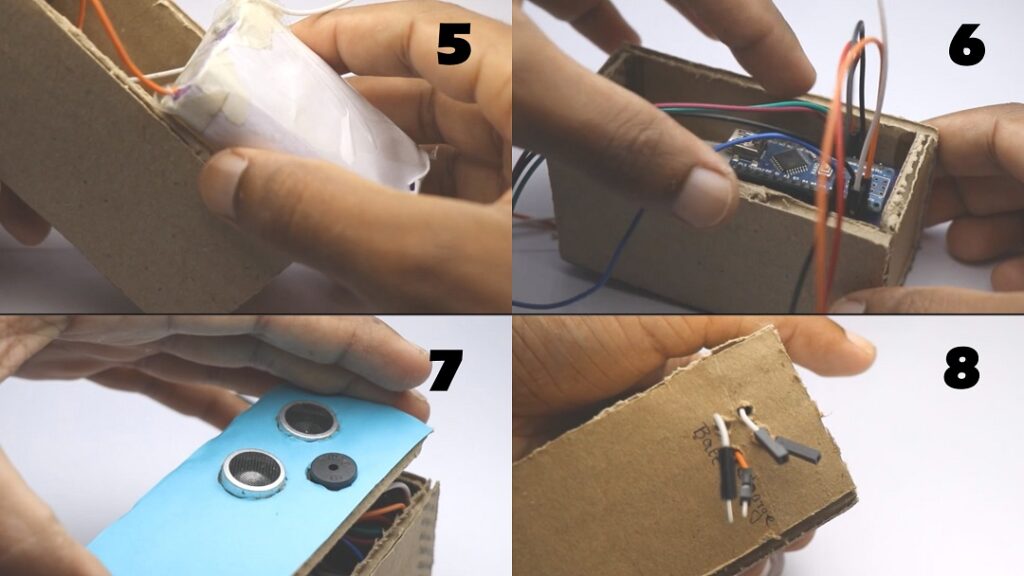
I have cut few pieces of cardboard and glued them all together to form a closed frame so that all my electronic components fits inside perfectly, if u have 3d printer you can print the body with ease taking measurements of standard electronic parts, I recommend to use lithium-ion battery which we all know is rechargeable and has long capacity and is cheap also, for recharging this batteries once its discharged I have kept the connection pins between battery and arduino Nano board outside the body(works as a switch too) so when not in use you can disconnect wires and keep it aside
Future upgrades
Social distancing alarm app
Social distancing alarm cap using arduino
So this was all about making this project, I Hope I have given you very detailed and clear explanation about making this project so that even a beginner who wants to make this will be able to build without any difficulty, Make it for yourself or for your friends who forgets to maintain safe distance! This can be used as Real life application project to eliminate complex problems occurring in day to day life basis
Since the sound of buzzer may annoy few people in public, alternatively it can be modified using vibrator which vibrates on detection of close objects but the challenge being sometimes the vibration can’t be felt/sensed,
Advantages
Very simple and easy to make project
Encourages learning of arduino and working of various other sensors
Enables creative thinking
Best science fair project idea
As always questions are welcome, if you have any suggestions for improving this project let me know in comments,
VIDEO LINK
You can also check video for social distancing alarm using Arduino
if you have any additional queries post in comments, Thank you for your time and interest


