Automatic gate opener using Arduino and Ultrasonic Sensor Full Project
Hey there are you thinking of building an Automatic gate opener using Arduino with Uno? Then you have landed on the right page.
In this article, I will go through step by step guide that you can follow to build your own Arduino automatic gate-opening system.
To begin with, let me go through a few things that motivated me to build this Arduino project and share it with an amazing community like you.
I had a gate in my parking area and every time I entered the parking with my car I had to open the gate manually before I entered and then drive through.
And again closed the gate, at some point this was a little bit frustrating for me.
I came up with an idea using very simple electronics that is Arduino, I found that the ultrasonic sensor was perfect for this project.
Some basic information about the project which we are building.
Note: You may also like our recent project on Arduino OLED Clock
What is an Arduino Gate Opening System?
By the name, you will get to know what this is.
In simple words, it is a gate that uses Arduino to automate the opening and closing of the gates
In my case, I will be using the ultrasonic distance sensor to sense the obstacles and then trigger the servo to open the gate.
When no obstacle is detected gate closes automatically.
Note: This is a fully working prototype and I will be implementing the same project with bigger components.
After some adjustments according to those components and share version 2 of this project with you guys in the future.
I recommend you to build this project and I will be giving the codes and circuit diagram.
To begin with, let us gather the supplies for this smart gate system.
Components for Building the Project
- Arduino Uno Bought from Here
- Jumper wires
- Micro servo known as SG90 servo
- Ultrasonic distance sensor (HC-SR04)
- Piece of cardboard
- Black sheet of paper
- White sheet of paper
- Hot glue and paper glue
- Arduino Programming cable and software
- Black and Yellow color pens
With these materials handy we can build the circuit
I will use the jumper wires to connect components to the Arduino board.
If you are advanced in electronics you can build your own PCB also.
Circuit Diagram for Arduino Gate Opening System Below is the circuit that we will build.
Since the number of components is only 2 we will not use any breadboard for connections.
And that’s a plus for reducing the size of the project.
Circuit Diagram of Automatic Door Opener using Arduino
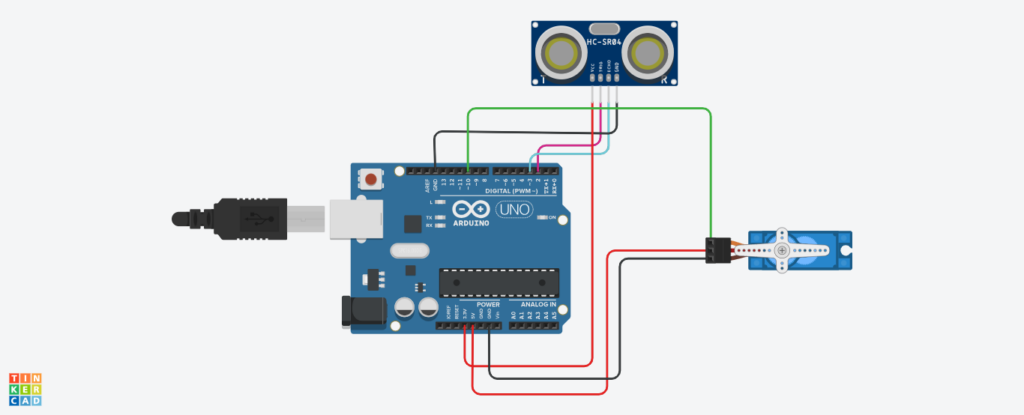
The micro servo has 3 pins for connections, Red wire is for the positive power supply and this wire is connected with +5v pin of Arduino board.
Black/brown wire is the negative of servo and we will connect this wire to GND pin of Uno.
Finally the yellow(green on the circuit diagram) is connected to Pin D10 of the Arduino Uno board.
Now for the ultrasonic sensor we have 4 pins VCC, GND, Trig and Echo
VCC and GND are connected with the 3.3v and GND pins of the Uno board, where as the Trig and Echo pins to D2 and D3 pins on the Uno.
Automatic gate opener using Arduino completed circuit
This completes the circuitry part and after the connections are complete as per the above instructions you will end up with the circuit as shown in the image below.
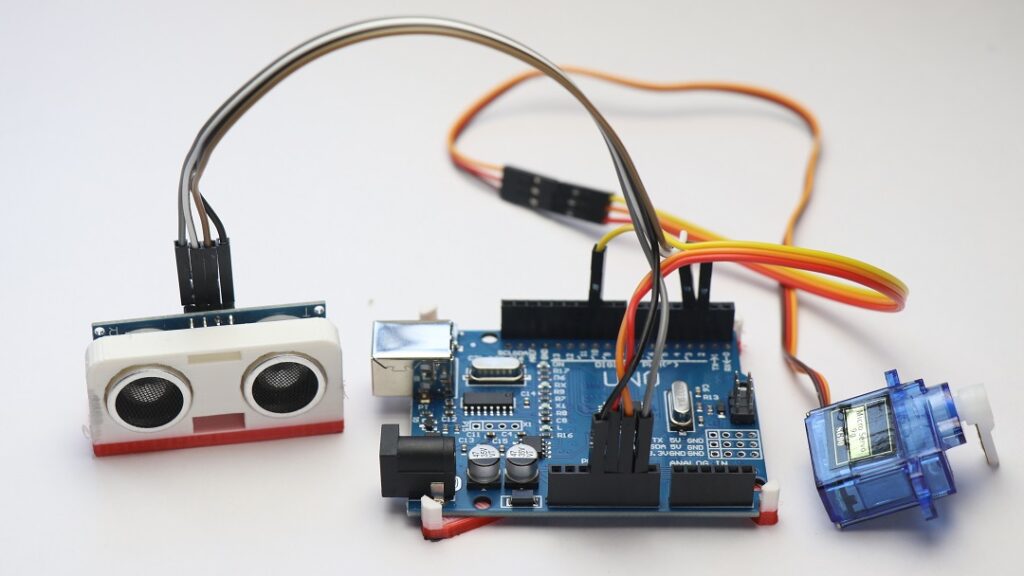
Note that the attachments for the ultrasonic sensor and the base of Arduino Uno were 3d printed if you wish to print the same here are the links for the Distance sensor case and Arduino Uno back case.
You can now upload the Arduino code for this project, all you have to do is copy and paste the below code on Arduino IDE and upload.
Before uploading make sure you have selected the proper COM port and type of board.
After the upload process is complete you can test the project.
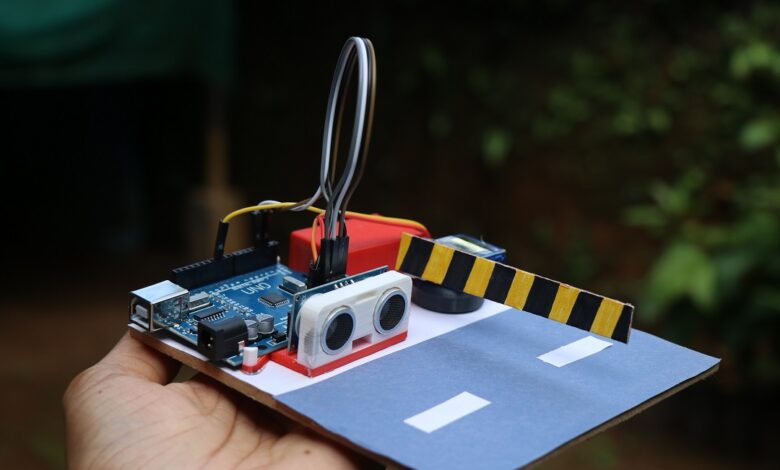
This was just a mere circuit now we have to get this in the form of the actual project, so I will place all the components on a piece of cardboard.
You can follow the exact same placements as I did.
use a decent amount of hot glue wherever necessary to place the components in their place.
In the end, I cut a black sheet of paper and glued it on this board to resemble the road.
And most importantly don’t forget to add the meter lines on the road.
Just cut strips of white paper and simply glue it.
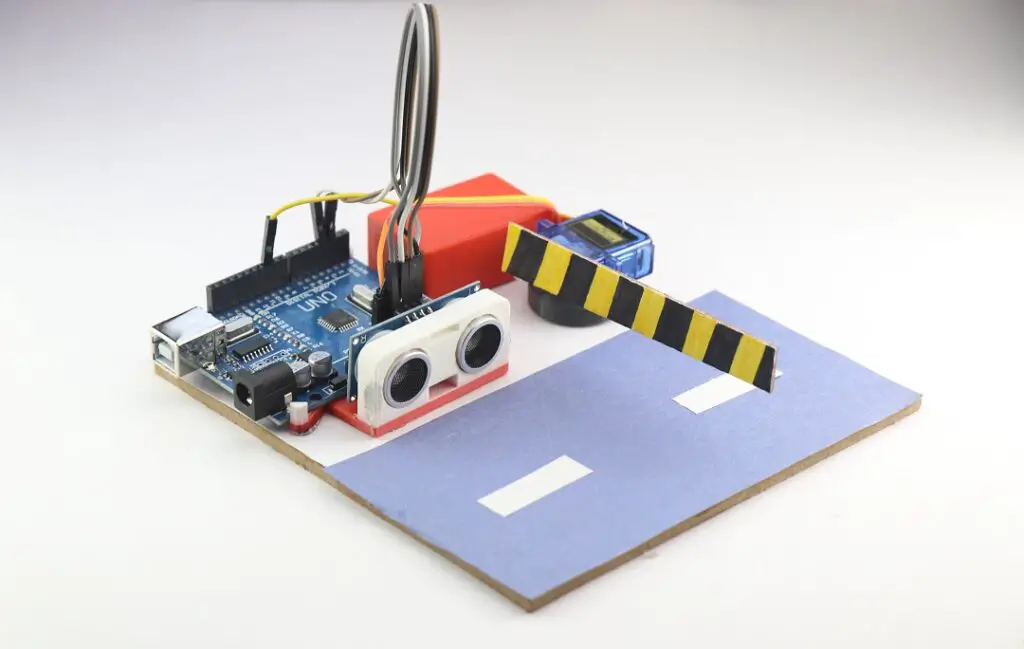
How to use the Arduino gate opener project?
Using this is very fun all you have to do is connect the USB cable to Arduino and place any obstacle in front of the sensor.
The servo should move and indeed it will if you have followed all the steps correctly.
This mechanism is utilized to detect the car passing by the sensor therefore the servo lifts the barrier/gate whatever you can name it.
This makes it a real working gate system that saves a lot of time while making the best use of Arduino.
That’s all now the project is ready for use, this project like I said can be built bigger for practical use.
I can’t wait to build a bigger version and share it with you guys in the future.
Hope you found the Automatic gate opener using Arduino project useful.
Thank you for reading, and good luck with this project.


