Interface LCD with Raspberry Pi very Easily using I2C and Python
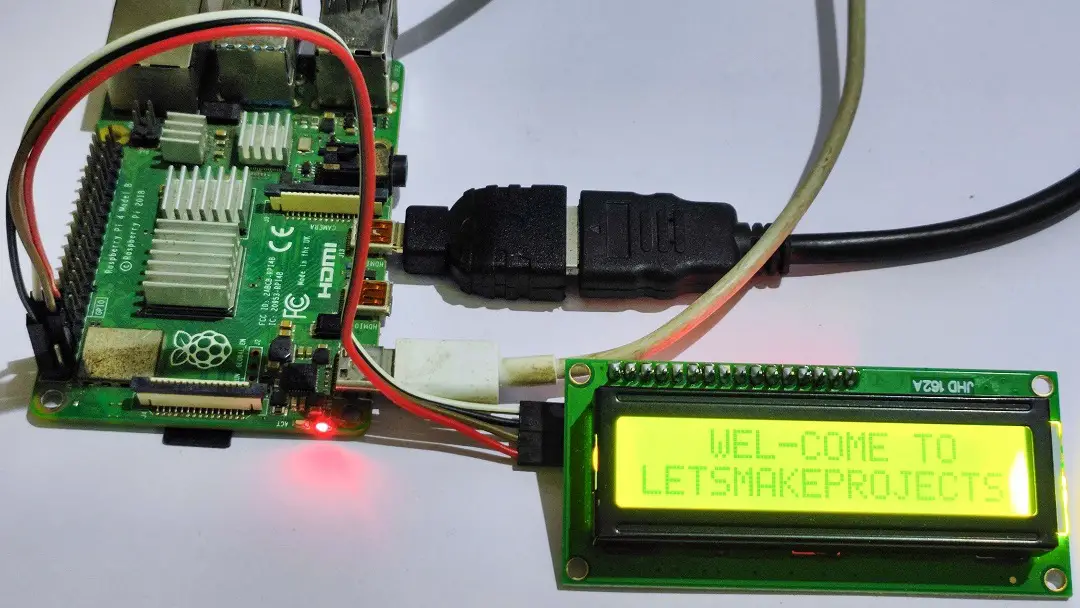
This is a simple tutorial showing how to use interface LCD with Raspberry Pi with Circuit diagram, Sample Programs, and its explanations.
Interfacing 16×2 LCD with raspberry pi is of utmost importance if you want to make any projects that use a display module.
In many Raspberry pi Projects you might need to print sensor values, But every time the monitor screen will not be attached with Raspberry pi.
In this case 16X2 LCD(Liquid Crystal Display) is very helpful as it does the job much easier.
Here I will help you to set up a 16×2 I2C LCD in raspberry pi so you can use it in your future project.
Note: Begin Raspberry Pi journey by getting Your first Genuine board from Amazon Here
Before jumping into the main topic let us know very interesting things about Raspberry pi.
Raspberry Pi is an ARM (Advanced RISC Machines) architecture-based pocket computer made for engineers and hobbyists.
Raspberry Pi has RAM, HDMI port, GPIO, Ethernet & USB port, Camera & Display port, and Wi-Fi available on a single board.
Due to its extraordinary features, Raspberry Pi can be feasible for many high-profile projects including Image Processing and Machine learning, I have made a separate list for these don’t miss to check those.
LCD Display Module Basics
Liquid Crystal Display accounts for a flat display technology seen everywhere like control panels, computers, energy meters, etc.
Get the LCD display from here
The 16×2 translates to a display of 16 characters per line in 2 such lines.
In this LCD each character shown as a 5×7 pixel matrix.
This LCD does not have a built-in I2C adapter, so by adding an 8-Bit I/O expander chip – PCF8574 it will become a 16×2 I2C LCD.
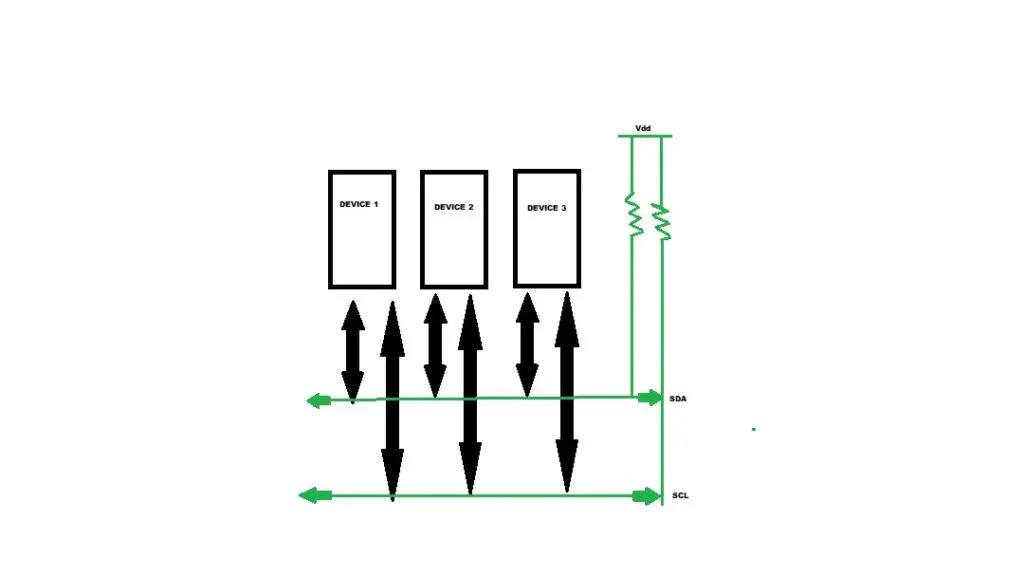
What is I2C
I2C (Inter-Integrated Circuit) is one type of bus serial communication protocol.
Originally designed by Philips Semiconductor in 1982.
Recently, it is a widely in use protocol for short-distance communication.
In this method, data is sent bit by bit along a single wire (SDA line) and synchronized by a clock signal (CLK line).
And both lines required pull-ups. The standard clock (SCL) speed for I2C is up to 100 kHz.
Now you may have a few questions as to what is the difference between I2C and LCD.
LCD standard vs LCD I2C
LCD Standard
- To operate a 16×2 LCD we need to use more gpio pins of the controller.
- More pins means more wires that makes the circuit looks complex.
- Programming is a little bit difficult.
LCD I2C
- In the case of 16×2 I2C LCD, it requires only 2 pins of the controller (SDA & SCl) for operation.
- Programing for this is simple.
- Has Potentiometer on board to control LCD brighness.
- Very easy to add to LCD, Just connect the module behind the LCD.
Materials Necessary For this Project
Raspberry Pi and a Memory card with the preloaded OS.
Computer and programming cable for Raspberry pi.
16*2 LCD, I2C module and four male to Female Jumper wires.
Interface LCD with Raspberry Pi Circuit Diagram
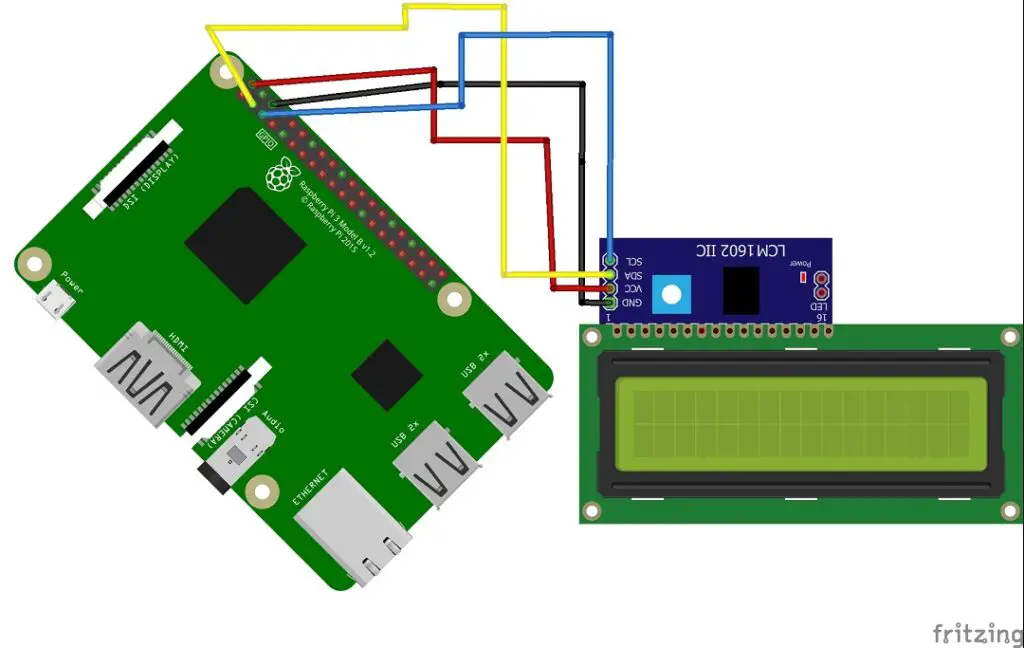
Connect LCD with Raspberry Pi in the following manner
LCD PINS to Raspberry Pi
GND to GND (Pin 39 or Pin 6)
VCC to 5V (Pin 2)
SDA to SDA (Pin 3/GPIO 2)
SCL to SCL (Pin 5/GPIO 3)
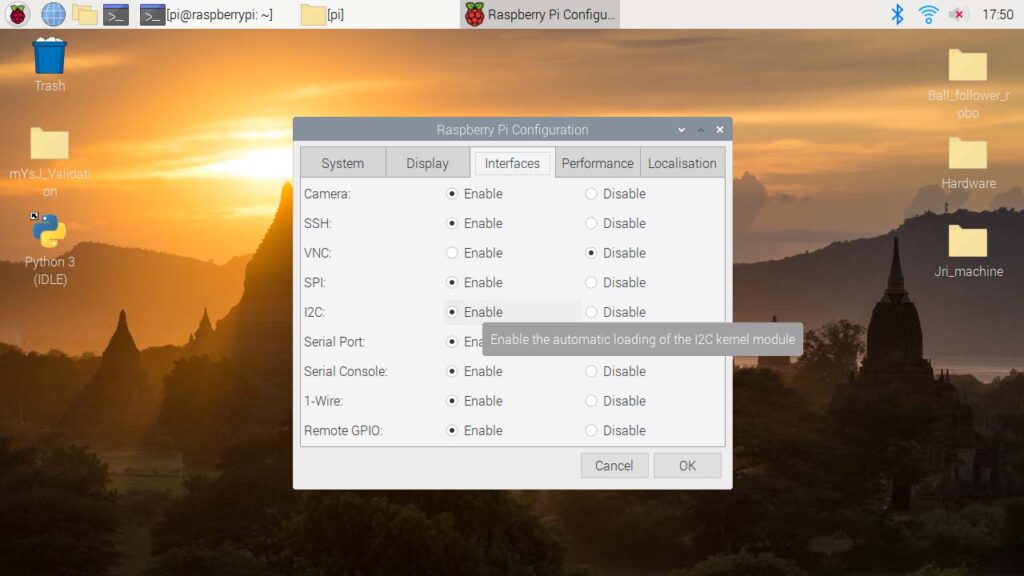
Enable I2C in Raspberry Pi
First of all, we need to enable the I2C interface in raspberry pi.
So go to Preferences > raspberry pi configuration > Interfaces and check if I2C is Enable or Disable.
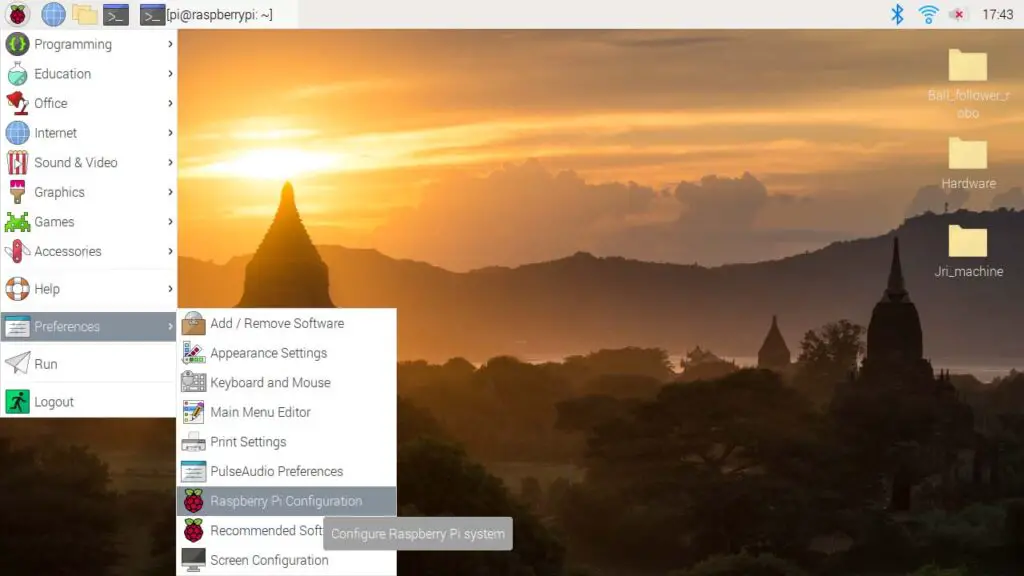
Settings showing to enabling I2C in below visual.
If it is Disabled Enable it.
After this change, we need to reboot Raspberry Pi.
Detect I2C LCD in I2C bus
To detect I2C LCD type “sudo i2cdetect –y 1” in the Raspberry Pi terminal so you will get the panel as below.
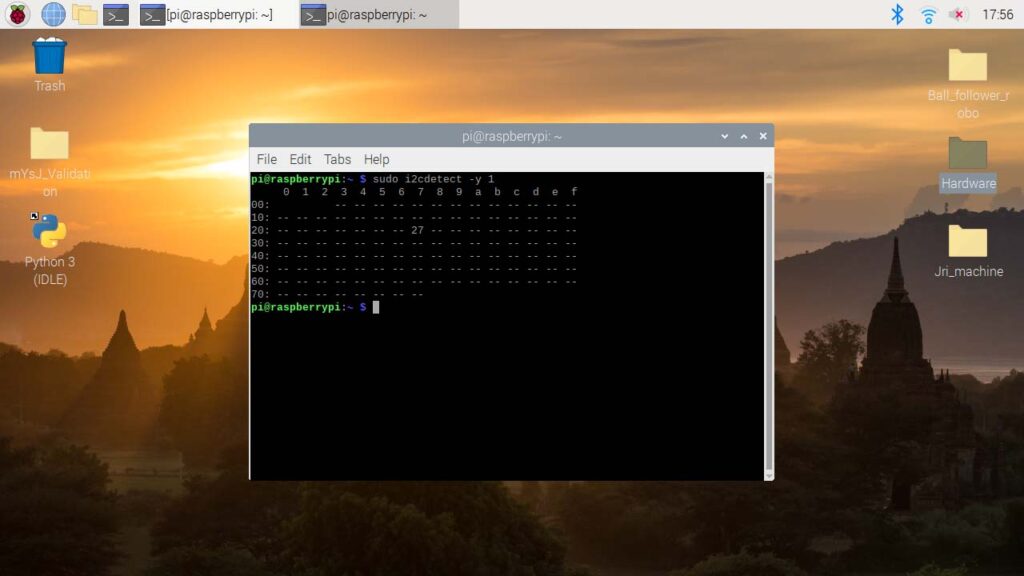
As per the above image, we can conclude that LCD is now connected with the Raspberry Pi and its address is 27(Check for the same in the image above).
Installing I2C_LCD_driver library
The simplest method to operate 16×2 I2C LCD in python is by using a dedicated library.
Here we use the I2C_LCD_driver library for the LCD interface with Raspberry Pi. You can download the library from here.
Please keep one thing in mind that the Library file and code file both are kept in the same folder.
Program for Raspberry pi lcd 16×2 i2c python
Here is the sample code to test our setup.
Below is the visual that gives a quick overview of the same.
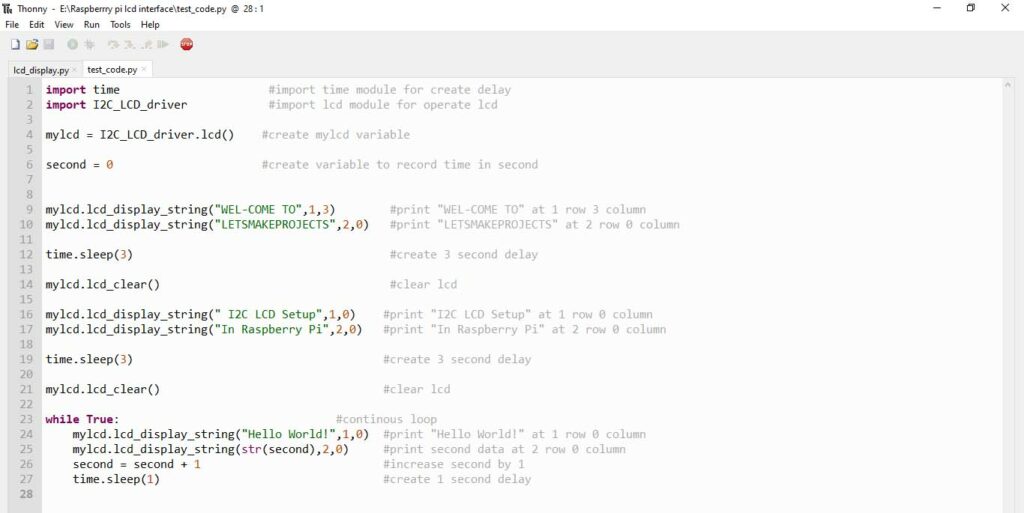
The above lines show the required modules for this code.
Some working definitions of the codes to help you better understand
Line 1 shows the module time used for creating a delay in code, and line 2 is I2C_LCD_driver for operating LCD.
We require one variable which will represent hardware LCD as shown in Line 4.
Line 9 and Line 10 show the print string on display using LCD display string (“text”, R, C) function already given in the I2C_LCD_driver library.
In this function replace text with your required text (like here I replace with “Welcome to”), R stands for ROW NUMBER (1 or 2) and C stands for COLUMN NUMBER (in between 0 to 15).
While True Command is a forever loop, with this command the statements inside this loop will be execute continuously.
If you want to create a delay in the code use time.sleep(second) function which was already define in the time library.
To remove all printed stuff from the LCD screen call led. clear() as mentioned in the above line.
I2C_LCD_driver module can’t print integer data directly on the display.
So code can print on display by converting it into string format by str() function.
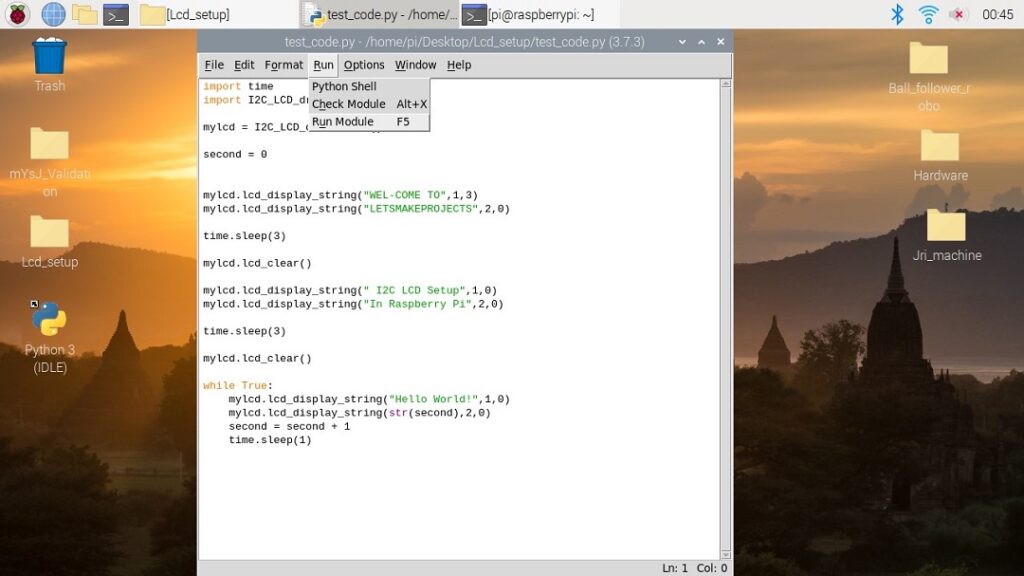
Run The Code
Open this code in Python IDLE and after saving press F5 or Run >> Run Module, so you will get the result as shown in the Working Video.
If Python IDLE is not installed, Just type sudo apt-get install idle in the Raspberry Pi terminal.
Working Video
Check this video that shows results from interfacing raspberry pi text display.
Note: If you think your LCD is not bright enough you can adjust brightness with the help of a potentiometer that is behind the I2C module.
That shows the easy way of coupling up raspberry pi to LCD display, Any additional questions are welcome.