How to Make Doc Ock Arms with Working Claws using Cardboard
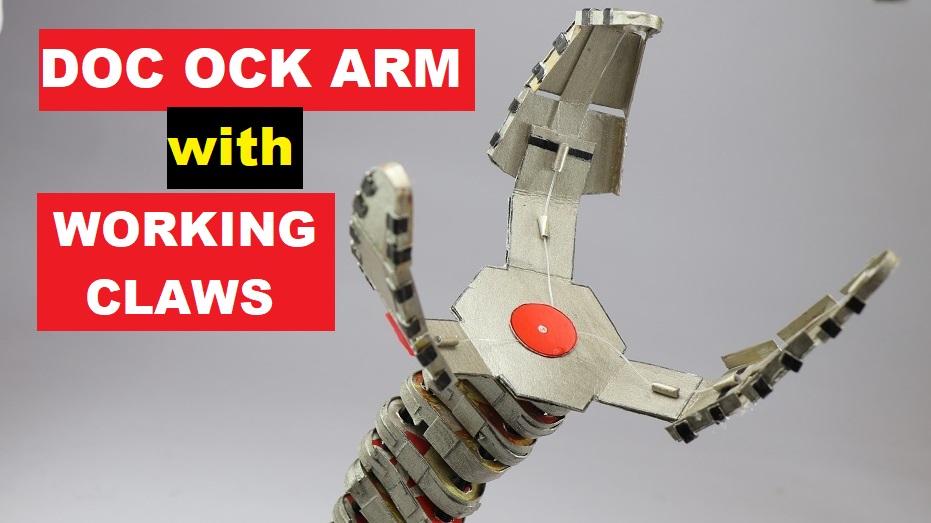
Hi cosplay lovers in this article we will see how to make doc ock arms or how to make dr octopus arms in a very easy way.
The best thing about our Doc Ock Tentacles is it has movable claws and is entirely made from cardboard.
In this post we will see how to build this at your home, I have taken a lot of time to build and fix this template.
But for my readers I am giving this doc ock claw template for free, so definitely you should try to make this interesting project.
To begin with, if you like cosplay Don’t miss to check this Working IRON MAN MASK made from cardboard.
Let me tell you a few things about the Doctor Octopus tentacles that we are doing.
This project is entirely made from cereal box cardboard that everybody can find in their homes.
Secondly, we are making just one arm out of 4, you can use the same steps for the other 3 too.
It took me around 10 hours to make this, as I built this from scratch including the template.
Materials Required to Make Doc Ock Arms
- Cereal box cardboard
- Paper glue and super glue
- Hot glue
- Ruler, pencil, protractor and compass
- Ballpen for tracing
- Silver color fabric paint or spray paint
- Plastic tube and 2-meter black wire
- Elastic band and Popsicle stick and fish wire/any other strong thread
Once you have all these supplies we can start to build out the project.
Grab a piece of cardboard and draw or trace the template on the cardboard.
Note: I have given a separate template for the claw and Arm.
Doc Ock Arm Template
This is the template that I made for Ock arms, it is on an A4 size sheet.
All the measurement values are in centimeters.
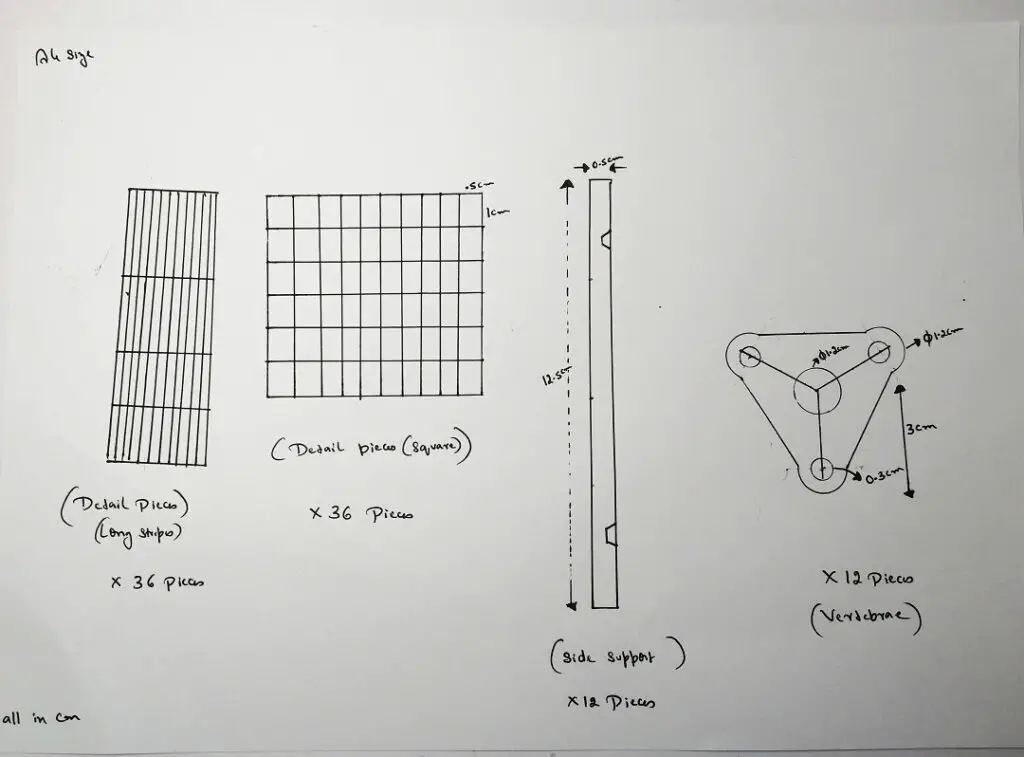
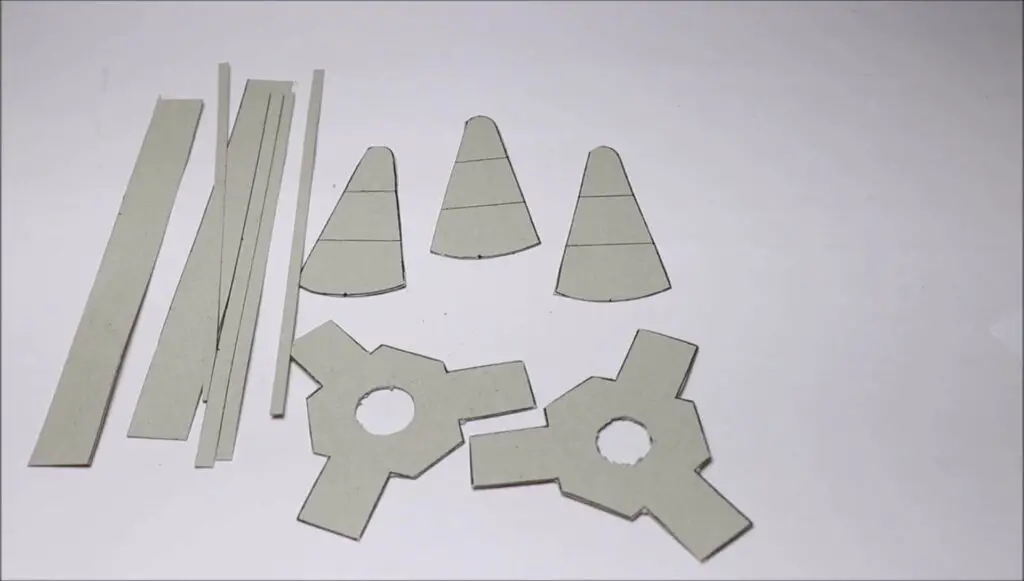
These are known as vertebrae and we will make each of 12 pieces one by one.
In the template, I have given a number of pieces along with the piece names.
Draw or print the template, cut the pieces and paste it on cardboard.
Here as we are having inner circles we need to work on those first.
Cut those inner circles with hobby cutters as those give better quality cuts.
After working on inner circles we can cut outer circles.
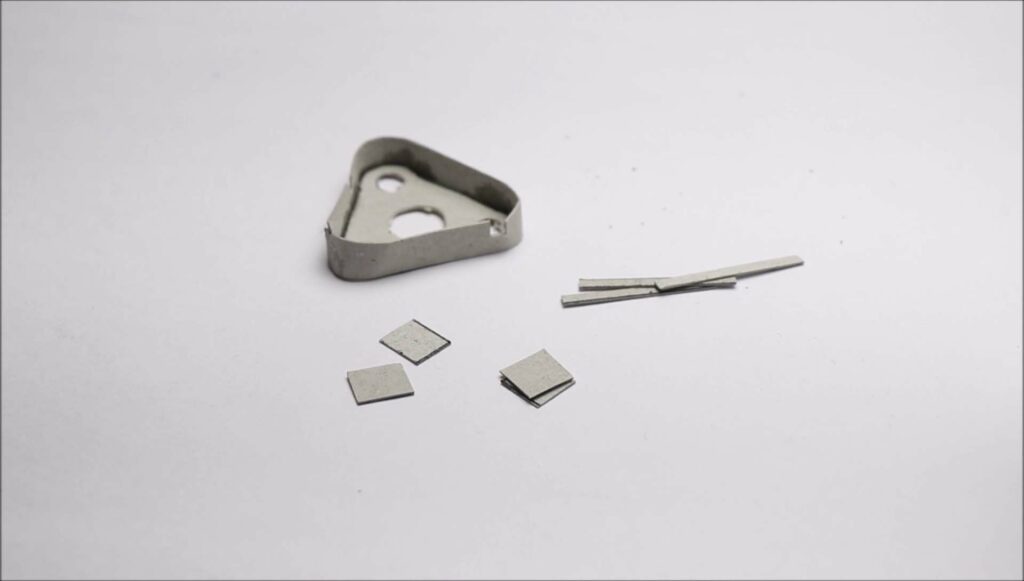
After the vertebrae are stick with side supports we can give some extra finish on the sides.
To give the finishing I made use of square-shaped pieces and small rectangular strips.
I suggest you use 3 square pieces on 3 all three sides and the leftover space should be given a rectangular strip lining.
Once this is complete we can begin with the paint job.
I will be using the silver color of metallic type to paint this, you can use spray paint too.
If you feel that your part is weak you can coat the surface with glue and allow it to dry before painting.
Doc Ock Arm Template
Like the previous template, even this is also made on a sheet of A4 size paper.
Values are of exact measurement and can be printed on paper or be drawn.
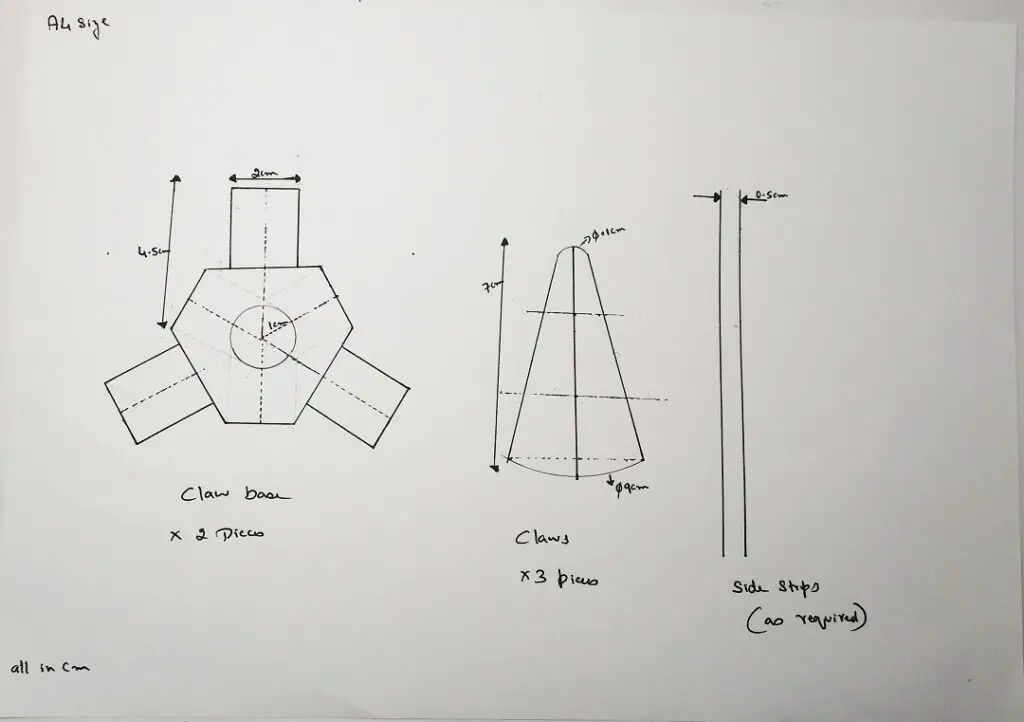
Once you have this template drawn on cardboard make sure you check for the number of pieces.
Claw support or base needs to be very strong as it should hold 3 claws and withstand pulling force.
In my case for the type of cardboard which I am using 2 was perfect.
You can use them accordingly, 3 or 4 would be best.
After tracing, we have the pieces to be cut and at last, we have this.
Here you may think about what to do with the dot lines on the claw part.
Those have a purpose, those are for bending action.
Cut along the dot lines and now you have 3 pieces of the claw.
Now cover each side of the piece with a strip, this is an additional detail provider.
After this is complete, add a rectangular strip along the middle of the claw part.
This prevents unnecessary bending, now you can fix all these to the base part.
Once you finish these steps we will end up with the parts as in the below visual.
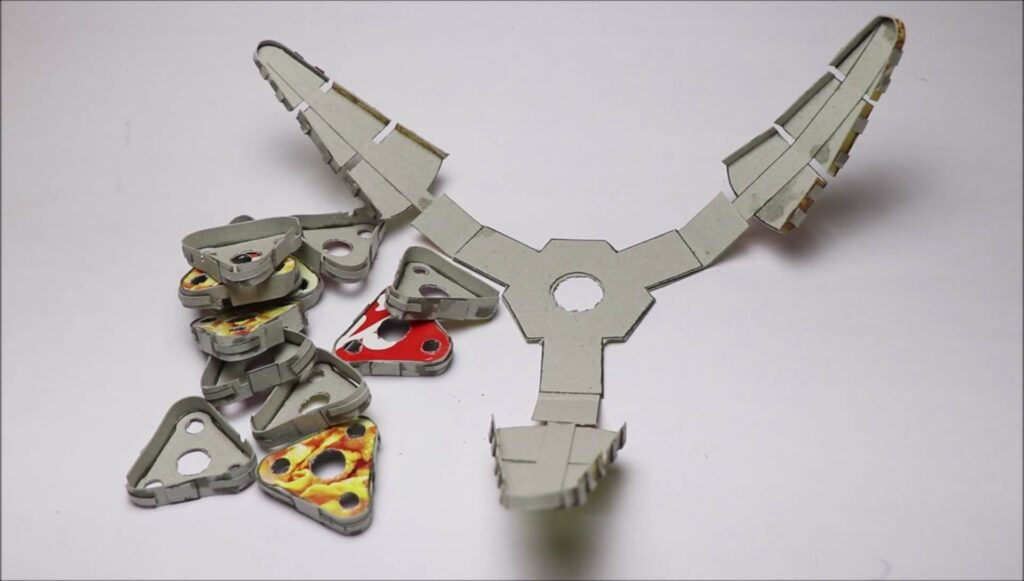
I prefer painting all at once as it makes the process a lot easier.
It took me quite a while to get the painting work.
I also made a few patterns that resemble the type of additional supports on the claw parts.
From the images going forward, you can see that the sides of the claw have a black color.
Whereas all others are silver, you can make such alterations in color.
Once the paint is completely dry we can start to assemble the process.
Assembly
There are 2 types of wire in use.
One is the hollow tube that runs on the mid-line or mid-hole of the vertebrae.
Another one is the braid type of wire that goes on the side holes.
You can see the side wires or braid wires in the below visual.
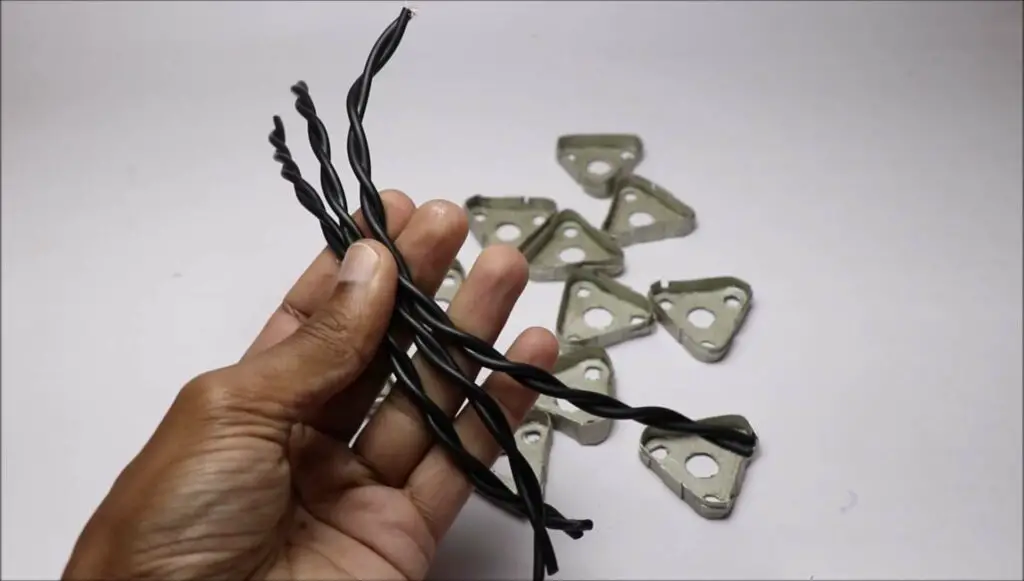
Use a drop of super glue on all the sides after placing the pieces.
Make sure to look at the distance in which 2 different pieces are kept.
Repeat the same step for all 12 pieces.
It will take time for this process, so working in patience is the option.
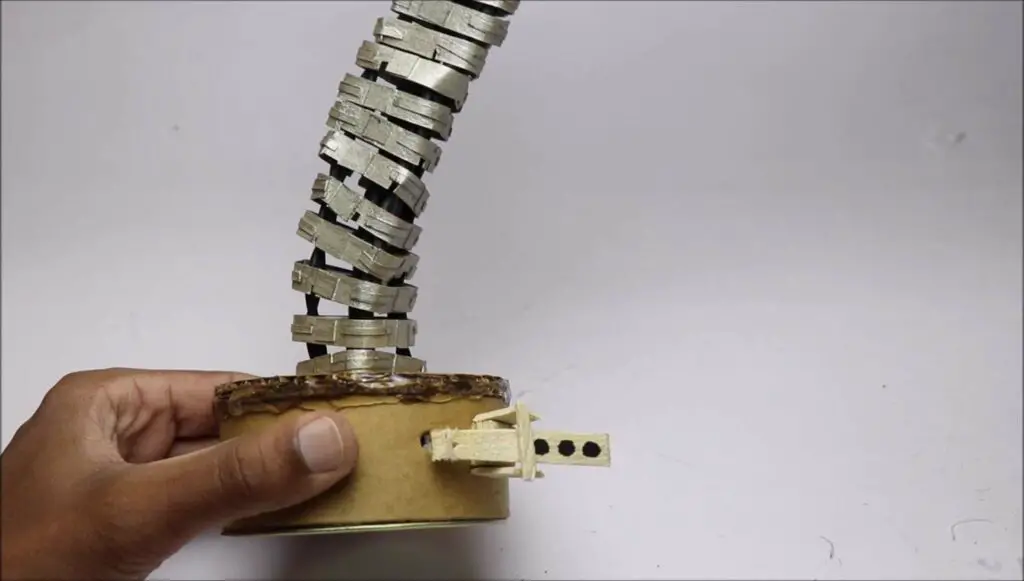
After the work is complete we will have the structure as in the below image.
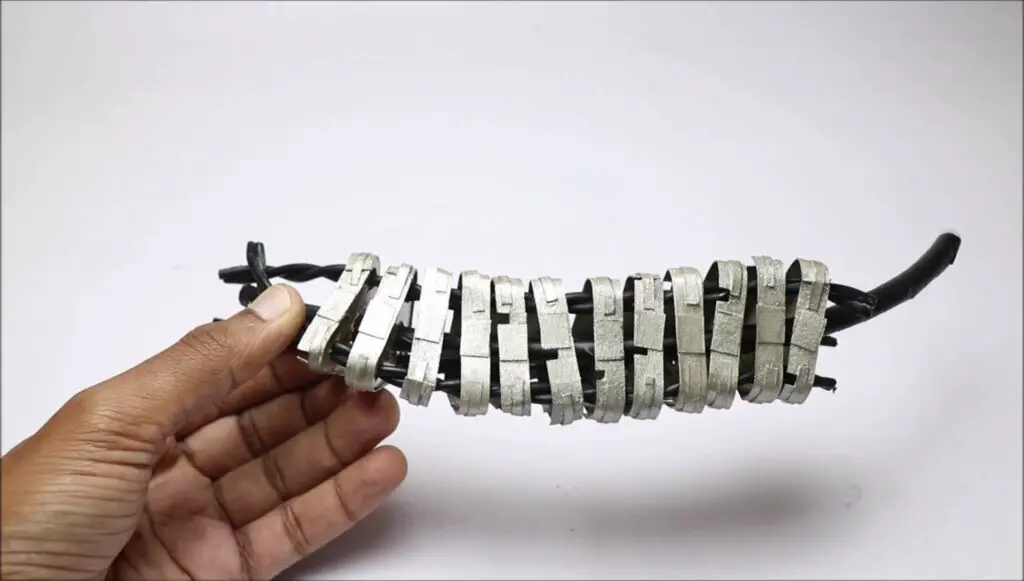
The vertebrae structure is complete, Now we can add the claw part.
To add this just trim the excess wire from the top surface of the vertebrae part.
Use super glue to couple these both together.
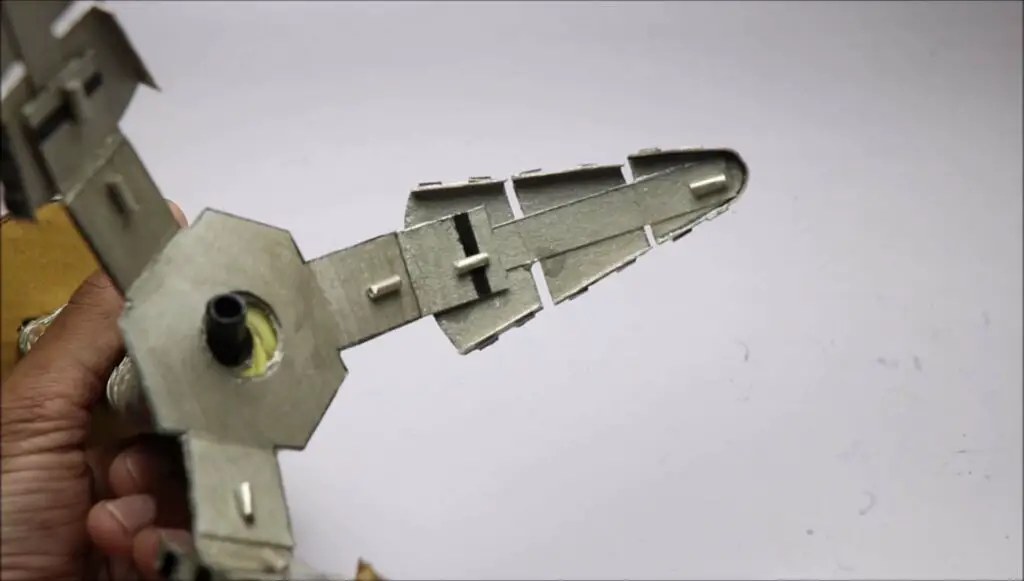
Folding mechanism of the Claw
To make the folding mechanism for the claw we need a few paper tubes.
I cut a few strips of paper and made small rolls.
To increase the strength I reinforced this by adding a drop of superglue.
Each claw part should have 3 pieces so in total we need 9 tubes.
Now by using fish wires connect all the 3 claws together.
Via hollow tube passes the single wire that connects to these 3.
Now to make it retractable add a piece of an elastic band at the backside of each claw.
The base cylinder tube made of cardboard.
I made use of popsicle sticks that makes a very simple mechanism.
It’s a simple crowbar-type mechanism.
on pressing one end the other end lifts up.
To the other end, Connect the main wire that controls all the claws.
On pressing the 3 black dot parts, the claw will be in a close position.
On releasing the pushing part the claw comes to the rest position.
Working video of Doc Ock Arms with Working Claws
Watch this video for the amazing working of this arm and for the video tutorial.
That completes our project of How To Make Doc Ock Arms, Definitely give it a try to make this.