Make Raspberry Pi Pico Robot Car controlled by Smartphone
Easy way to Make Raspberry Pi Pico Robot Car that is totally controlled by a smartphone, the interesting thing here is, Application for this robot car was self-built! How cool is this?
This can be one of the best Raspberry pi pico projects for beginners, Future upgrades are awaiting and I will keep them updating here.
You can directly convert this post for your robotic car project pdf for your mini engineering project.
Thank you HashRobotics for Providing this interesting Idea.
To begin with, let us know what features does our inexpensive Picar has.
Features of Raspberry Pi Pico Robot Car
There are many interesting features, Let me give you a glimpse of most highlighting features.
The Body of this Raspberry pi pico car was made from 3D printed parts.
Has a chain wheel system to have better traction and descent offroad controls.
Has a smartphone application that can be installed on any phone.
Controlled by Bluetooth hence no internet connectivity is essential.
These were the features, in the future I will be upgrading the same model to work as an IOT project.
This interesting project took me quite a little time to build, hence support is very much appreciated.
This also teaches raspberry pi pico motor control concept as we are controlling 4 motors.
To make this we do not require any raspberry pi pico modules but some basic components.
Supplies essential to make a pico robot car
- Set of 4 BO Motors
- Raspberry pi pico and usb cable
- L298N Motor driver and Bluetooth Module
- Set of screws (M3 10mm and 30mm) and screw driver
- 3D printer
- Bluetooth module
- Bread board, switch, Jumper wires and rechargeable battery
- 3D Printed parts
- Thonny Programmer
Robot car chassis design
The chassis and wheels for this robot car were made from Fusion 360 software.
You can have a look at how this car seems in it’s design phase.
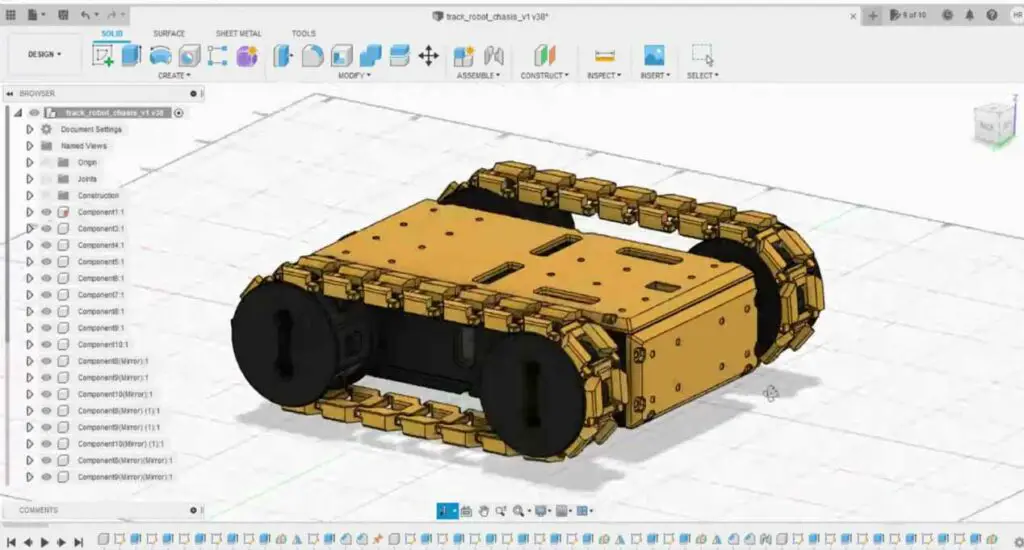
It took me several times to build this design from scratch, But you don’t have to struggle as I am giving you free Design.
Check Here for 3d printed car parts files.
Once you have got your STL file use Ultimaker Cura with basic settings to slice the design.
You may have to wait for hours to get the printing process to be complete, but it’s worth the wait.
One thing you have to note here is chains are print as individual blocks and later assembled.
A piece of PLA filaments is inserted across the end of the chain that works as hinges that allow free movement of chains across wheels.
Assembling of 3D Printed Robot Car
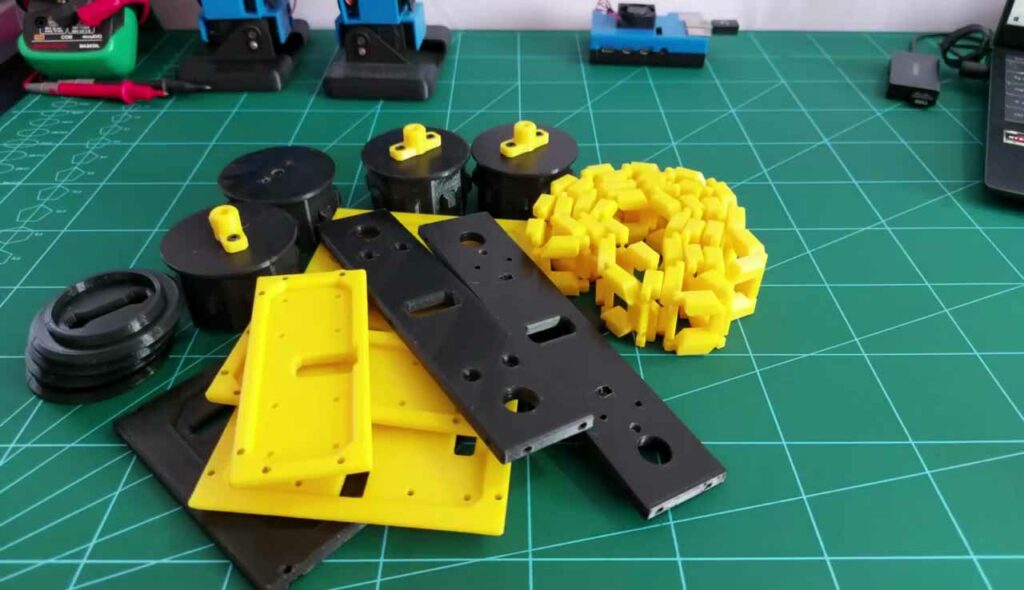
The assembly process is very easy for these 3d printed car parts.
Long black plates make the side frame while those yellow are front and back chassis.
Four wheels with shaft support to connect DC motors.
This is a very easy install process.
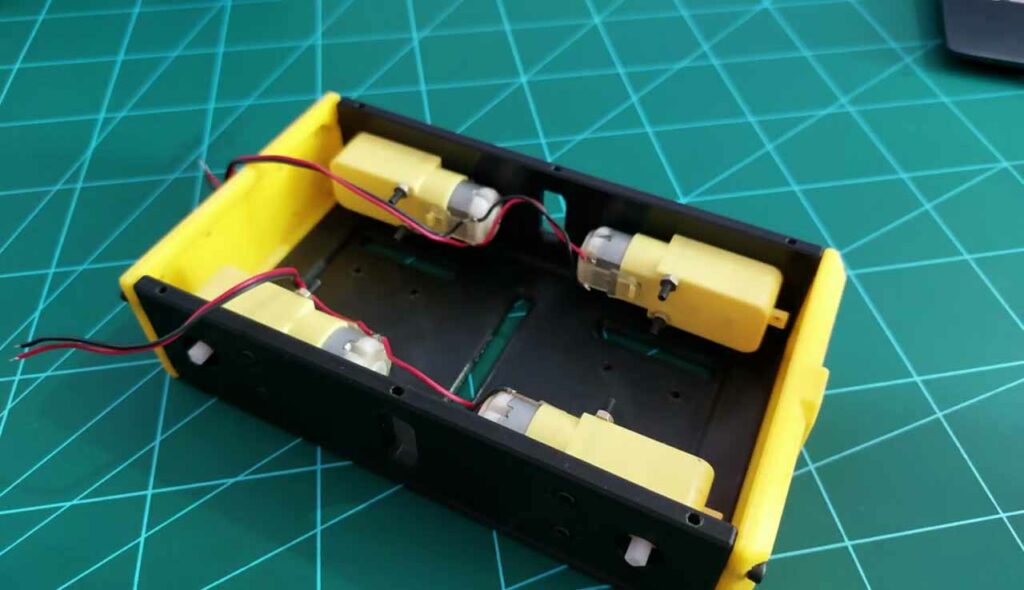
Place BO motors on the side plate and firm them with 10mm screws, Repeat the same for the other 3 motors.
Note: Connect motor wires opposite to each other(refer to the image below).
Use 30mm screws to connect the base plate with the side plate.
After doing this you can have something as showing in the below visual.
After you build this basic connection use the circuit diagram to bring all the components together.
Bluetooth controlled car using Raspberry pi pico circuit diagram
If you are a beginner to raspberry pi pico, it can be told that only in uploading script there are some changes.
But in terms of circuits almost you can expect the same experience as with Arduino nano.
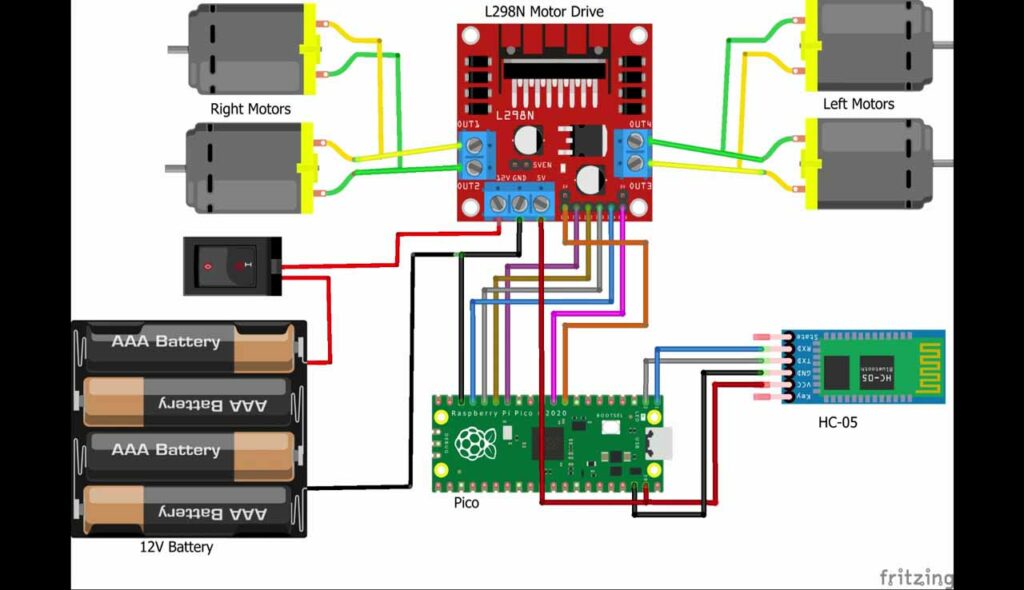
Follow this simple circuit diagram to connect all the components with pi pico.
Make sure you do not insert the batteries when you are making a circuit.
Use small breadboard and jumper wires to make connections.
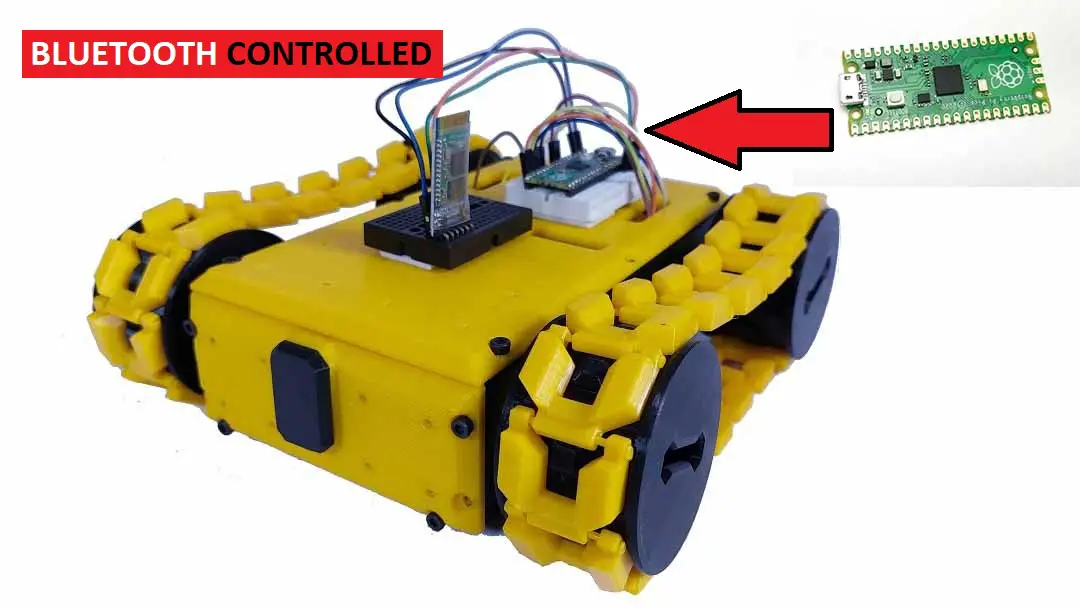
After you make connections fit everything inside the 3d printed car chassis that we made earlier.
End of this process you will have our project that looks like this.

To Finish this project we have one last step that is coding.
As we are using Raspberry pi pico there are some changes in the process of uploading codes to this board.
Don’t worry, this simple guide will help you how to upload and get the project working with ease.
Raspberry pi pico programming for Robot car
Here we are using MIT App Inventor to build a smartphone application to interact with this car.
The smartphone is the transmitter that controls this robot.
Check the description on the video to know more.
After this, we will upload the program to pico.
Press the flash/boot button on pico and connect the USB between the computer and pico.
Open Thonny Programmer IDE.
Don’t have thonny get your free raspberry pi pico thonny windows Here
Install and open IDE and in tools check for options and select interpreter then from the drop down select micropython (raspberry pi pico) option.
Click on ok and wait for the installation of micropython to complete.
Close the window and type print(“Hi”) in the terminal to check if everything works fine.
Now Click on file then open the Thonny program from the computer (Save this SCRIPT on the computer first before doing this step).
Run the script and later save this by going to file and then saving inside Raspberry pi pico by name main.Py
Stop the program and disconnect the cable.
Now you can connect the battery source to our project.
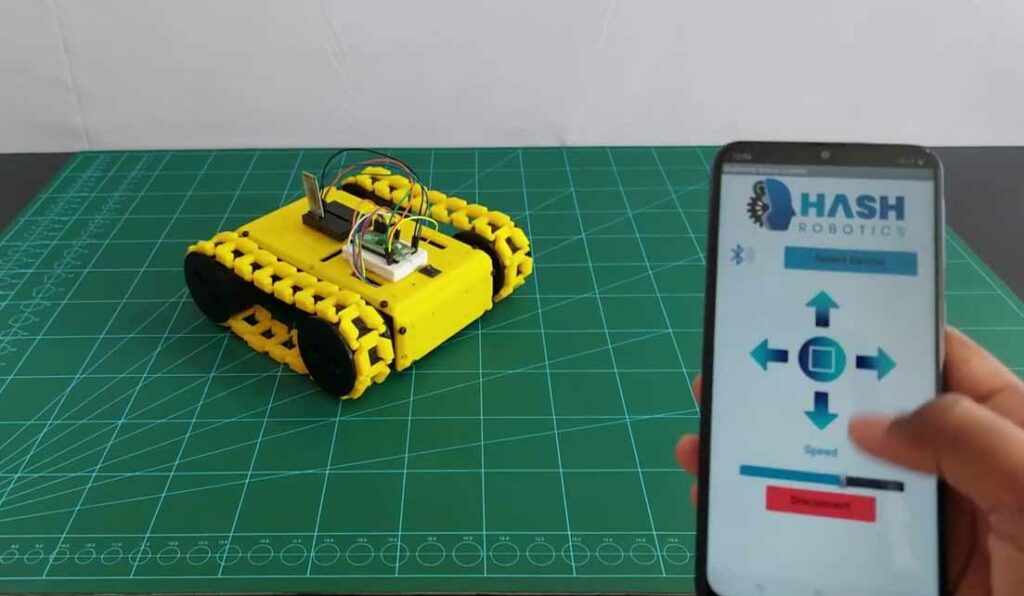
Turn on Bluetooth, open the smartphone application, and connect to this car network.
Check for direction controls and our project is ready to use.
That winds up our Robotic car project, Checking the Working Video of this project.
Don’t Miss our previous informative post on How Machine Learning Works