Arduino Stepper Motor Control with Code and Circuit Diagram
Arduino Stepper Motor Control is very essential if you are working on a electronic project that needs precise mechanical movements.
Lets say you want to build a robot that is dependent on precise movement or a CNC machine that will do the design job.
The limit is endless and hence we need to know being a creator to build connections between stepper and uno or other arduino boards.
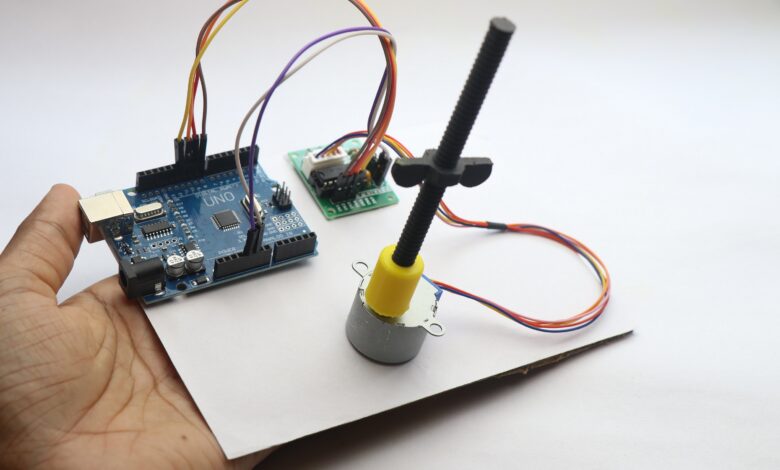
In this post i will show you how to connect Arduino Uno with uln2003 driver and stepper motor along with circuit diagram and basic program to run the project
Materials required to build this project
- Arduino Uno
- Stepper motor (i used 28BYJ-48 stepper with uln2003 driver)
- Breadboard(optional) if you are willing to use an external power supply
- Jumper cables
- Arduino IDE
- Programming Cable
- 3D printed Screw for stepper shaft(optional)
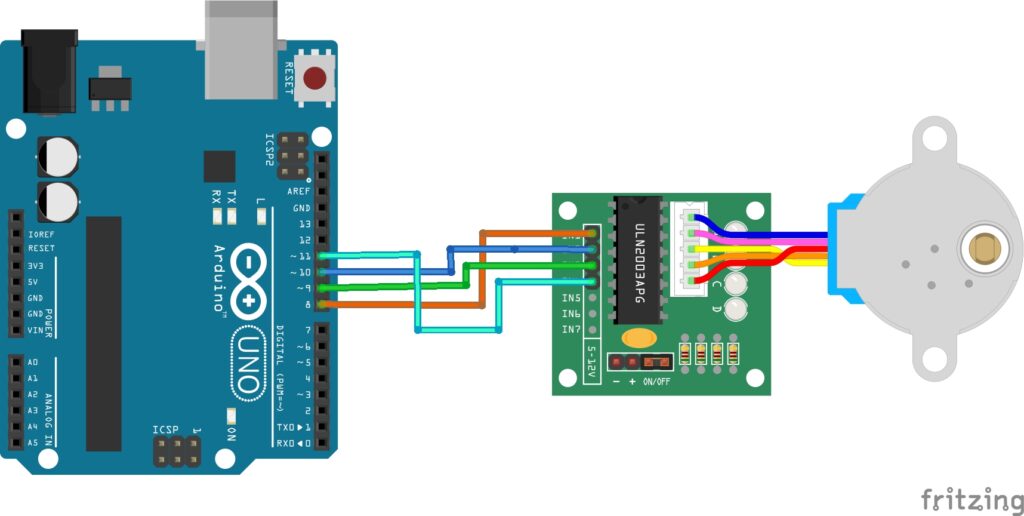
After you gather all these supplies we can head over to build the circuit, Below is the circuit diagram
Arduino stepper motor driver circuit
If you want to connect 28BYJ-48 stepper with arduino uno below is the circuit connections that you need to make.
Use jumper cables to connect these 2 components
If you are new to electronics let me explain you the circuit here once again in detailed steps.
The stepper motor driver is the part we are building the circuit using jumper wires
The ULN2003 Driver board has IN1 to IN7 pins, The IN stands for Input pin, Here in this project we are giving instructions to the stepper motor from arduino via the driver board.
The IN pins are connected to Arduino Uno board as follows
IN1 to D8
IN2 to D10
IN3 to D9
IN4 to D11
If your stepper motor is not connected to driver you can connect it first and now connect uno board to computer using USB.
At this point we have connected uln2003 driver with uno.
Arduino code for stepper motor 28byj-48 and uln2003 driver
Here is the program to connect 28BYJ-48 stepper motor with uln2003 driver with Arduino uno board.
Note that if you are experienced in coding in some way you will be able to modify the basic parameters.
If you are totally new you can have a look at the code and see that there are various parameters that you can change to suit your project needs.
#include <Stepper.h>

#define STEPS_PER_REV 2048  // 28BYJ-48 has 2048 steps per revolution

// Initialize Stepper library (IN1, IN3, IN2, IN4 sequence for ULN2003)
Stepper stepper(STEPS_PER_REV, 8, 10, 9, 11);

void setup() {
  stepper.setSpeed(10); // Set speed (increase for faster motion)
}

void loop() {
  stepper.step(512);  // Move forward (1/4 revolution)
  delay(1000);        // Wait 1 second
  stepper.step(-512); // Move backward (1/4 revolution)
  delay(1000);        // Wait 1 second
}
You can open Arduino IDE, If you dont have get it here, Install it according to your system specifications.
Open the arduino ide and connect your uno board to computer usb port using USB cable.
Now simply in the menu select tools-> port and select the port to which your board is connected.
And then go to Tools -> Board and select Arduino uno and now you are good to go.
In some cases the program may give error asking for 28byj-48 stepper motor driver in such cases you can install it first and then upload the code to board.
After the program is uploaded succesfully the stepper motor shaft will make movements and you can see that in action.
Controlling 28BYJ-48 Stepper Motor with ULN2003 Driver
Now you already have the working stepper motor and the movements are controlled using the program.
If you want the stepper motor to work in a certain way then you have to make changes in the arduino program
You can experiment in these part of the program stepper.step(values) and stepper.setSpeed(your values) there are other areas also.
Read the comments next to the code to make changes on your own.
You can also add other components like the HCSR04 or any other sensors to make this much more interactive.
Well now you know how you can control 28BYJ stepper motor that has ULN2003 Driver using Arduino uno and the process remains almost same with Arduino Nano.
If you have any other questions let me know in the commnets we can discuss it over.
You may also like my other projects on making RFID based door lock project


