Automatic Rain Shield for Clothes Using Arduino
Hello everyone in this project I made an Automatic Rain Shield for Clothes using arduino in a simple way.
I have given all the build steps in this post and also a working video is available in the end so you can see its working.
To make an Automated Rain Shield for Laundry Using Arduino you need some arduino components and i have given the list below.
If you are looking to build this for your upcoming project this is a great choice.
I have given a circuit diagram with explanation and also code, with this you can make a cool project report.
Arduino auto rain shield for clothes components
To build this project you need these supplies. Keep them handy to have a quick build
- Arduino Uno
- Micro servo
- LCD with I2c
- Jumper Cables
- Arduino IDE to program the Uno
- Rain sensor module
- Cardboard
- Hot Glue
Note that these are amzon affiliate links and upon successful sale i may receive a small percent of the sales at no extra cost to you
Auto rain shield for clothes circuit diagram
The circuit diagram for this project is shown well in the video, also here i have explained them for you.
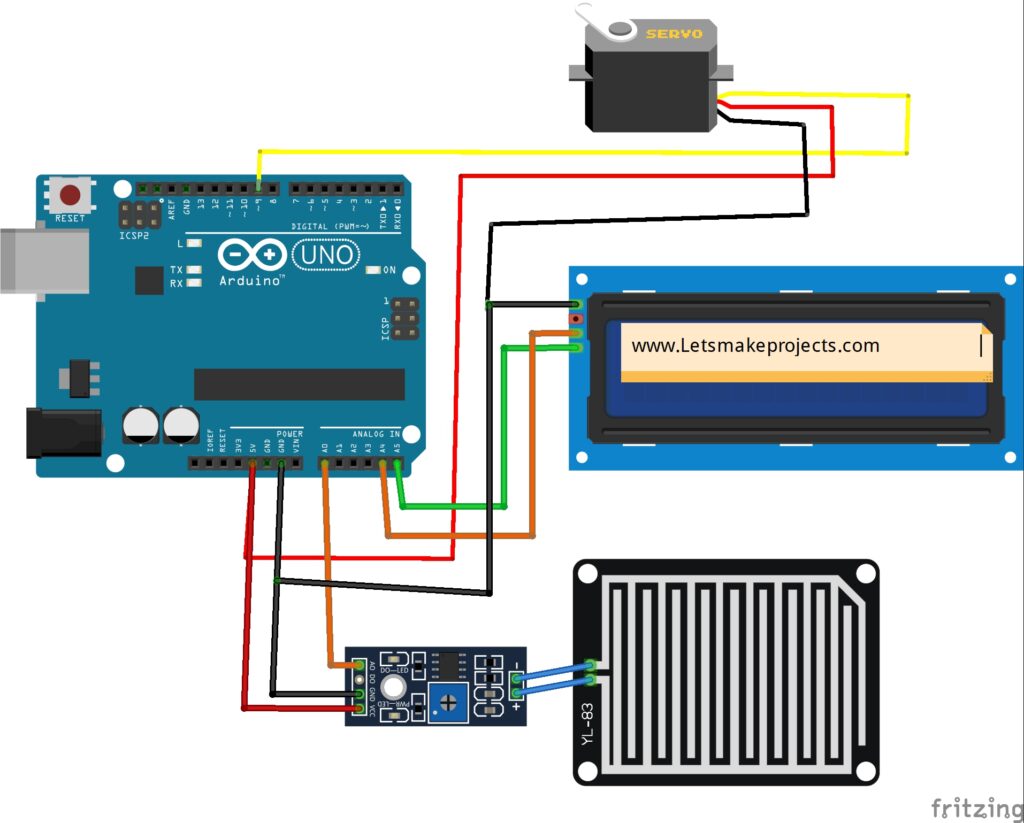
This is the circuit for auto rain shield project, we are using 3 main components to make the circuit.
The rain sensor, LCD 16×2 with I2c and then the micro servo for movements.
Start by connecting the rain sensor to its amplifier module if its not done.
The A0 pin is connected to A0 on uno whereas the vcc ang gnd are connected to 5v and gnd respectively.
From LCD i2c the SCl is connected to A4 and the SDA is connected to A5 the power pins follow like the previous one.
Finally connect the servo signal to D9 pin and the power pins to 5v and ground of uno board.
Arduino Auto Rain Shield for Clothes Code
After you make all these connections connect the uno to computer with programming cable and open IDE.
#include <Servo.h>
#include <Wire.h>
#include <LiquidCrystal_I2C.h>

Servo shadeServo;
LiquidCrystal_I2C lcd(0x27, 16, 2);  // Change to 0x3F if 0x27 doesn't work

int rainSensor = A0;
int rainValue = 0;
int threshold = 400; // Adjust based on your sensor readings
int servoPos = 0;

void setup() {
  shadeServo.attach(9);
  lcd.init();
  lcd.backlight();
  lcd.setCursor(0,0);
  lcd.print("  Cloth Shade ");
  lcd.setCursor(0,1);
  lcd.print("   System On   ");
  delay(2000);
  lcd.clear();
  shadeServo.write(0); // Shade open initially
}

void loop() {
  rainValue = analogRead(rainSensor);

  if (rainValue < threshold) {
    // Rain detected
    lcd.clear();
    lcd.setCursor(0,0);
    lcd.print("Rain Detected!");
    lcd.setCursor(0,1);
    lcd.print("Closing Shade...");
    shadeServo.write(90); // Close shade
    delay(2000);
  } else {
    // No rain
    lcd.clear();
    lcd.setCursor(0,0);
    lcd.print("Sunny Day");
    lcd.setCursor(0,1);
    lcd.print("Open the Clothes");
    shadeServo.write(0); // Open shade
    delay(2000);
  }
}
After you open the IDE, paste these lines of program and if you wish you can change the message on LCD.
If you face any error let me know in the comments and i will help you in fixing them.
Making the house model and clothesline
Since the project can be implemented on a small scale i will make a small house model on cardboard to show the project working.
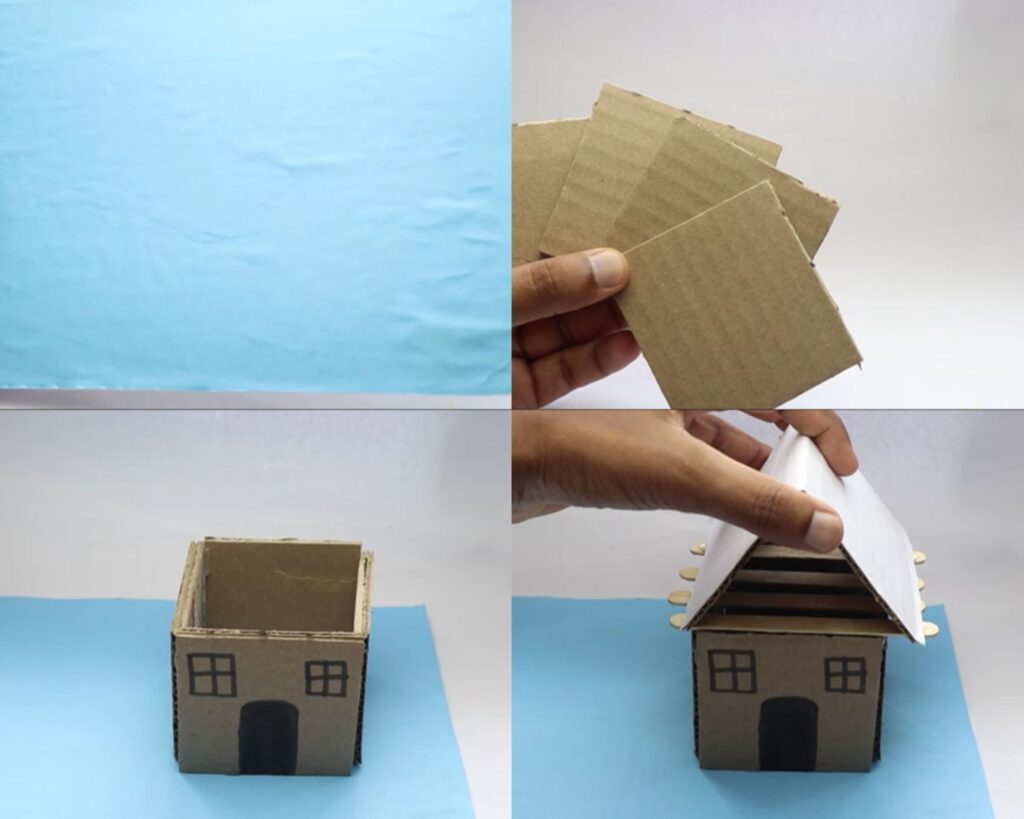
I will start by cutting 4 piece of cardboard and then gluing them together to make it look like walls of house.
Now i will add popsicle sticks for support and add the ceiling.
This will complete the house part now we can add the electronics into this.
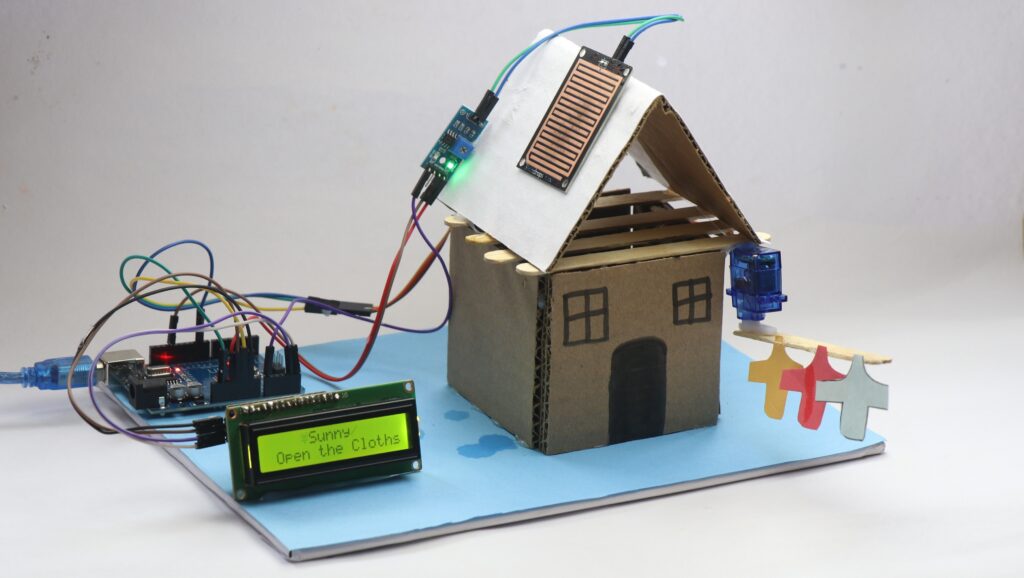
Start by gluing the rain sensor to the rooftop and if possible hide the amplifier module somewhere inside the house!
Place the other electronics on the board and secure them with glue.
Now you are good to go! project is ready and can be tested and let me tell you how to use.
Using the automatic laundry project
Using this is very fun and definitely everybody will enjoy watching it working.
Connect the Uno board to USB power supply and you can see the LCD display showing some message.
You can customise these messages and in my display it says sunny and to open the clothes.
At this point the servo will keep the clothes out for drying.
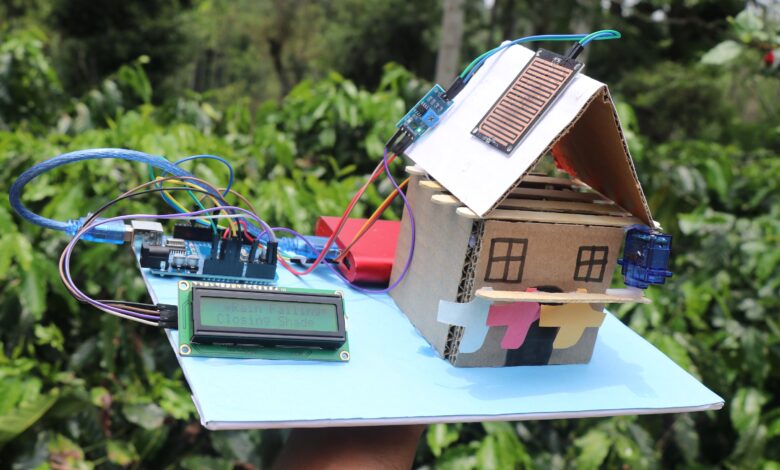
Now when the rain is detected! in our case rain is the water spray from bottle.
The servo retracts along with the clothes and the LCD shows rain message, If the sensor becomes dry(sun) again the clothes are exposed to light.
You can check the working of this project on the video here.
This was all about this project, if you have any suggestions or questions drop them in the comments.
You may also like my previous post on Arduino garbage sorting Machine


Are you selling this project bro