Arduino Gas Leakage Detector Project
Hello readers in this instructables i will show you how to make Arduino Gas Leakage Detector Project along with temp display.
I will use the DTH11 sensor to detect the temperature and the MQ2 gas sensor to detect the LPG leakage.
Alongside i will add an LED that indicates that the gas is detected you can also replace this LED with buzzer also.
Like always complete project video is available in Jeevan Jee Youtube channel.
To begin with let me go through the list of materials you need to make this project.
Arduino Uno, DTH11 sensor, MQ2 gas sensor, LED, 128×64 I2c LCD display, Jumper cables and LED.
The above materials list links are amzon affiliate links and upon qualifying sales i will recive a small percent of sale at no extra cost to you.
Arduino Gas Leakage Detector Project Circuit Diagram
Building the circuit may seem difficult if you see this circuit diagram, but let me break it down for you.
I will explain the circuit one by one so that you can build the connection in parts.
Start with LCD first since we have to connect many cables to this module and you can do as follows.
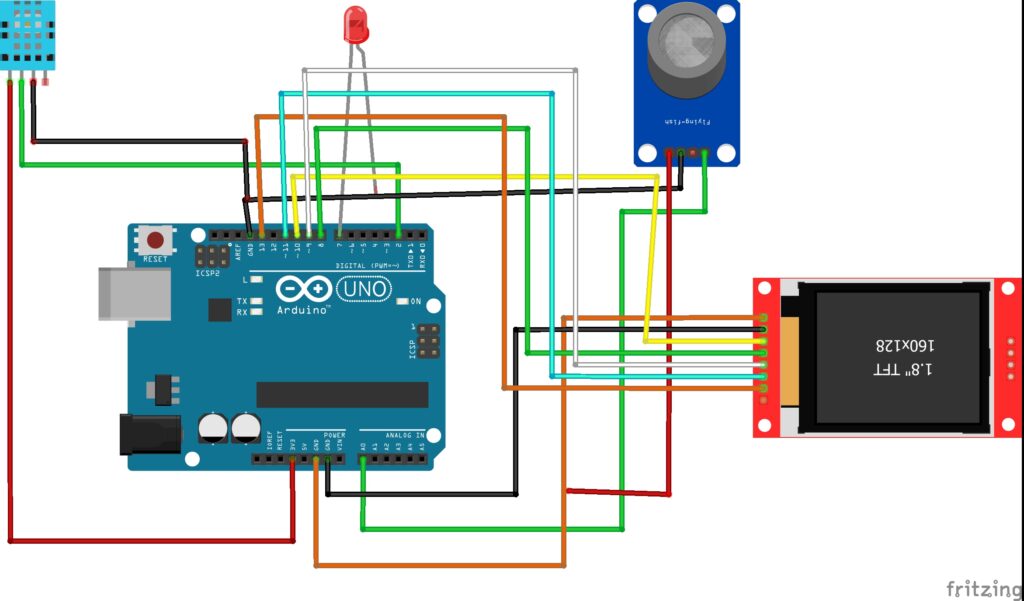
TFT Display or ST7735 Connection with Uno board
- VCC to 5V of Uno and GND with GND
- CS to Arduino Pin 10
- RESET to Arduino Pin 8
- LED to 3.3V or 5V
- A0 from LCD to Arduino Pin 9
- SDA to Arduino Pin 11
- SCK connects to Arduino Pin 13
DTH 11 sensor connection
Signal pin to D7 pin whereas the vcc and gnd to 5v and the ground pins respectively.
MQ2 Gas sensor connections
A0 pin is connected to A0 on the Uno board and the power pins to respective pins.
LED/Buzzer Connections
The positive pin is connected to D6 and the Gnd is connect to Ground on the Arduino Board.
After these connections are complete you can go ahead and upload the program and see how that is done.
LPG Gas Leakage Detector using Arduino code
Connect Arduino Uno board to Programming cable and the other end to the computer.
Copy and paste the below code inside your IDE and before you upload make sure to check the library are installed.
Get the Gfx library and the st7735 library and once you add inside your IDE proceed to upload the program.
#include <Adafruit_GFX.h>
#include <Adafruit_ST7735.h>
#include <SPI.h>
#include <DHT.h>

// TFT pins
#define TFT_CS    10
#define TFT_RST   8
#define TFT_DC    9

Adafruit_ST7735 tft = Adafruit_ST7735(TFT_CS, TFT_DC, TFT_RST);

// DHT11 setup
#define DHTPIN 2
#define DHTTYPE DHT11
DHT dht(DHTPIN, DHTTYPE);

// MQ2 Gas sensor analog pin
#define MQ2_PIN A0
#define LED_PIN 7

void setup() {
  Serial.begin(9600);
  dht.begin();
  pinMode(MQ2_PIN, INPUT);
  pinMode(LED_PIN, OUTPUT);

  tft.initR(INITR_BLACKTAB);
  tft.setRotation(1);
  tft.fillScreen(ST77XX_BLACK);
  tft.setTextColor(ST77XX_WHITE);
  tft.setTextSize(1);
  tft.setCursor(10, 10);
  tft.println("Weather Station");
}

void loop() {
  float h = dht.readHumidity();
  float t = dht.readTemperature(); // in Celsius
  int gasValue = analogRead(MQ2_PIN);

  Serial.print("Temp: "); Serial.print(t);
  Serial.print(" *C, Humidity: "); Serial.print(h);
  Serial.print(" %, Gas: "); Serial.println(gasValue);

  // Clear data area
  tft.fillRect(0, 30, 160, 80, ST77XX_BLACK);

  tft.setCursor(10, 30);
  tft.print("Temp: "); tft.print(t); tft.println(" C");
  tft.setCursor(10, 50);
  tft.print("Humidity: "); tft.print(h); tft.println(" %");
  tft.setCursor(10, 70);
  tft.print("Gas: "); tft.println(gasValue);

  // Trigger LED on gas alert (adjust threshold if needed)
  if (gasValue > 300) {
    digitalWrite(LED_PIN, HIGH);
    tft.setTextColor(ST77XX_RED);
    tft.setCursor(10, 90);
    tft.println("GAS ALERT!");
    tft.setTextColor(ST77XX_WHITE);
  } else {
    digitalWrite(LED_PIN, LOW);
  }

  delay(2000);
}
If you have issues in uploading the code to uno check for proper port number and board type and try it should work.
After the code is done uploading to uno the circuit is ready for using.
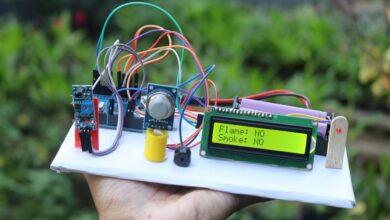
At this point you may see some messages on the LCD panel.
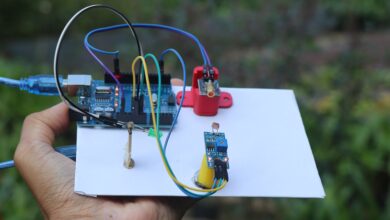
The project is ready i will place all the components on a board so as to look like a prototype.
How to use the gas leakage detector using arduino project
Using this project is also simple, all you have to do is connect the Uno board to power supply.
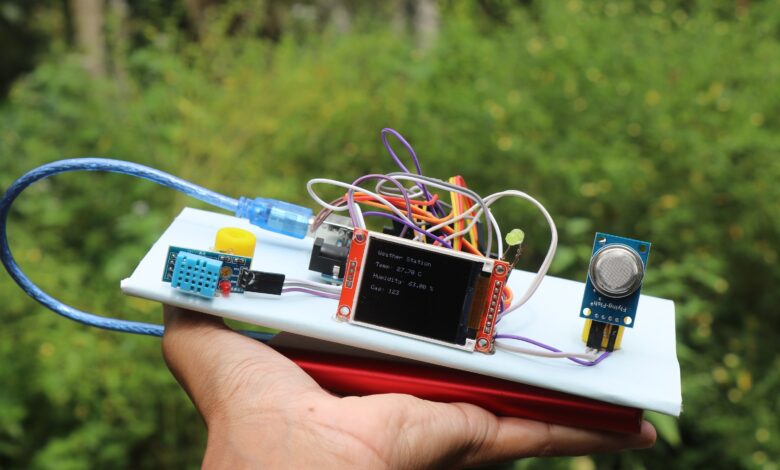
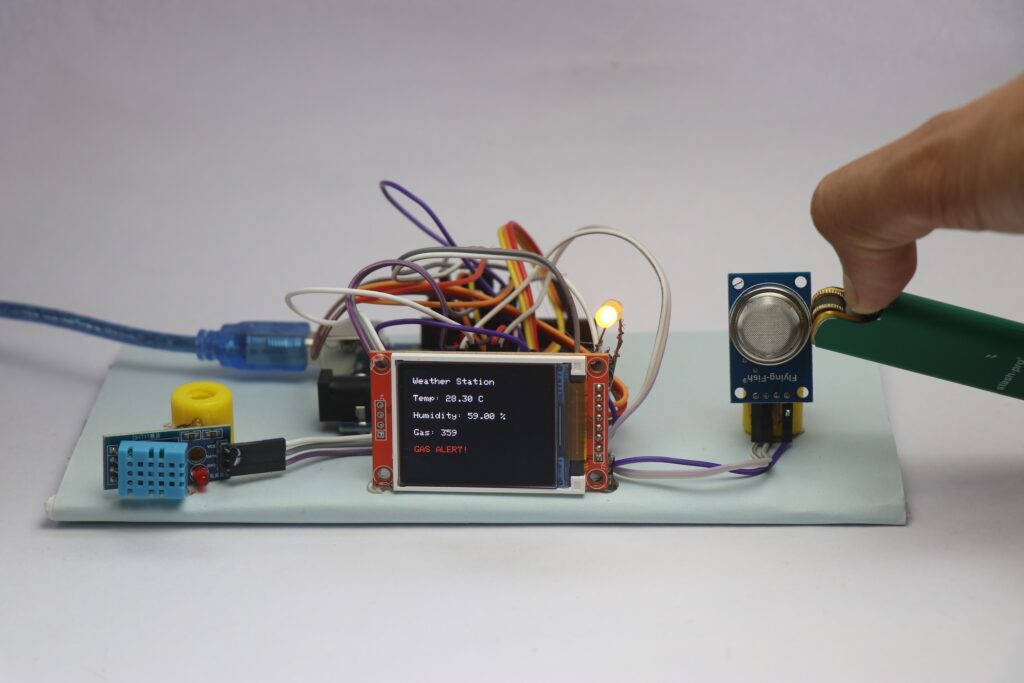
Since the MQ2 gas sensor has some heating element inside allow few seconds and by the time you can see temperature.
The DTH11 sensor displays the room temperature and the humidity and its pretty accurate.
Now to test if the gas sensor actually works i just exposed the gas from a lighter, in no time the led glows and alert message is shown on LCD.
Instead of LED you can use buzzer also, If i used buzzer i could not show the working of this project.
This project can be encased inside a 3d printed case and kept as a desktop gadget.
You can also customise the messages and other widgets on the LCD panel as per your needs
That was all about Arduino Gas Leakage Detector Project you may also like our previous project on smart street light