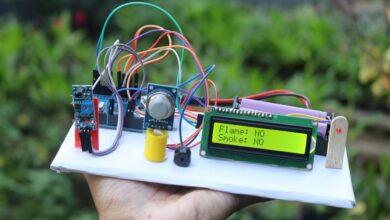
Arduino Laser Light Security System

Hey guys in this project i will show how i made this Arduino Laser Light Security System.
If you are new to arduino boards then consider building such projects that gives exposure to hands on circuit building.
To begin with let me quickly tell you how this project works.
The logic behind working of laser security alarm project is very simple.
LDR or light dependent resistor is continuously exposed to light and when something obstructs the light the alarm goes on.
Instead of buzzer here i will be using LED. This is the principle behind its working.
To build this project you need Arduino Uno, LDR module, Laser Module and LED/Buzzer.
Arduino laser security system wiring diagram
This is the circuit that we will be using in this project, the connections are simple.

LDR module signal is connected to D2, whereas the power pins are connected to 5v and gnd respectively.
I have modified this LDR module from flame sensor, just replaced the IR led with LDR.
The laser module is connected to 5v and gnd pins on the uno board.
I have connected to positive leg of LED to D7 pin on the uno and the gnd is connected to gnd, this completes the connections.
Laser Arduino Security System Code
Connect uno board to computer, open ide and paste the below program.
Program is simple, if you want to learn more you can try exploring the program by changing values.
#define LDR_PIN 2   // Digital output from LDR sensor module
#define LED_PIN 7   // Red LED

void setup() {
  pinMode(LDR_PIN, INPUT);
  pinMode(LED_PIN, OUTPUT);
  Serial.begin(9600);
}

void loop() {
  int sensorState = digitalRead(LDR_PIN);

  if (sensorState == HIGH) {
    // LDR receiving light (laser ON)
    Serial.println("Laser detected - Blinking LED");
    digitalWrite(LED_PIN, HIGH);
    delay(100);
    digitalWrite(LED_PIN, LOW);
    delay(100);
  }
  else {
    // Laser blocked (no light)
    Serial.println("Laser blocked - LED off");
    digitalWrite(LED_PIN, LOW);
  }
}
In this program you can make changes such as the response time or the duration at which the alarm should be happening.
There is no need to install any library, everything works because the program is simple.
I recommend to keep the program as it is, the project is now ready for using.
I will keep all the components on a cardboard base and arrange them as shown in the image below.
How To Use LDR Security System Project
You can either power the uno using battery or usb supply.
The light should be exposed to LDR module and when something comes between this line the LED glows.
You can double check the circuit using this simple way.
Dont keep the LDR too far from light as this may cause the sensor to not detect the light properly.
The light on the LDR module should glow when light is exposed so that we know that the project is working.

If you want an alarm, replace the LED with buzzer or connect both parallely.
Make the project more attracive by placing a house in the cardboard.
Hope you found this Arduino Laser Light Security System project useful, you may also like my previous post on automatic rain shield for clothes


