Arduino Ultrasonic Gate System
Hi in this project i made Arduino Ultrasonic Gate System that opens if you simply wave at the sensor.
This project can be implemented on house gates, garage doors or for other gate related requirements.
You can also add additional level of security by adding touch sensor or rfid module for the existing one.
I wanted this project to be simple so i used less components yet fully functional project.
Like always i have given a working video at jeevan jee youtube channel.
To begin with let me give you the materials that you need to make this smart gate arduino project
- Arduino Uno from amazon
- Micro Servo
- Ultrasonic Sensor
- Jumper Cables
- Arduino IDE
- Programming Cable
These are affiliate links and upon qualifying sales i may receive a small percent of sales at no extra cost to you.
Arduino ultrasonic gate system wiring diagram
The circuit part for this project is not soo complex and anyone can make it.
I made it even more simpler by explaining the circuit step by step.
There are total 2 different components here and i will go through each of those.
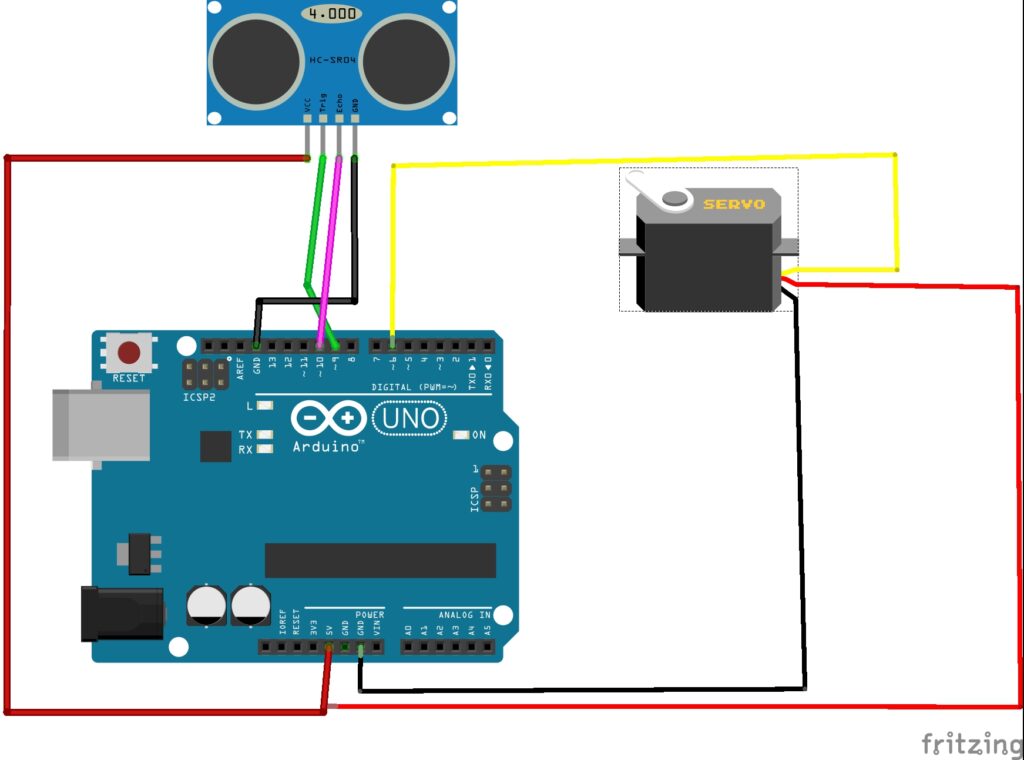
Ultrasonic Sensor Connections
These sensor comes with 4 pins, Trig, Echo, Ground and Vcc.
Trig and echo are connected to D9 and D10 on the Uno board.
Vcc and Gnd are connected to 5v and ground pins respectively.
Micro Servo Connections
The power pins of micro servo, gnd and vcc are connected to ground and 5v pin of the Uno.
Signal pin of the uno is connected to D6 and that is all about the connecions part.
There is no need of using breadboard here, just you can connect all the components directly.
Arduino Ultrasonic Gate System code
This is the arduino code for smart gate project, You can simply copy and paste this on your arduino IDE.
If you dont have servo library you can get it here you can directly use the libabry after you install it inside IDE.
#include<Servo.h> /servo library/
Servo myservo;
const int trigPin=3;
const int echoPin=5;
long tmeduration;
int distance;

void setup() {
myservo.attach(9);
pinMode(trigPin,OUTPUT);
pinMode(echoPin,INPUT);
Serial.begin(9600);


}

void loop() {
digitalWrite(trigPin,LOW);
delayMicroseconds(2);
digitalWrite(trigPin,HIGH);
delayMicroseconds(10);
digitalWrite(trigPin,LOW);

tmeduration=pulseIn(echoPin,HIGH);
distance=(0.034*tmeduration)/2;

if(distance<=10){

myservo.write(90);
  }
else{
myservo.write(0);}

Serial.print("distance:");
Serial.println(distance);

delay(1);

}
Connect board to computer, you should see the com port, select your port and type of board and upload the program.
You can also change the servo angle and time of response by varying the values.
After the program is done uploading you can simply test the circuit by waving at the ultrasonic sensor.
The sensor when it detects obstacle will make the servo to work, You can simply use long strip of cardboard also.
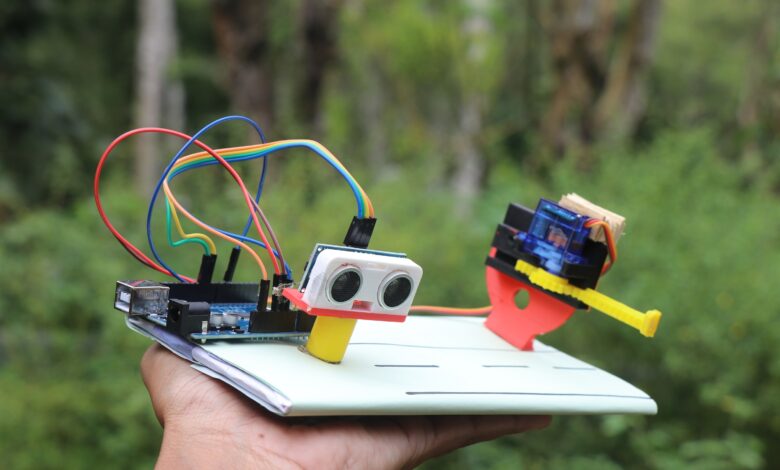
I used a 3d printed slider mechansim to show the gate mechansim.
How to Use Arduino Ultrasonic Gate System
You can choose either external power source to power this or USB supply.
I set up using cardboard and i made it as small as possible so that it is easy to carry and looks cool.
With the same mechanism you can implement to other projects also, like for the toll gate project if you add RFID sensor module.
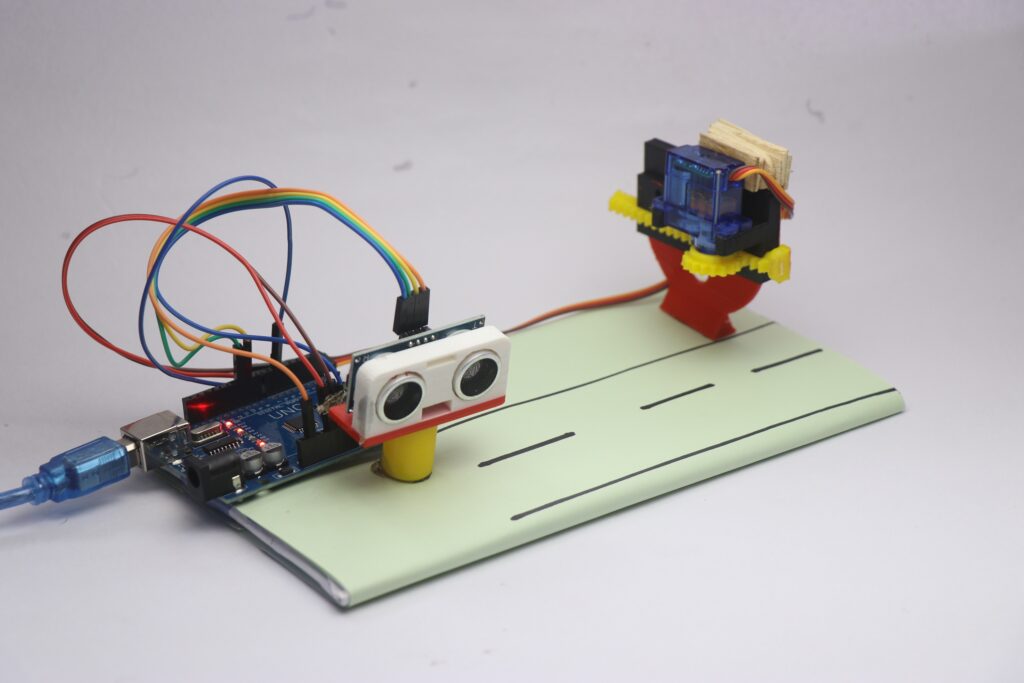
The 3d printed servo attachment is a servo slider mechansim that can also be replaced with a small stick on shaft.
When you bring hand in front of the sensor the servo shaft moves making the gate open and close after few seconds.
You may think the hcsr04 responds to only hand gestures? No it responds to any object that is infront of it.
This is all about this arduino gate system using servo and ultrasonic sensor give it a try you can learn a lot of new things.
Consider checking my previous post on automatic street light project.