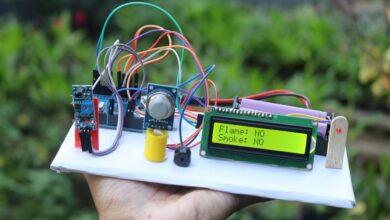
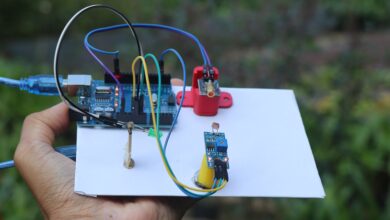
How To Make Smartphone Controlled Floor Cleaning Machine

Floor cleaning robot is Trending Home Appliance in the recent days and in few years every house will be having own floor cleaning robot!! Currently the price of such robots are expensive, If you are looking for an Awesome Mini project idea, Making your own Smartphone Controlled Floor Cleaning Machine Robot will be a very good idea, here I will be explaining in very detailed steps on How to Make your own Floor Cleaner Machine which is controlled by smartphone with circuit Diagram and Codes, Which can go to any corners of your home while you can sit and control From your couch! Importantly I have provided u the code for free!
Mechanism of Working
Floor cleaners available in the market use vacuum suction method to pull out dirt from the floor and also they are autonomous, Meaning just switch it on and it starts doing it’s work, but here we are making Smartphone Controlled Floor Cleaning Machine, also to make this robot cost-effective I am using small floor cleaning robot mop which should be Rotated using Geared DC Motors and hence the dirt will be picked from ground, all these are DIY projects meaning it’s a Do it yourself project.
Note: Video link is provided at the End
Materials needed to make Smartphone Controlled Floor Cleaning Machine

Motor Driver aka motor shield
Two Geared DC Motors(I’am using dual shaft dc motors)
Rubber wheels, MDF wood
NODE MCU or ESP 8266
Hot Glue gun and sticks
Superglue(optional)
All Components are available in amazon and links are given Below
| Components | Buy in India | Buy in USA |
| Node MCU | https://amzn.to/3sjOiC1 | https://amzn.to/2ZB69YD |
| Motor Driver | https://amzn.to/3sewGat | https://amzn.to/3aGgJUC |
| BO Motor | https://amzn.to/37yNuRL | https://amzn.to/3uumNaO |
Disclosure: These are affiliate links. As an Amazon Associate I earn some credits from qualifying purchases.
Let’s start with function of each part used in this project,
Node mcu is a small development board to prototype iot projects, this board comes with inbuilt Wi-Fi module which is an added advantage to our project.
Motor driver is used to control the speed and direction of DC Motors
I will be using 150 RPM geared DC Motors you can’t use normal DC Motors for this project because here torque is very essential
For the mainframe you can either use wood or plastic since MDF wood is very cheap and provides sufficient strength, I prefer to use this
CIRCUIT for Smartphone Controlled Floor Cleaning Machine
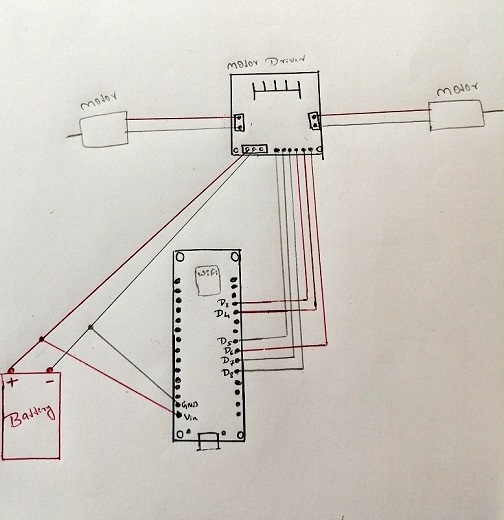
Please follow the circuit diagram provided to make the circuit connection
If you are using a new motor driver shield please make sure you will remove the pins also called as loops which will be connected to Ena and Enb by default
If these pins are connected means either top speed or else lowest speed of motor control is achieved, But here we need our DC Motor to be controlled in gradual speed which means to be able to control in small speed steps
- Using jumper wires connect Ena to d5 pin of Node MCU
- In1 to D7
- In2 to D8
- In3 to D3
- In4 to D4
- Enb to D6
Once the connection between motor driver and nodemcu is completed, connect your geared DC Motors to two output terminals(first output and second output) of motor controller/motor shield is finished, Please make sure 12 volt of motor shield and vin in a nodemcu is connected to positive side of the battery, whereas Gnd of Servo as well as Gnd of Nodemcu goes with negative side battery
I am using two rechargeable lithium-ion batteries which are connected in series to supply the power for entire project
Once the Circuit is complete we can upload the code to our board
CODES for Smartphone Controlled Floor Cleaning Machine
And later we can start building frame for this robot
How to Upload codes to ESP8266
Open arduino IDE on your computer
If u don’t have arduino IDE Installed on your computer get it from arduino.org
Using USB cable connect ESP8266 arduino with your computer
Open the software, Copy paste the code given
Make sure u have selected the right type of board
To check type of board which will be selected goto menu>tools>board>bottom you can find ESP8266 ..Select it
If you are unable to see it make sure u have installed ESP8266 Wi-Fi driver in your Arduino library
If you don’t have Library installed just search ESP8266 Wi-Fi library on google and download it
Goto menu>sketch>include library>add .zip library>choose downloaded location and click on ok
Check for port number, if it’s not selected by default click on available ports section from menu>tools>port
Click on upload
It takes some time for the code to upload since it’s the first time
Once the code is done uploading disconnect USB cable and let’s build frame
NOTE: You can change the name which will be displayed as per your favourites by editing wifi name in the code provided i have named it as “FLOOR ROBOT”
Frame building steps
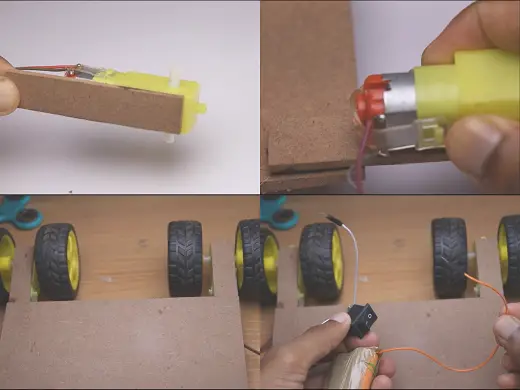
- Start by gluing dc motors to strips of MDF wood
- Later couple it to main frame using superglue/hot glue
- Attach wheels on both sides of dual shaft DC Motors
- We need 2 separate switching circuits
- One for wheels control
- One for mop control
- Use normal switch circuit with battery
Making the mop spinning Mechanism
To make spinning mop follow these instructions
Find out old CD or buy new
Use a piece of cloth to cover CD and stick it with glue
Once the glue is dry trim extra edges
Attach this CD to DC gear motor shaft using small piece of wood
Using hot glue stick motor to main frame

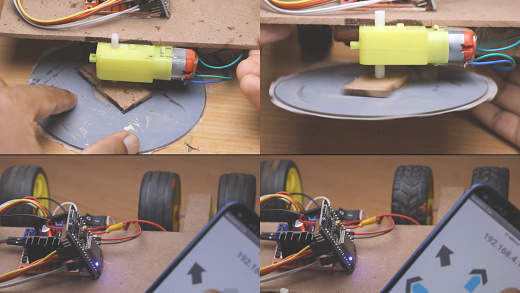
Note: Here one thing to be noted is that motor part needs separate switching circuit and we don’t have control over speed, since we are using geared motors as soon as the switches are kept on mop will start spinning
How to use floor cleaning robot?
From the app store download Node mcu car application and install it on your smartphone/tablet
Switch on first switching connection i.e between Nodemcu and motor driver
Search for available Wi-Fi devices in your smartphone
Once you find node MCU Wi-Fi connect to that network
Later open Node mcu car application on your phone
U will find buttons at this time that can control our robot in all directions depending on our needs
Once u get sufficient control of all the buttons switch on power supply of mop spinner
Hurray! Our floor cleaning robot starts doing it’s job
Working video of this project
Amazing video tutorial of this project
Thanks for your time and interest for reading this article, if you have any ideas for improved version let me know in the comments section,if you have any problems while building this project let me know that too! I will be helping you, Thank you

