Make Arduino Automatic Plant Watering System
Hi Makers in this article we will see How To Make Arduino Automatic Plant Watering System along with an easy explanation.
If you are looking for a project report, you are at the right place.
I have given stepwise instructions along with circuit diagram explanation and Arduino codes, don’t miss any!
To begin with, let me give you a quick intro to this project.
Note: You might also like this award-winning Wireless energy transfer system project
What is Arduino Automatic Plant Watering System
You might have already know the definition of the automatic plant watering system.
For instance, if you are watering the plants in your garden you do it very often or when the soil becomes dry.
This is a regular process or manual process, imagine you go for a vacation and are unable to water your indoor water pots.
In such a case the automatic watering system becomes handy.
When the soil becomes dry this system automatically starts to pump water.
Here we will use Arduino and a soil moisture sensor for this purpose.
This was a very quick ideology of the Automatic Watering System for Plants using Arduino.
How does an Automatic Plant Watering System work
Here a Soil moisture sensor that senses the presence of water.
When it detects water low signals will be sense from the sensor which will be further convert to detectable signals via an amplifier.
The other end of the soil moisture sensor is connect to this amplifier board.
This is further connect to the power supply and signal pins on Arduino Uno.
So signals after entering Uno commands the water pump via relay module.
This job is taken care of by the Arduino Uno program/code.
Finally, the pump will supply a limited quantity of water to the soil until the sensor receives water content.
Now it stops supply as soon the sensor is able to detect enough quantity of water.
This is how an Arduino plant watering system works.
Materials to Build this Project
You can see the components used for this project in the below visual.
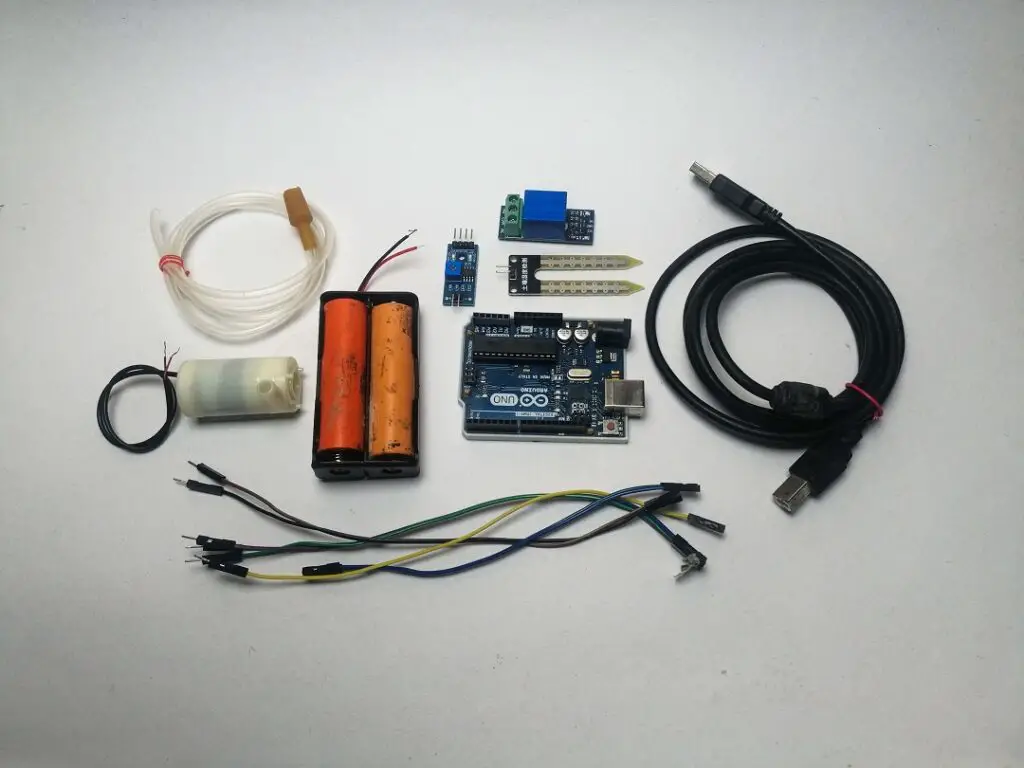
- Arduino Uno
- Submersible water pump 5v or 6v with tube/pipe
- Soil moisture sensor
- 5v Relay module
- Jumper cables
- Lithium-ion batteries with holder
- USB power source
- Arduino IDE and Programming cable
- Small container with soil for demonstration
- A cup of water
Circuit Build stage
We will start by making the jumper wire connections to all the components.
Start with a soil moisture sensor and amplifier then connect this to Arduino.
Specific pins are meant to be used while making connections to Arduino and those can be seen in the below circuit.
Automatic Watering System for Plants using Arduino Circuit Diagram
Below is the simple circuit diagram of the automatic plant watering system that is very easy to understand.
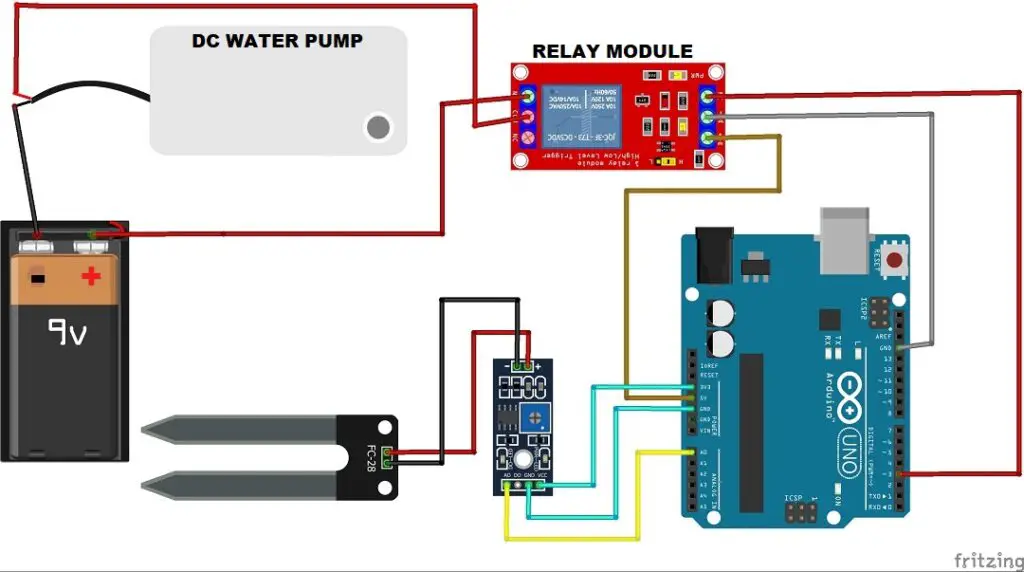
This is the circuit we will be using in this project.
If you are not good at reading diagrams don’t worry I will explain this below.
I will divide circuitry into 2 parts one with a sensor and the other with a dc motor.
Soil sensor connections
As said earlier soil moisture sensor is connect to the amplifier and the end of the amplifier has 3 pins.
Two for power supply and the other for signal.
Gnd and Vcc pins from the amplifier are connect to 5v and gnd pins of Uno.
A0 pin will then be connect to the A0 pin on the Arduino board.
DC water pump connections
I will power this project using 2 lithium-ion batteries that are well known for their battery capacity.
The negative terminal of the battery and pump are connected together.
Another end that is positive of battery is connected to NO pin on the relay.
Positive of the pump to COM pin on the relay.
Now the other end of relays has Gnd, Vcc, and Sig pins.
Gnd and Vcc are connected to Gnd and 3v pins on Uno board.
The signal pin is connected to D3 pin on Uno.
ABOUT PCBWAY
If you want to make simplest circuit board for this project you can get high-quality PCB at a very reasonable price from PCBWAY
PCBWay produces FR-4 and Aluminum boards along with advanced PCBs like Rogers, HDI, Flexible and Rigid-Flex boards, at a very reasonable price.
You can get instant online quote at pcbway.com/orderonline
Make sure to Inspect your Gerber file before placing the order at OnlineGerberViewer
You also can order as less as 5pcs of PCB from the PCBWay.
You can explore amazing PCB projects from the PCBWay Open-source community
For more details please visit the following articles. Why PCBway ,High-Quality PCB and PCB Capabilities
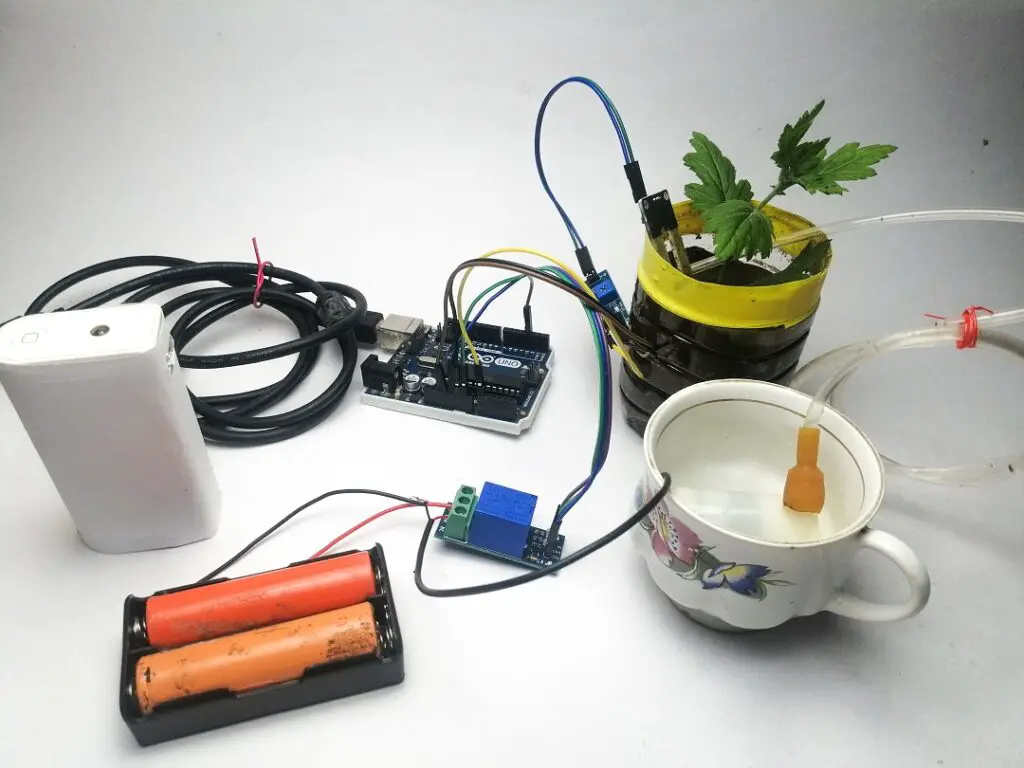
Finished Circuit
After following the circuit diagram and making connections you will end up with these connections.
You can refer to this visual if you have any additional clarifications.
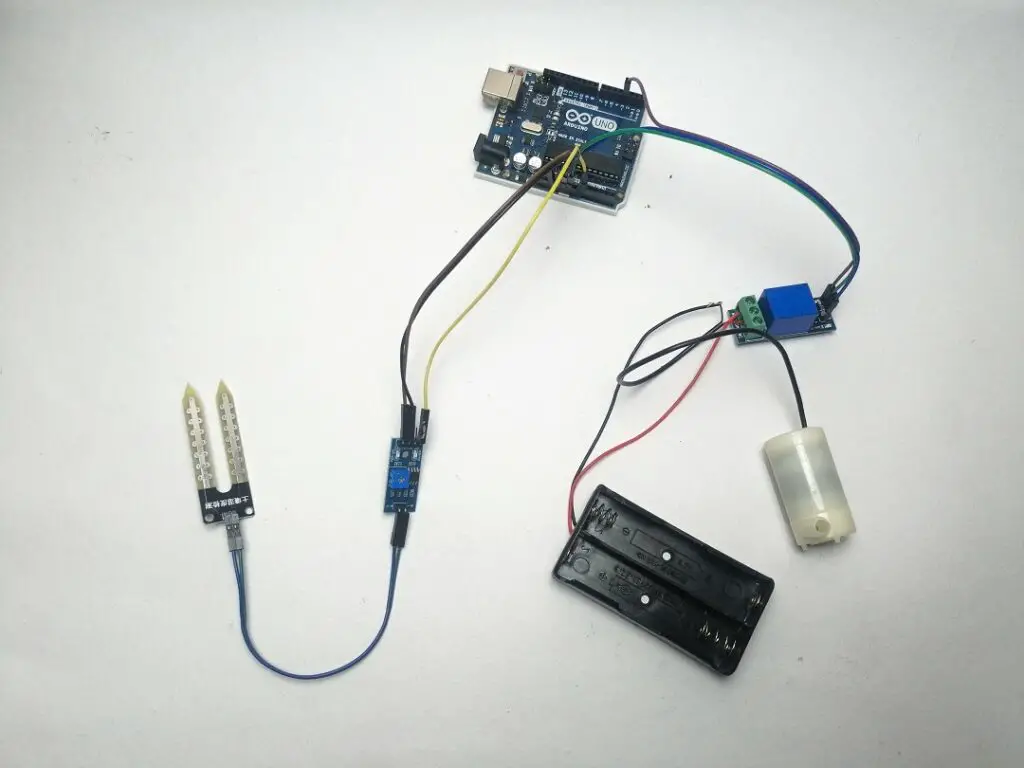
Like i did do not insert the batteries while making the connection.
This needs two power sources to operate, one for Arduino and the other for Relay.
For Arduino, we are simply using a USB supply.
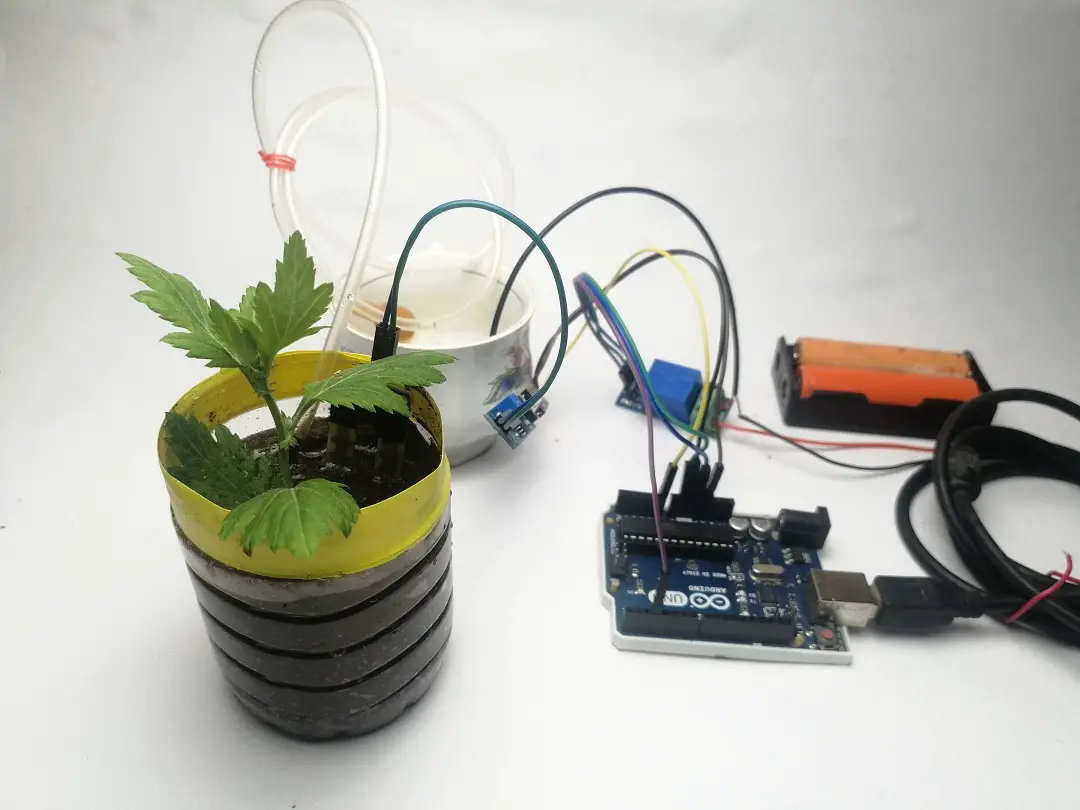
How to use automatic plant watering system
Here You need your plants that needs water!
Just see the visual below that shows my simple setup to demonstrate this project.
Insert soil moisture sensor inside the soil.
A tube that supplies water from dc pump to the soil as well.
Motor dipped inside water source.
Finally, insert the battery into the case and USB of Arduino to the power bank.
Now it will start working and water will be pump to the soil until soil moisture sensor detects water.
Upon detection of water, motor will be stopped and water supply will be cut off.
Arduino Code for Automatic Plant Watering System
Now you can upload the codes to Arduino.
Just open your Arduino IDE and paste this simple CODE
Working Video of Automatic watering system with arduino
Check this Amazing video for step by step video instructions and working video


