How To Make a Digital Soil Moisture Meter using Arduino Nano
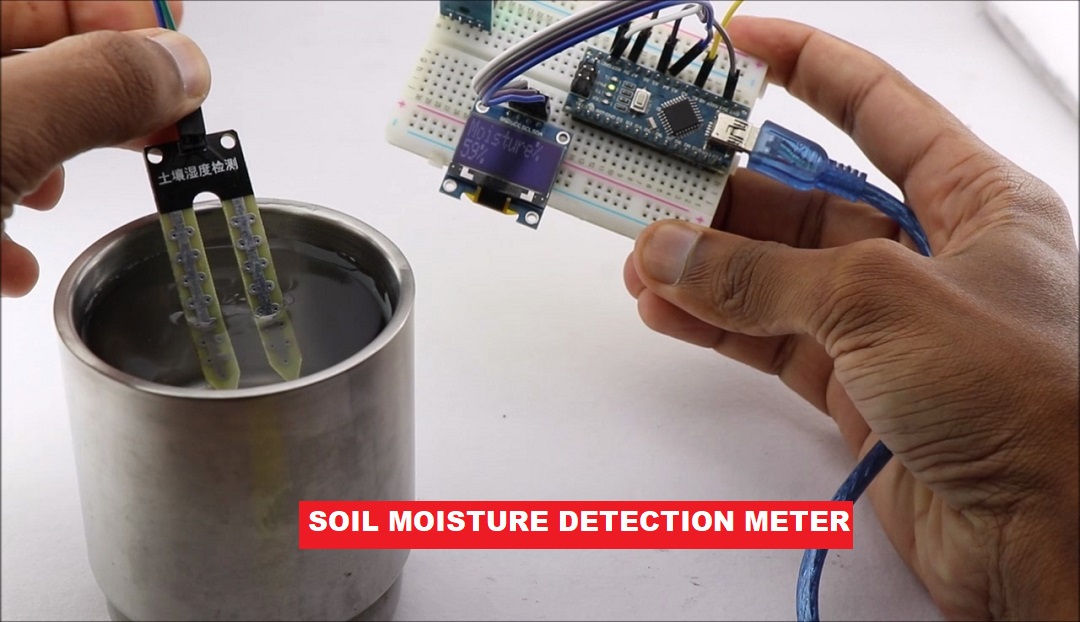
Hi Creative people! in this post, we will see how to make a digital soil moisture meter that is very useful if you have indoor plants.
This is an interesting project and if you are looking for useful Arduino projects this is the perfect one.
You may also check our other collection of interesting Arduino projects like these gas leakage detector and heart rate monitor
What is Digital Soil Moisture Meter?
By the name, we can understand that soil moisture means humidity in the soil.
in other words percent of water content in the soil.
This is very important factor in the growth of plants.
As we all know that water is the main source of most plant’s growth.
Maintaining a proper level of moisture is necessary for good plant development.
By merely looking at the soil one can’t determine the moisture content in the soil.
To measure this we need soil moisture meter.
To summarize it is a device that helps to measure the level of water content in the soil.
How Digital Soil Moisture Meter Works?
Arduino Moisture Sensor calculates soil water level/ moisture to the differences in conductivity (electrical) of the earth.
Resistance between the two electrodes of the sensor is calculated.
The comparator triggers a digital output when the adjustable threshold is exceeded.
To convert these low signals to measurable signals we are using an amplifier.
Finally, these signals are sent to Arduino and the Arduino program converts these signals.
The signals come out as digital readings on an OLED display.
Materials for Arduino Moisture Meter
- Arduino Nano
- Breadboard and jumper wires
- OLED display
- Arduino moisture sensor
- Arduino programming cable
- Cup of water for demonstration
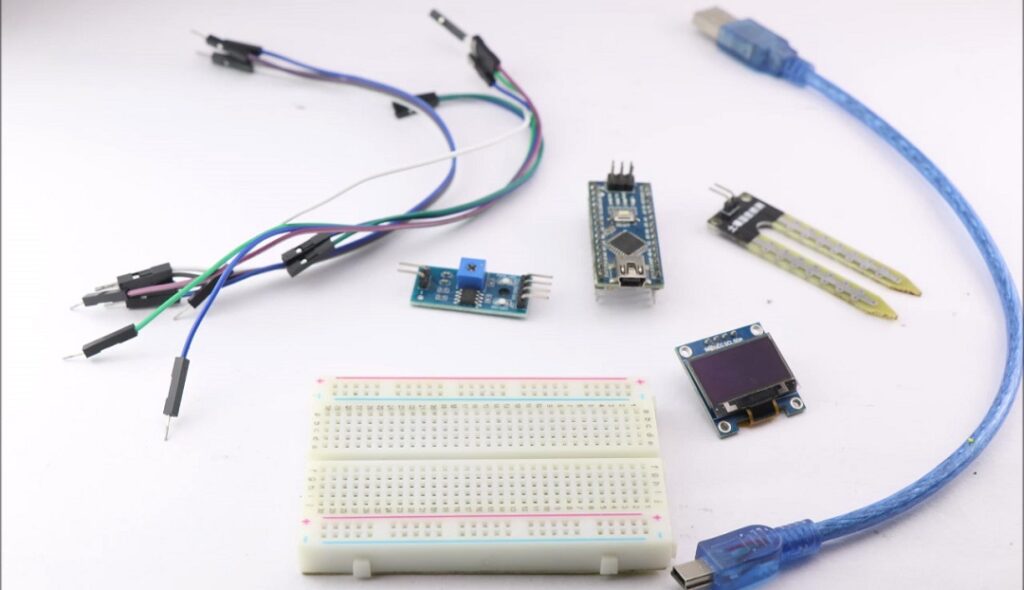
You can have a view of all the components used in this project in the visual above.
If you don’t have Arduino nano you can make the same project using Arduino UNO also.
Just make sure to select the proper type of board when you are uploading the program.
After you gather all these components we can start to build this project.
Follow this circuit diagram to build an Arduino soil moisture meter with an LCD display.
Arduino Soil Moisture Meter Circuit Diagram
Here is the most awaited circuit diagram! It is very simple if you think it is very complex.
To make it even easier I will explain the connections step by step.
Componentwise connections always help in better understanding.
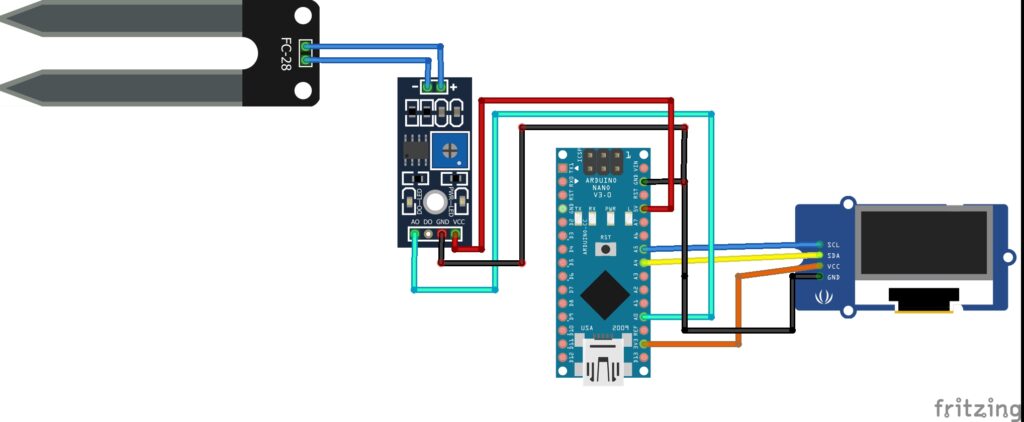
Circuit Diagram Explanation.
We will divide components into 3 sections.
First is soil moisture sensor, the second is an OLED display and third is Arduino Nano.
Start by adding OLED board to breadboard, I recommend to use small breadboard.
Soil moisture sensor connections
First, it should be connected to the amplifier.
The soil moisture sensor comes with 2 inputs when its connect to the amplifier it will have 4 pins.
Ao, Do, Vcc and Gnd.
Ao Pin from the amplifier board will be connect to the Ao pin of Arduino.
Gnd to Gnd where as Vcc to 5v pin on nano board.
OLED Display Connections
This display board comes with four input connections.
Scl, Sda, Vcc, and Gnd.
Scl pin from OLED will go to A5 pin of Nano.
Sda pin to A4 pin.
Vcc to 3v pin of Nano and Gnd to Gnd on board.
This completes all the connections.
You can see after the circuit how this looks like in the below visual.
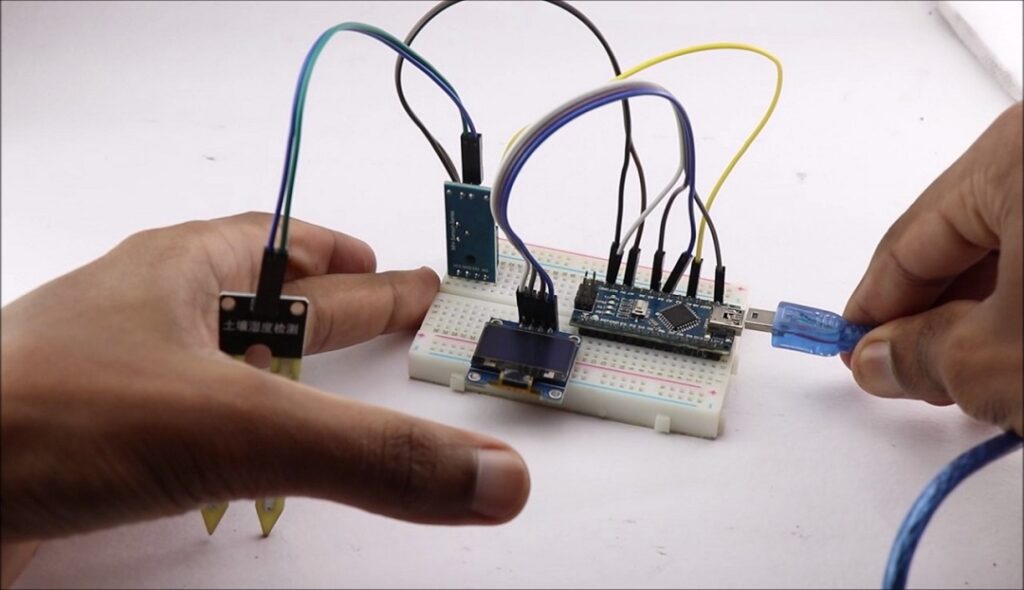
Now we can upload the program to the Arduino nano board.
Just plug in USB to the computer and the other ends of the cable to nano.
Use the program below to use in your Arduino IDE.
Arduino Soil Moisture Sensor with LCD Display Code
Arduino program for soil moisture meter project is HERE
Just copy and paste this arduino code on your Arduino IDE.
if you don’t have OLED display library you can get it here
Just download these Zip and include these on your arduino IDE
SSDD1306 library is here.
Arduino GFX library is here.
Download these and in your IDE goto sketch include library then add .zip library.
After these libraries are added you can select type of board if not already selected.
Check for proper port number and click on upload.
Once the program is successfully upload to board you can use this project.
You can always use high-quality PCB from PCBWAY for any electronics project.
ABOUT PCBWAY
Note: Its raining discounts as PCBWAY is celebrating their 8th anniversary, Check their exciting offers Here
More about them, PCBWay produces FR-4 and Aluminum boards along with advanced PCBs like Rogers, HDI, Flexible and Rigid-Flex boards, at a very reasonable price.
Great to say that they have completely replaced TG-150 with higher heat resistance.
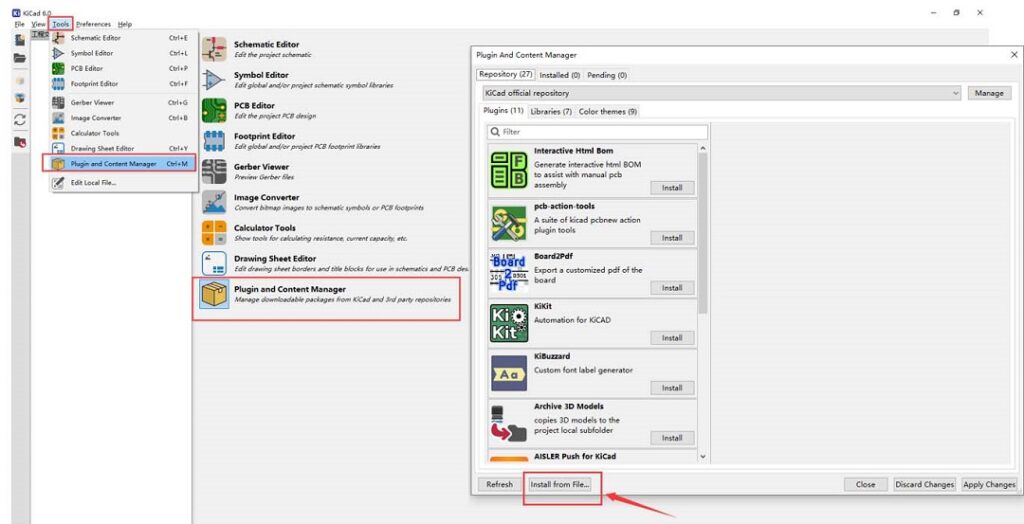
Most importantly they have add new plugin too for KiCad check that here
you can find in the below visual
Why are you waiting? You can get instant online quote at pcbway.com/orderonline
Don’t forget to Inspect your Gerber file before placing order on OnlineGerberViewer
Explore amazing PCB projects from the PCBWay Open-source community
For more info please visit the following posts. Why PCBway ,High-Quality PCB and PCB Capabilities
How to use Arduino Soil Moisture Meter
Using this useful Arduino device is very easy.
Just plug in the cable to any USB power source, it can be your laptop or power bank.
Ensure your OLED shows the default readings as zero.
Insert the probes of the soil meter device into water or soil where you want the moisture level to be detected.
Check for the readings on you OLED.
That’s it! Now you have your own homemade soil moisture digital meter.
Working video of Digital Soil Moisture Meter
Check this interesting working video of this project.


