Make Arduino Garbage Sorting Machine with Codes and Circuit Diagram
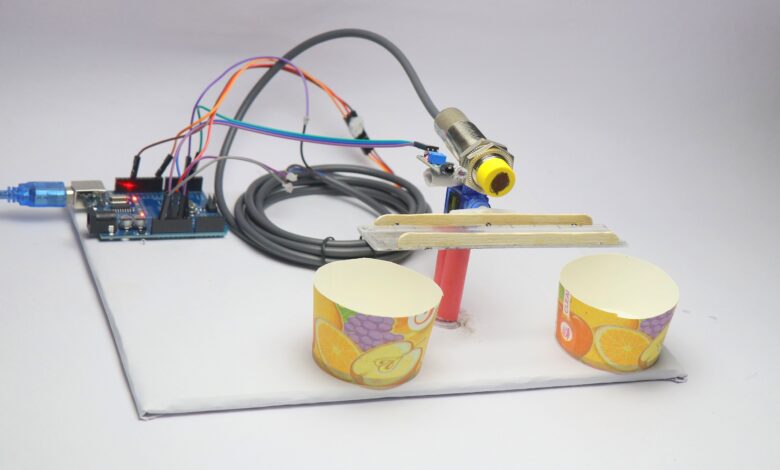
Hello readers in this article i will show you how to Make Arduino Garbage Sorting Machine in a simple way.
I will be giving you all the circuit diagram explanation and arduino program to make this project.
To begin with let me quickly tell you about this project.
This arduino powered metal and non metal segregator device helps you to seperate metalic and non metallic objects.
Micro servo is used upon which there will be a plate that will seperate metal and non metal objects.
Capacitive proximity sensor is used to detect metal objects whereas the IR sensor is used to detect the objects.
I will explain the working logic, at first the object is checked and secondly if metal is detected post detection it falls under metal category.
If the metal object is not sense by capacitive proximity sensor then the object falls under non metallic category.
Materials to build Arduino Garbage Sorter
Arduino Uno – The main microcontroller board
Servo Motor (SG90) – For actuating the sorting mechanism
Capacitive Proximity Sensor – To detect metallic objects
IR Sensor – To detect the presence of any object
Jumper Wires – For connections
Cardboard/Acrylic Sheet – For the base platform
Small containers/bins – To collect sorted objects
Wooden/plastic plate – Attached to servo for directing objects
Power Supply – 9V adapter or USB power
Circuit for Arduino Metal and non metal garbage segregation
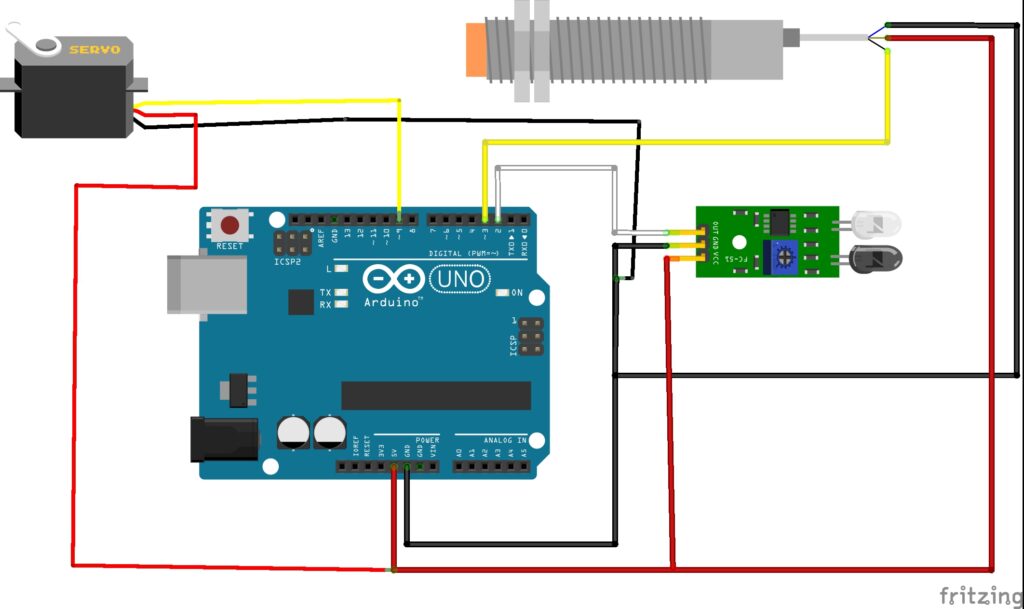
Arduino Uno Pin Connections with the respective modules
IR Sensor Module
VCC to 5V pin and GND goes with GND pin
OUT to Digital Pin 2
Capacitive Proximity Sensor
Brown wire is VCC and is connect to 5V pin
Blue wire or GND to GND pin
Black wire goes with Digital Pin 3
Servo Motor Connections
Red wire to 5V pin and Brown wire or GND to GND pin
Orange wire (Signal) to Digital Pin 9
Code to Make Arduino Garbage Sorting Machine
After you build the circuit, Simply connect your uno board to computer and open Arduino IDE
Use the program below, select proper board type and port and click on the upload.
#include <Servo.h>

Servo sorterServo;

const int irPin = 2;        // IR sensor
const int metalPin = 3;     // Metal sensor

int currentPos = 90;        // Neutral position

void setup() {
  sorterServo.attach(9);    // Servo signal pin
  pinMode(irPin, INPUT);
  pinMode(metalPin, INPUT);
  sorterServo.write(currentPos);
}

void loop() {
  int irState = digitalRead(irPin);
  int metalState = digitalRead(metalPin);

  if (irState == LOW) { // Object detected
    delay(1000); // 1-second delay before servo response

    if (metalState == LOW) {
      // Coin detected → Move left to 135°
      sorterServo.write(135);
      delay(2000);
    } else {
      // No metal → Move right to 45°
      sorterServo.write(45);
      delay(2000);
    }

    // Return to neutral position
    sorterServo.write(90);
    delay(1000);
  }
}
After the code is done uploading, disconnect the cable and test the circuit for working.
You can test by placing the object infront of IR sensor first wait for few seconds and now the servo should move to certain angle.
Make a note of angle and now place a metal object in front of capacitive proximity sensor and alongside ir sensor now servo moves in opposite angle.
This confirms the working of circuit and now assemble all the components on cardboard.
Finishing the arduino segregator project
Place the electronic components as shown, you can also use your own ideas.
One thing you need to keep in mind is that there should be no obstacles in the moving areas of the servo.
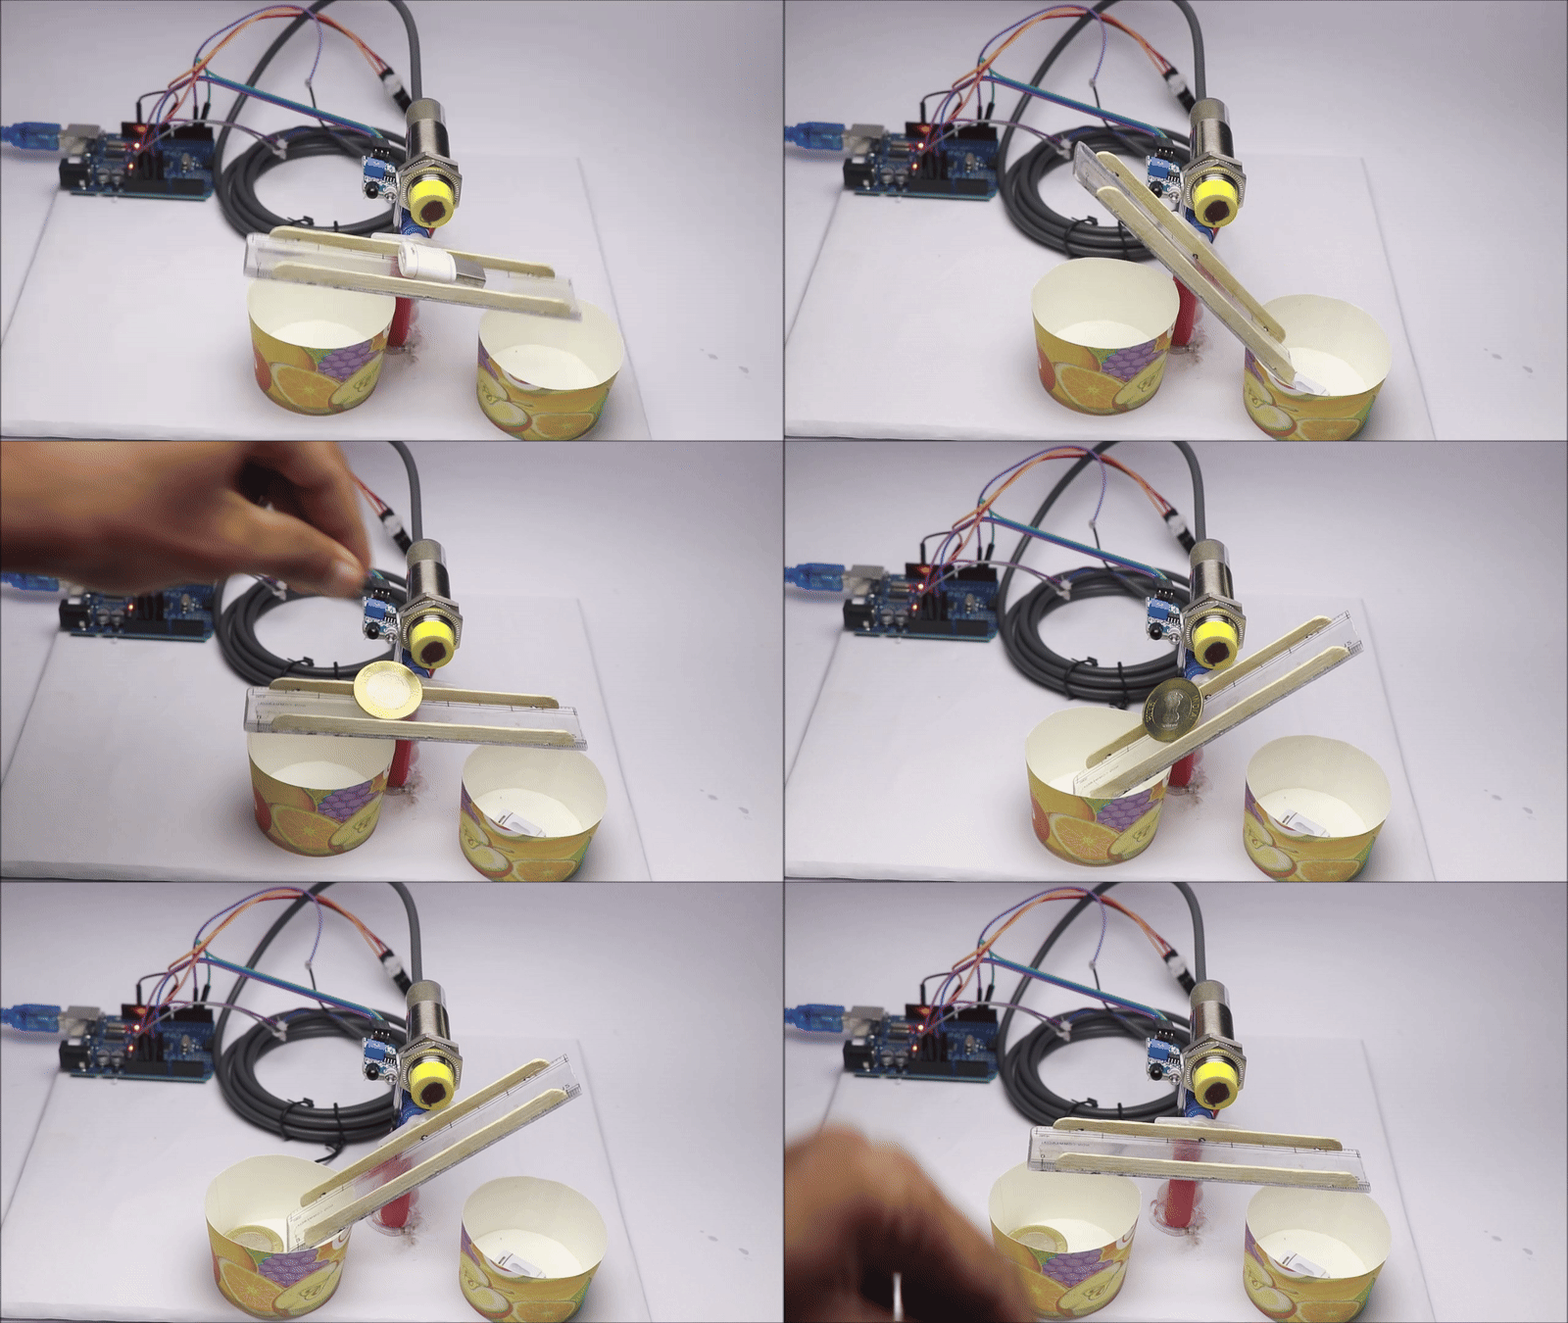
You can also see that from the above image how this sorter works.
If you want to build this project its a good idea to consider for mini engineering projects.
If you have any questions to ask feel free to leave it in the comments box and i will reply to it soon.
You may also like my previous article on RFID and Password Lock Project

