How to Make Music Reactive LED light using Arduino Nano
Hello, In this article I will be showing you detailed steps on How to make Music Reactive LED light Using WS2812B LED Strip and Arduino which responds to every beat in your favorite music in the form of awesome color patterns, while the color which can be produced from this type of LED’s are estimated around 16million which means every color which you can imagine can be generated from this LED Type.
OUTCOME from this Project
This is going to be amazing Electronics Project as this contains lots of educational information, if you are beginner or pro who are reading this, surely one can customize this project according to their taste.
Students who always wonder what to make for upcoming Science projects or Mini engineering project ideas try this for your upcoming science project, this will be best and easy Arduino projects.
Principle of working
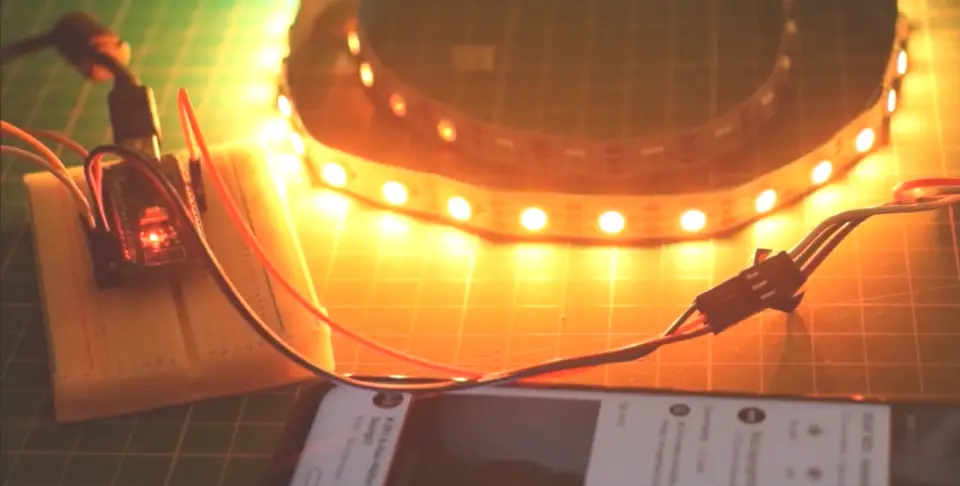
Sound sensor picks up sound signals while playing your music from speaker, Smartphone and laptop, this happens when the diaphragm inside the device vibrates to music beats , This analog signal later will be converted into digital signals and sent to Arduino board which again refines those signals as per parameters given in code(colors and time). Finally sends all those signals to ARGB Led light strip to which it reacts in form of various color patterns and all this process happens in real time, So let’s build this
Materials Required to build music reactive LED light

- Arduino Nano (Uno also works fine)
- Sound Sensor with adjustable knob for sensitivity
- LED Strip (WS2812B)
- Breadboard and Jumper wires
- USB a type cable for uploading codes
- Arduino IDE on your computer
| Component | Buy in India | Buy in USA |
| Arduino Nano | https://amzn.to/3pH1O0A | https://amzn.to/2NJkBLI |
| Arduino UNO | https://amzn.to/3kbjZL2 | https://amzn.to/3buKSoW |
| ARGB LED Strip | https://amzn.to/3aGiWiV | https://amzn.to/2ZDTGDv |
| Breadboard and jumper wires | https://amzn.to/3qHY406 | https://amzn.to/2OPKmu6 |
| Sound sensor | https://amzn.to/2ZP7xY1 | https://amzn.to/3k75Y0R |
Disclosure: These are affiliate links. As an Amazon Associate I earn some credits from qualifying purchases.
Arduino Uno can also be use to make this project, since the size of Arduino Nano is small compared to other boards I prefer to use this in my project, the sensor which I’m using is very cost effective it is only about a dollar. There are lots of other sound sensors available outside which responds to even very low sound(sparkfun sound sensor) but the price of those sensors are quite high that is around 12 dollars.
Why Normal Strip Wont Work?
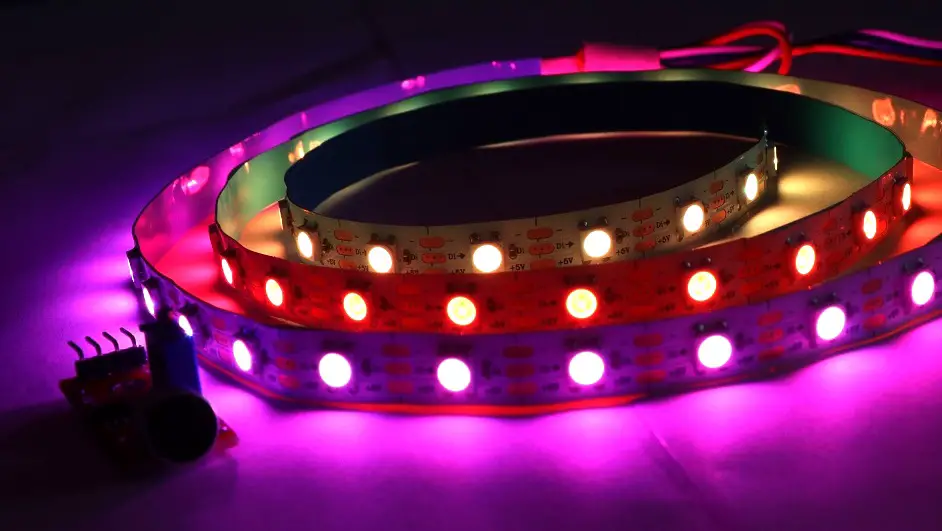
Normal LED strip light won’t work for music reactive led light as there is no option for signal input, here I have used ARGB led light strip which stands for addressable red green blue.
Means each led in strip can be control individually producing any light color using RGB combination, Also called as WS2812B LED Strip
Coming to circuitary part, I included circuit diagram so that everything is clear and easy to understand if you are planning to make this.
CODE for Music Reactive LED Light using Arduino
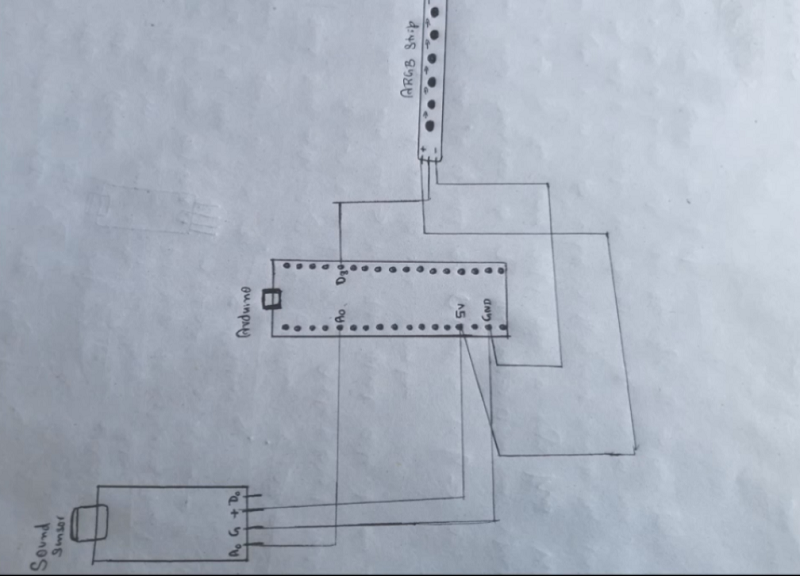
Steps to make circuit,
Let’s begin with sound sensor circuit first
A0 pin goes with A0 of Nano
G/ground pin goes with gnd of Nano
+/positive pin goes with 5v of Nano
We are not using D0 pin for this project
Sensitivity can be adjusted by turning screw on sound board
Now let’s make circuit connections to WS2812B LED strip
ARGB led strip has 3 wires in my case wire colors are red, white and green
Red and white are for positive and negative power supply, whereas green is signal input terminal for ARGB led strip
Note: If you are making project like this(I did with 60 LED’s) you don’t need extra circuits for safety
if you are using larger number of LED in Strip u may need capacitor and resistor of specific ratings and separate power source for LED strip(as it consumes too much power) which harms Nano.
Tip
In this project you can connect LED strip to separate power source while connecting only signal pin to Nano board, but sound sensor should be connected to Nano board only
if we use separate source for sound sensor we need three different power sources one for Arduino , one for STRIP other for sensor so it becomes quite complex to manage such circuits, so I recommend not to use 3 separate sources.
Uploading Arduino Code
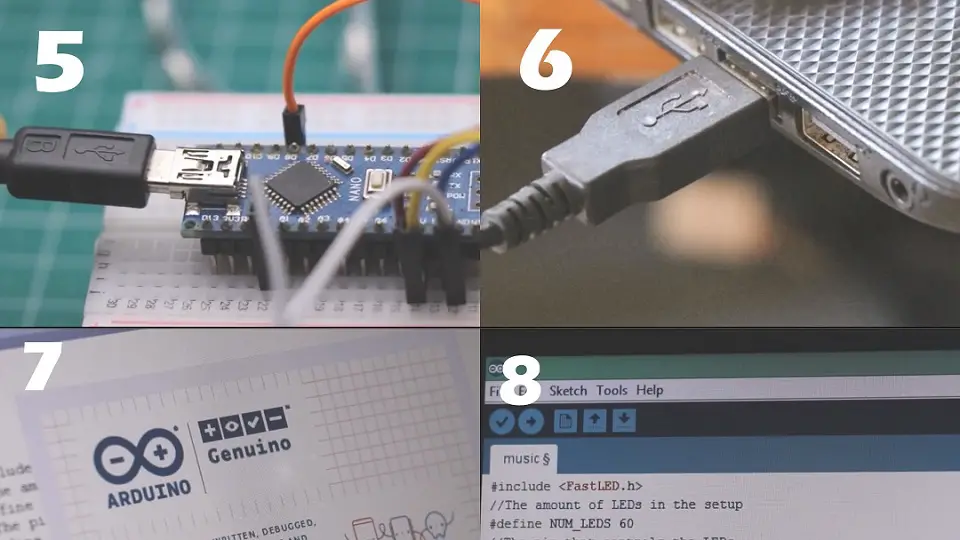
Using USB a type USB cable connect Nano board to your computer (image 5 and 6)
Open ARDUINO IDE Software on your computer(image 7)
Make sure NEOPIXEL installed in library
Before uploading code check for COM port number
Select the type of board NANO /UNO
If you need any changes in color to be displayed you can alter color and timings in the code
Upload the code by clicking on upload button( image number 8)
Once the program gets uploaded project is ready for use
I’m using power bank to power this project if you are using external power supply u can connect to NANO board pins
Note: If you are using larger number of LED in the Strip don’t use board to power those LED strip as the LED draws too much power/current and cause serious damage to board all this happens on long term usage

How To use music reactive LED Lights?
Play your favorite music I recommend to use rock and pop music, Bass in those songs will be pretty high
Bring the sound sensor close to the speaker of your mobile or computer or music box
watch the Led strip reacting to every single beat of your music! You can use this in your house party as well and surprise your friends
Any plans to make this for your school project you may need to add closed frame made using cardboard/plastic
If u have a 3D printer amazing frames can be printed for smooth finish. Since this was part of my weekend electronic project I didn’t feel to add any closed frames to this circuit
also we are not dealing with any harmful electronic components which poses any sort of electrical risk to user.
If you are making this project, I suggest you to make it soon! since the building phase is very exciting and end results will definitely make you feel it’s worth spending time.
VIDEO LINK
Authors video to watch music reactive Led light working! It’s Amazing
If you have any queries regarding this or any suggestions for much more improvements let me know in comment so there can be lots of information exchange
Thank you for your time and interest . Have a good day