DIY Arduino Robotic Arm
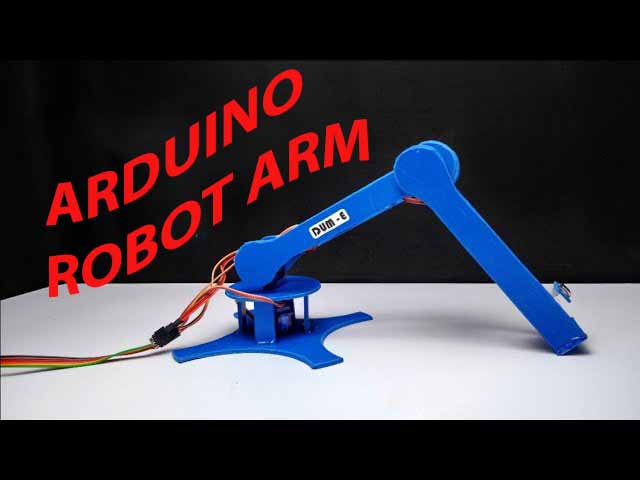
It is better to make DIY Arduino Robotic Arm since Industrial robotic arms are very expensive because of complex sensors and high accurate motors, in this project we will make budget friendly robot arm.
Features of Arduino Robot Arm
Uses micro servo for movements
Controlled by potentiometer
Can be use to pick and place objects since Rotation up to 180 degree is possible
i use less expensive servos for high stability you can use metal geared servos but price of project goes high
Arm can be lift and release here Nano will be use to control the communication between potentiometer and servo
Circuit can be made in breadboard or PCB i made with PCB
Supplies required to Make Robot Arm
If you want to get all these components check below i have provided list where you can buy them also don’t miss video at the end
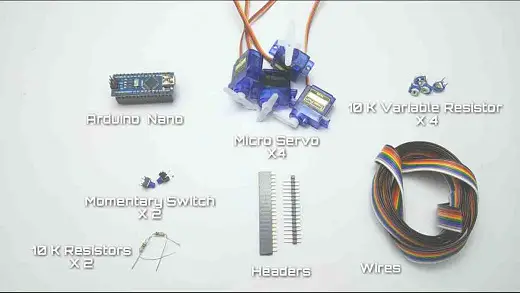
- Arduino Nano works fine for this project since size is small and can fit on top of small PCB
- If you don’t have Nano consider buying one from below link as this boards come in very inexpensive
- Micro servo x4 plastic geared version works fine unless you can compromise with jitter during heavy load lift
- 10k variable resistor x4
- 10k resistor x2
- Jumper wires for connections
Buy the components
Disclosure: These are affiliate links. As an Amazon Associate I earn from qualifying purchases.
Once all these are gather in place upload code to Arduino using IDE if you are beginner to this stuffs consider checking my older arduino projects post for detailed tutorial on how to upload code to board
Arduino Robot Arm Code

After code is done upload start building body/ frame for this robot
i use plastic to build frame alternatively light weight materials like Plexiglas or cardboard works fine
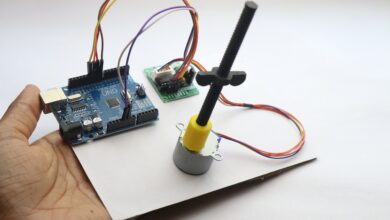
I have cut square shape board following by marking circles from mid sides as a result i got this shape shown in below visual
place micro servo on exact center use glue or double side tape
Cut circle of 5cm diameter and attach to servo shaft this mechanism rotates arm upto 180 degree
For arm lift, release place another servo on top of circle this performs up down movement
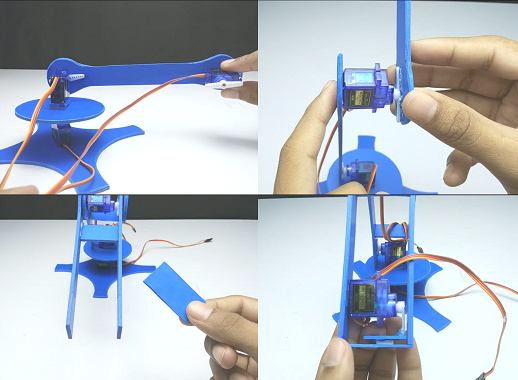
End of this place another servo which is second joint for up and down motion
Cover it from double side so to have good and strong arm
To pick objects i attach L shape cut from popsicle stick glue with magnet connect to servo horn
Add this part to end of second joint
Cover all the servos wherever necessary and enforce joints if necessary
Frame and body is finished now lets build control circuit
Arduino robotic arm circuit diagram
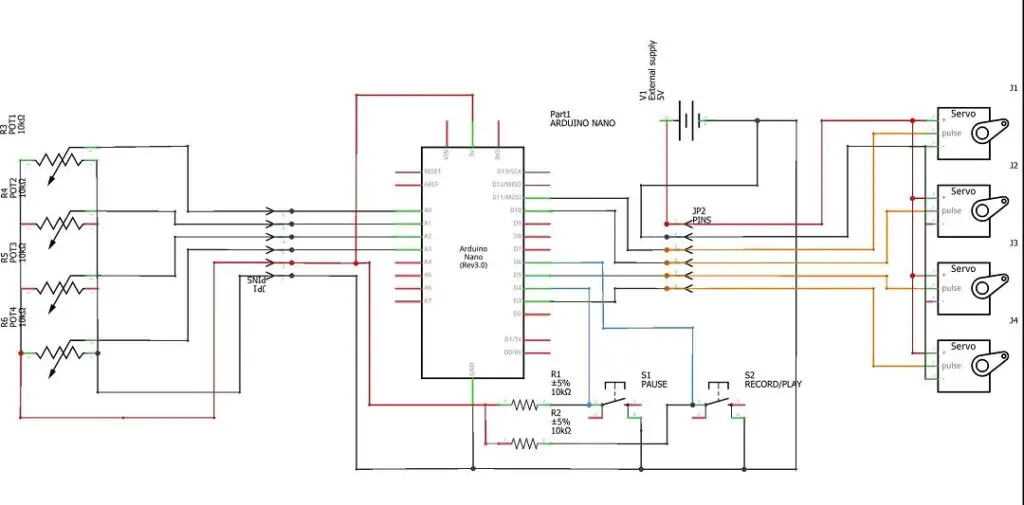
Follow above schematics and build circuit using connectors and slot board
Connect servos to dedicated slots
Meanwhile make exact copy of this robot arm using variable resistor and wires as shown in above visual
Higher the details more precise the arm moves later
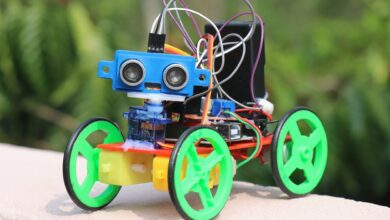
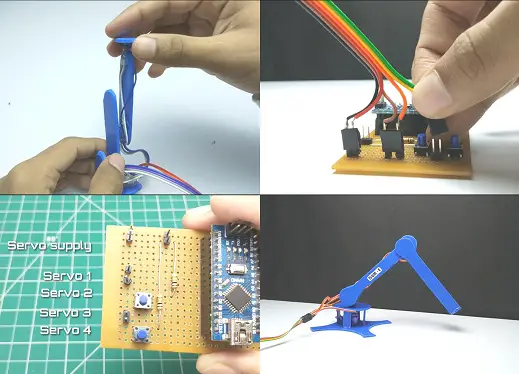
After getting all the circuit work done your work will be displayed on board you can check mine in image above
I made 4 different points for all different servos
All shown in circuit diagram above
That is it just power your board and move joints attached to variable resistors
After few demos you can try to pick and place objects it took me around 20mins to get good control from this
DIY Arduino Robotic Arm Video
For video tutorial and working video of this project click here also considering watching other interesting videos
That was one of easy way to make Arduino robot arm which servers many applications also for mini projects and engineering projects, if you are struck anywhere in between while making this project we got you! You are just one comment away. Thanks and have wonderful day