Arduino Keypad Door Lock System with LCD

Hello guys in this project i will show you how to make arduino keypad door lock system with changeable password.
There are many ways by whihc you can secure the door and you have seen also in many areas.
It may include your house door or your gate at the entrance of your house but did you ever wonder to make one?
Even i wanted to buil one so after a few extensive research i was able to come up with this project.
I wanted to make the project affordable so that anyone can build it and learn the principles behind its working.
In this project i will use 4×4 keypad matrix membrane to enter or change the password.
Note: Video tutorial on my Jeevan Jee youtube channel
If you like fun robots that are actualy useful you may check this arduino sunflower robot project
Materials to build this project
- Arduino Uno from amazon
- Keypad matrix membrane 4×4
- LCD module with i2c
- Micro servo
- Jumper cables
- Arduino IDE and Programming Cable
- Piece of cardboard
- Kind of door model that you can make yourself
- Glue
Note that these are amazon affiliate links, As an associate i may receive a percent of sale at no extra cost to you.
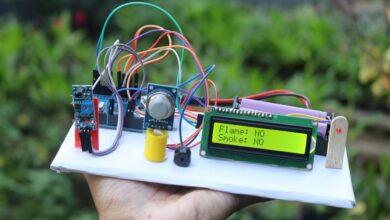
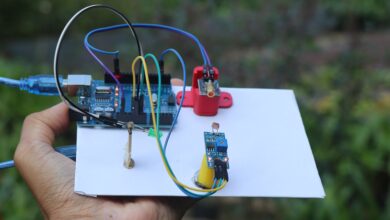
Arduino keypad door lock system wiring diagram
This is the circuit that we will be building to make this project.
At first glance most of them think it is a very hard circuit, Not you are wrong this is the easiest circuit.
When i say the easier one i mean the way i will explain the circuit connections will make you think so.

There are 3 main components
Keypad Matrix connections
There are total 8pins and we are separating them as rows and colums
Connections are made from left to right so start from D2 to D5 rows connection pins.
Then connect the remaining pins from D10 to D13.
There is no power pins here so thats all for the matrix membrane connections.
Servo Connections
The power pins that is ground and vcc are connected to gnd and 5v pin of uno.
Signal pin is connected to D6 pin on the uno board.
LCD with i2c connections
The Vc and gnd pins are connected to 5v and gnd pins.
Scl is connected to A4 and Sda is connected to A5 pin of uno.
Did you know?
You can adjust the lcd brightness using the potentiometer on the i2c module.
After you make this circuit your components are simply connected it needs instructions! So we need to upload the program.
Arduino keypad door lock system programming
Open the IDE and paste the program, if you havent used any or one of these componnets before you may need to install the library first.
I will make the work easier for you, get the library from official arduino source Keypad Library, servo library, Adafruit library, Gfx library
// Password Door Lock with 4x4 Keypad, Servo and SSD1306 OLED
// Requires libraries: Keypad, Servo, Adafruit_SSD1306, Adafruit_GFX

#include <Keypad.h>
#include <Servo.h>
#include <Wire.h>
#include <Adafruit_GFX.h>
#include <Adafruit_SSD1306.h>

// --------- OLED Config ----------
#define SCREEN_WIDTH 128
#define SCREEN_HEIGHT 64
Adafruit_SSD1306 display(SCREEN_WIDTH, SCREEN_HEIGHT, &Wire, -1);

// --------- Keypad Config ----------
const byte ROWS = 4;
const byte COLS = 4;
char keys[ROWS][COLS] = {
  {'1','2','3','A'},
  {'4','5','6','B'},
  {'7','8','9','C'},
  {'*','0','#','D'}
};
// connect keypad ROW pins to these Arduino pins:
byte rowPins[ROWS] = {2, 3, 4, 5};
// connect keypad COL pins to these Arduino pins:
byte colPins[COLS] = {10, 11, 12, 13};

Keypad keypad = Keypad(makeKeymap(keys), rowPins, colPins, ROWS, COLS);

// --------- Servo Config ----------
Servo lockServo;
const int SERVO_PIN = 6;
const int LOCK_POS = 0;    // locked angle
const int UNLOCK_POS = 90; // unlocked angle

// --------- Password Config ----------
char defaultPassword[] = "1111"; // change this to your desired default password
const byte PASSWORD_LENGTH = 4;

char inputBuffer[PASSWORD_LENGTH + 1]; // +1 for null terminator
byte inputIndex = 0;

unsigned long unlockDurationMs = 5000UL; // how long to remain unlocked (5s)

// optional: failed attempts locking (simple)
byte failedAttempts = 0;
const byte MAX_FAILED = 5;
unsigned long lockoutUntil = 0; // millis until which keypad is locked (0 = not locked)
const unsigned long LOCKOUT_TIME_MS = 20000UL; // 20 seconds lockout after max fails

// --------- Helper functions ----------
void showWelcome() {
  display.clearDisplay();
  display.setTextSize(1);
  display.setTextColor(SSD1306_WHITE);
  display.setCursor(0,0);
  display.println("Arduino Door Lock");
  display.println();
  display.println("Enter 4-digit code:");
  display.display();
}

void showInputMasked() {
  display.clearDisplay();
  display.setTextSize(1);
  display.setTextColor(SSD1306_WHITE);
  display.setCursor(0,0);
  display.println("Enter 4-digit code:");
  display.println();
  display.setTextSize(2);
  display.setCursor(0,28);

  // show masked input with '*' for each entered digit
  for (byte i=0; i<inputIndex; i++) {
    display.print('*');
  }
  display.display();
}

void showMessage(const char* line1, const char* line2) {
  display.clearDisplay();
  display.setTextSize(1);
  display.setCursor(0,0);
  display.println(line1);
  display.println();
  display.setTextSize(2);
  display.println(line2);
  display.display();
}

bool checkPassword() {
  inputBuffer[inputIndex] = '\0'; // null-terminate
  // Compare with defaultPassword
  if (strcmp(inputBuffer, defaultPassword) == 0) return true;
  return false;
}

void clearInput() {
  inputIndex = 0;
  memset(inputBuffer, 0, sizeof(inputBuffer));
}

void unlockDoor() {
  lockServo.write(UNLOCK_POS);
  showMessage("Access Granted", "Unlocked");
  delay(200); // tiny delay to allow servo move start
  unsigned long until = millis() + unlockDurationMs;
  while (millis() < until) {
    // small refresh so display doesn't freeze too long
    delay(50);
  }
  // lock again
  lockServo.write(LOCK_POS);
  showMessage("Locked", "");
  delay(700);
  showWelcome();
}

void wrongPasswordAction() {
  failedAttempts++;
  showMessage("Access Denied", "Wrong Code");
  delay(1000);
  if (failedAttempts >= MAX_FAILED) {
    lockoutUntil = millis() + LOCKOUT_TIME_MS;
    char buff[32];
    snprintf(buff, sizeof(buff), "Locked for %lu s", LOCKOUT_TIME_MS/1000);
    showMessage("Too many tries", buff);
    delay(1200);
    showWelcome();
  } else {
    showWelcome();
  }
  clearInput();
}

void setup() {
  Serial.begin(9600);

  // Init OLED
  if(!display.begin(SSD1306_SWITCHCAPVCC, 0x3C)) { // 0x3C is common
    Serial.println(F("SSD1306 allocation failed"));
    for(;;); // don't proceed, loop forever
  }
  display.clearDisplay();
  display.display();

  // Attach servo and start locked
  lockServo.attach(SERVO_PIN);
  lockServo.write(LOCK_POS);
  delay(300);

  showWelcome();
}

void loop() {
  // If in lockout period, ignore keys
  if (lockoutUntil != 0 && millis() < lockoutUntil) {
    // show countdown occasionally
    static unsigned long lastUpdate = 0;
    if (millis() - lastUpdate > 500) {
      unsigned long rem = (lockoutUntil - millis()) / 1000;
      char buf[32];
      snprintf(buf, sizeof(buf), "Try after %lu s", rem);
      showMessage("Keypad Locked", buf);
      lastUpdate = millis();
    }
    // still allow the loop to run
    return;
  } else if (lockoutUntil != 0 && millis() >= lockoutUntil) {
    // lockout expired
    lockoutUntil = 0;
    failedAttempts = 0;
    showWelcome();
  }

  char key = keypad.getKey();
  if (key) {
    Serial.print("Key: ");
    Serial.println(key);

    if (key == '*') {
      // Clear input
      clearInput();
      showInputMasked();
      return;
    }

    if (key == '#') {
      // Submit
      if (inputIndex == PASSWORD_LENGTH) {
        if (checkPassword()) {
          failedAttempts = 0;
          unlockDoor();
        } else {
          wrongPasswordAction();
        }
      } else {
        // Not enough digits
        showMessage("Incomplete", "Enter 4 digits");
        delay(800);
        showInputMasked();
      }
      return;
    }

    // Only accept numeric digits for password
    if ((key >= '0' && key <= '9') && inputIndex < PASSWORD_LENGTH) {
      inputBuffer[inputIndex++] = key;
      showInputMasked();
      // auto-submit if length reached (optional)
      if (inputIndex == PASSWORD_LENGTH) {
        // small wait for user to press # if they want - comment out if auto-submit desired
        // auto submit:
        if (checkPassword()) {
          failedAttempts = 0;
          unlockDoor();
        } else {
          wrongPasswordAction();
        }
      }
    }
    // ignore A-D for now (or you can assign them to change password etc.)
  }

  // small loop delay
  delay(20);
}
After you upload this Arduino door lock code the project is ready for using, Now i will tell you how to use this
How to use arduino door lock project
There are few things that you need to know before using this project.
You can reset the password on your own or simply use the default password 1234.
Start by connect the uno board to computer, wait for LCD screen to show the message.
Now on the keypad press * and now you will see option to enter the password enter 1234 and press A and now the servo will open the door for you.
After few seconds the door will close automatically, you can explore various options inside this.

I have arranged all these components to look like a actual door system i used cardboard for this.
You can also use gate also for this project, choice is yours.
Make sure the base is hard enough so that when you press the keypad the button actually presses.
This was all about this Arduino door lock system using password, if you have any questions ask in the comments.