Easy Arduino Handheld Game Console
In this project we are going to make an Easy Arduino Handheld Game Console project, You can easily make this as we have given all the circuit diagrams and free Arduino codes for this OLED game project.
The best thing being this is a programmable handheld console which means you can play unlimited games with this little gadget.
What is Arduino Game Console
Arduino game console comes in a variety of shapes and sizes but the fact being as the size gets bigger the project becomes more complex hence more expensive.
So to overcome this we used pocket-friendly hardware by not compromising quality.
With this project, you can play all the retro games like Tetris, snake, and other games.
When you search Arduino OLED projects there will be thousands of results popping up.
But most of them use Arduino Uno which is a little expensive compare to nano.
Arduino nano suits best here so we will use the same.
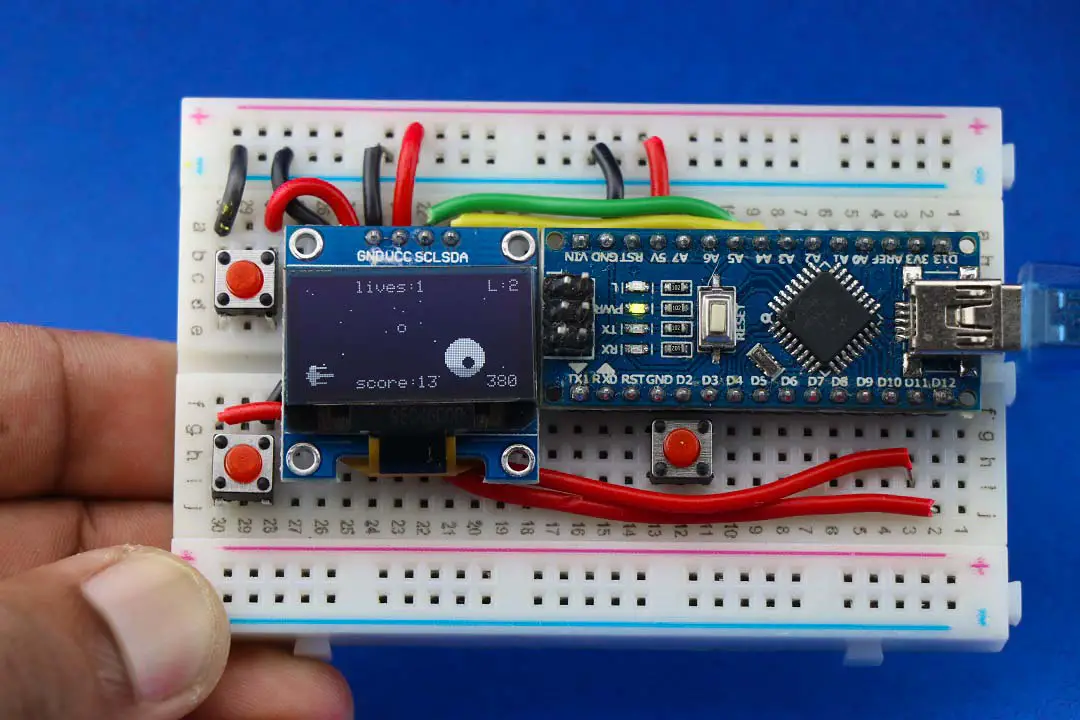
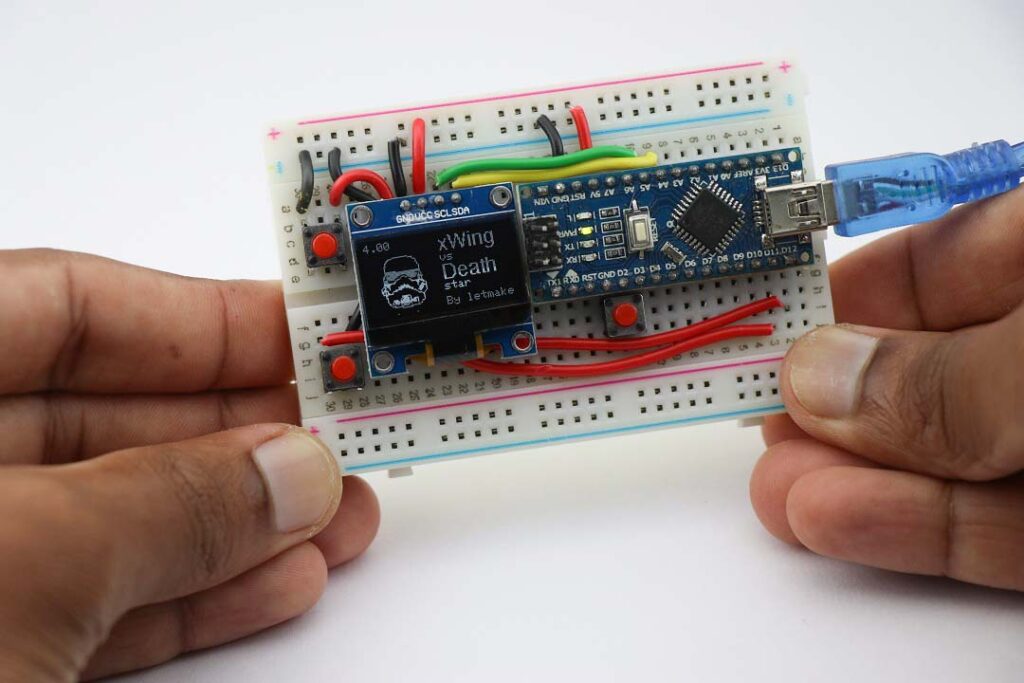
For demonstration, I ran the star wars game( video is given below).
This project uses a very cheap version of an OLED display.
These were some of the basics, now let’s begin to make this OLED video game project with Arduino nano.
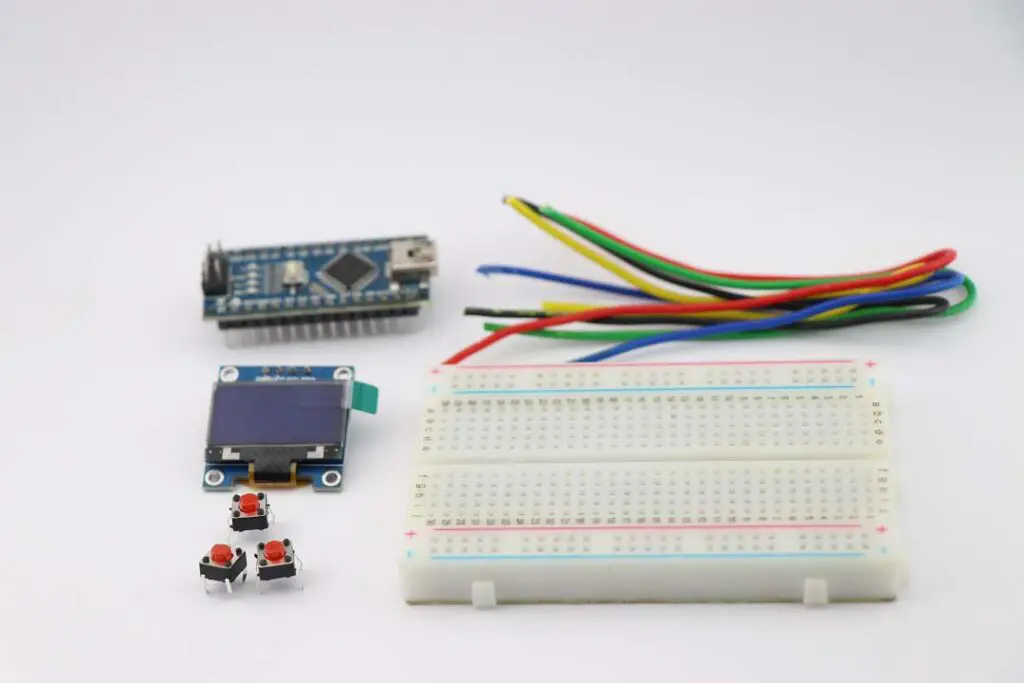
Materials for Arduino Handheld game console
Can you believe these are the only materials to make this interactive game project!
Arduino nano, Oled display module, Breadboard, pushbuttons, and single-strand wire.
Apart from this, all you need is Arduino IDE.
Wherever you go you can easily get all these materials at a very cheap price.
If you are getting a generic version of Arduino nano you may face some issues while uploading code.
But Don’t worry there is a driver that solves the problem which I have included below.
Now back to the project, Once you gather these materials you can start making the circuit by following the below schematic.
Arduino Handheld Game Console circuit diagram
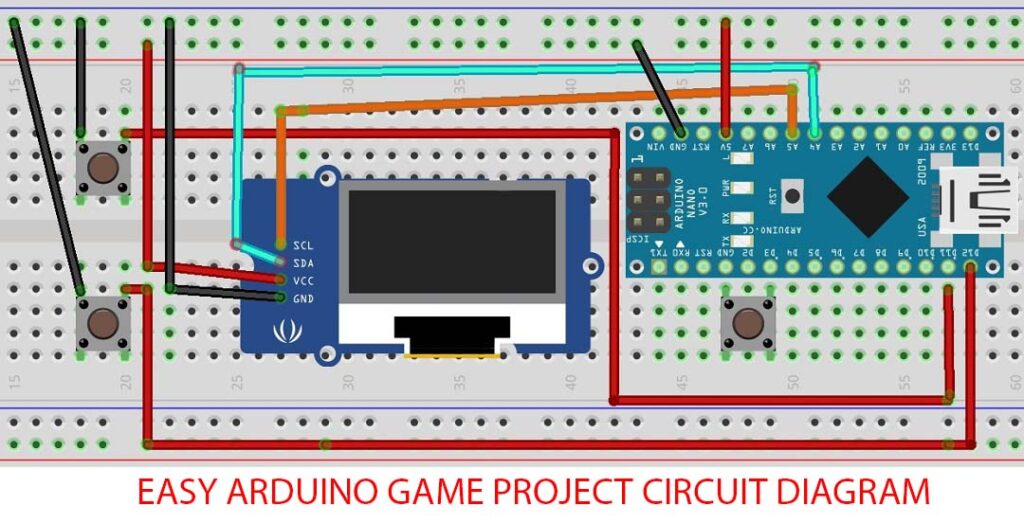
This Circuit is very simple and I made use of single strand wires instead of jumpers to make the project look neater.
The use of jumper wires makes it difficult to control the game, so use this method.
To make it simpler I will give a quick overview of the circuit diagram.
Oled circuit
Scl and SDA pins from the OLED display will be connected to A5 and A4 pins.
Gnd and Vcc to negative and positive rails in the breadboard.
Push button circuit
There are 3 push buttons in total use in this project.
From the above circuit diagram, we can see we are using 2 on the left side while the other is just below the Arduino board.
We will make connections for the left side buttons first.
One end of pushbutton will go with negative rail and other with D11 repeat same for other but other pins to D12.
The third push button( below Arduino) is connected directly to d3 and GND pin.
Hope you it simple to make this circuit.
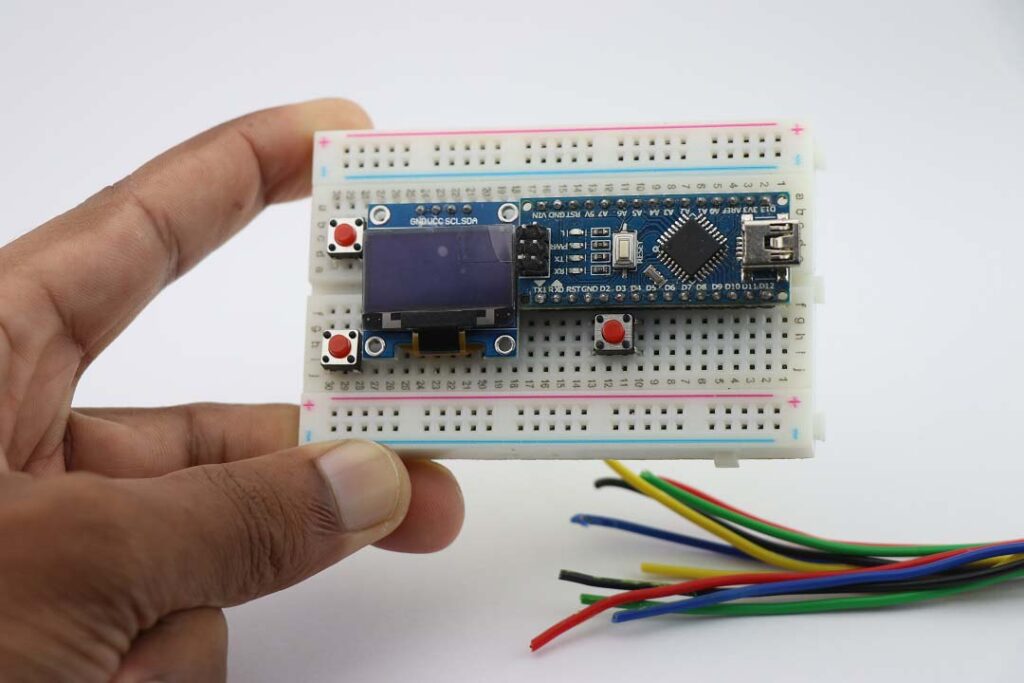
You can start to make wire connections once you place components first.
You can refer above image for the proper placement of components.
Once you finish wiring all the hardware together upload code to your board using Arduino Ide.
Arduino game code for Handheld game console
Here is the code for this project which you can directly use in ide.
Note: Arduino nano game is the main code for this project rest 2 are libraries.
If you don’t have libraries installed install them by going to sketches in the menu of Arduino ide.
Then click on include library and use these files (extract and use).
If you are using the generic version of nano you may face issues with the driver(ch34x) hence I have given that too!
Just open the setup and install and you are ready to go.
Once you complete your upload you will have this popping up, It means your game is ready.
How to Play Arduino STAR WARS Game in 4 easy steps
- Plugin usb to any device
- Your game starts
- Control the movements using left 2 buttons
- To start and stop the game use button which is below arduino (can be seen in above image)
- As the level goes high game becomes more and more difficult
- Compete with friends as to see who scores high
That was all about the Easy Arduino Handheld Game Console project made using OLED and Arduino nano, Thanks for your interest.
If you face any issues at any stage let me know that in the comments I will help you out.
You can check the working of this Arduino nano game console project in this VIDEO
You may also like our previous arduino rock paper scissors project


