How to Make Mini Drone at Home – DIY Flying Drone
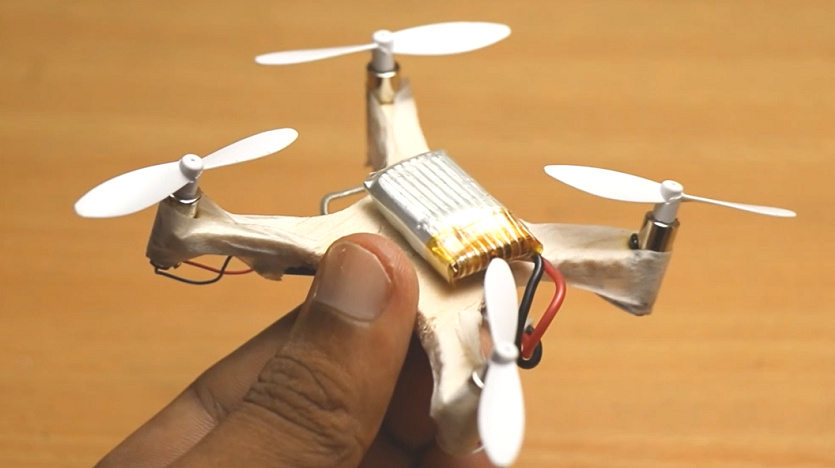
In this article I will show in very detailed steps on How to Make Mini Drone at home, This DIY Mini Drone is very easy to make also I have mentioned all the parts which is required to make this drone so that everyone can build it. This can also be your next science project idea.

Everybody wants to fly Drone but due to their inflated prices and local rule of flying restrictions many of them are unable to fly drones, also few can’t afford to buy a Drone, so why can’t we make mini Drone for our self when all the materials needed to make them are available online!
Note: Video Link is at the End
And since this is a mini toy drone there is no risk of flying as it’s not having any camera and also it can’t fly to a long distance!
Advantage of Drone Building
One advantage here is
It can survive minor crashes without any damage
Can be a pure trainer drone for you!
First let’s start with the materials which is necessary to make Mini drone,
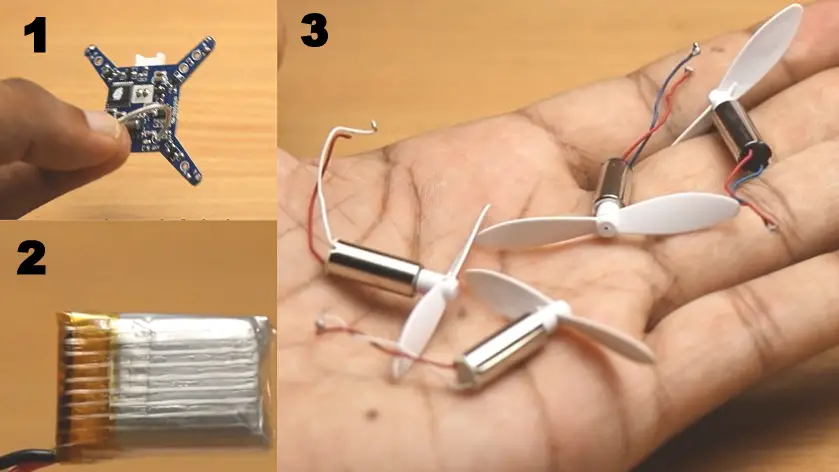
- Drone transmitter(remote control)
- Small Li-po battery
- Set of 4 coreless Motors also called high RPM DC Motors
- Receiver board
- For all parts link please check my video description link
DIY Frame for Drone
let’s start by making the main frame for this mini quad-copter, since we are using set of 4 core less Motors we don’t need a electronic speed controller in short ESC to control speed of propellers, this will be inbuilt within our receiver board.
These Mini Motors incapable of carrying extra payload despite battery and weight of body, hence to reduce weight of body I will be using balsa wood
Balsa wood is a type of wood which is very light in weight but possess good strength hence it is used in building remote controlled airplanes and other small application aerial vehicles
Main problem in using this wood is it absorbs water unlike plastic and steel, but who flies drone in rain!!
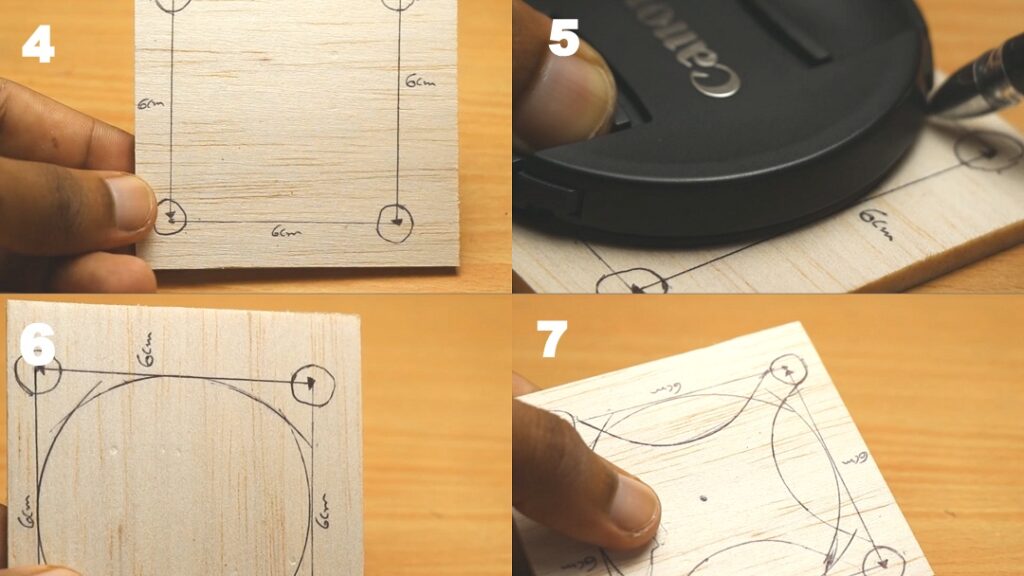
A Square of 6cm sides should be Drawn on the balsa wood each corner circles which has exact same diameter as motors are drawn
Big circle is drawn inside square
Once the circle is complete it’s time to draw internal curves
Arcs should be cut taking middle lines of square sides as reference Using compass,
Frame for mini drone
Follow steps below
Drone Framing Making, Easy steps for balsa frame
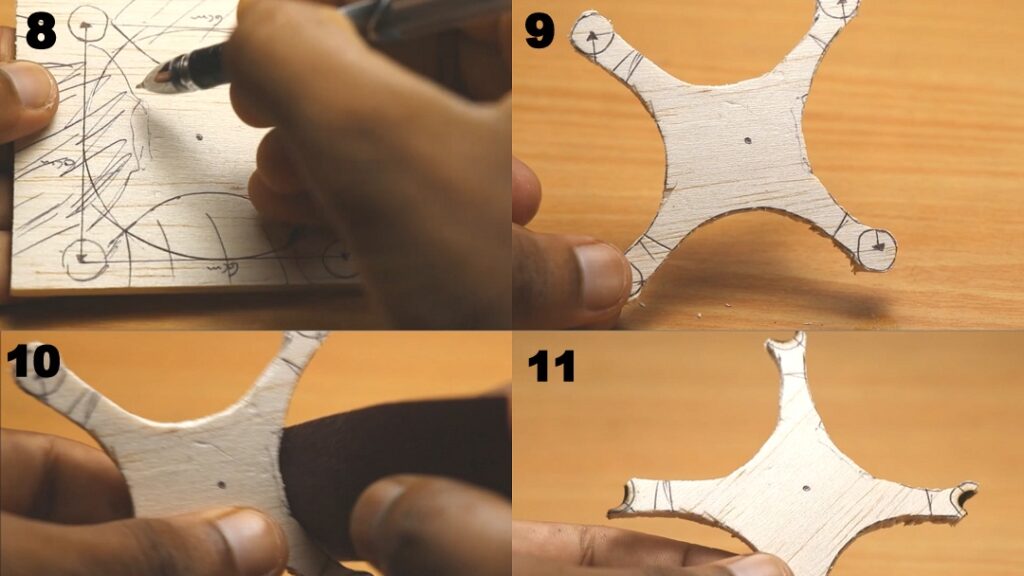
Mark rough lines on extra surfaces which is need to be removed
Cut using cutter
Rub with Sand paper for smooth finishing of edges
Make space for high speed DC Motors by cutting circled edges
To keep the coreless Motors in place I am cutting of the circle into half
using hot glue I can stick the Motors
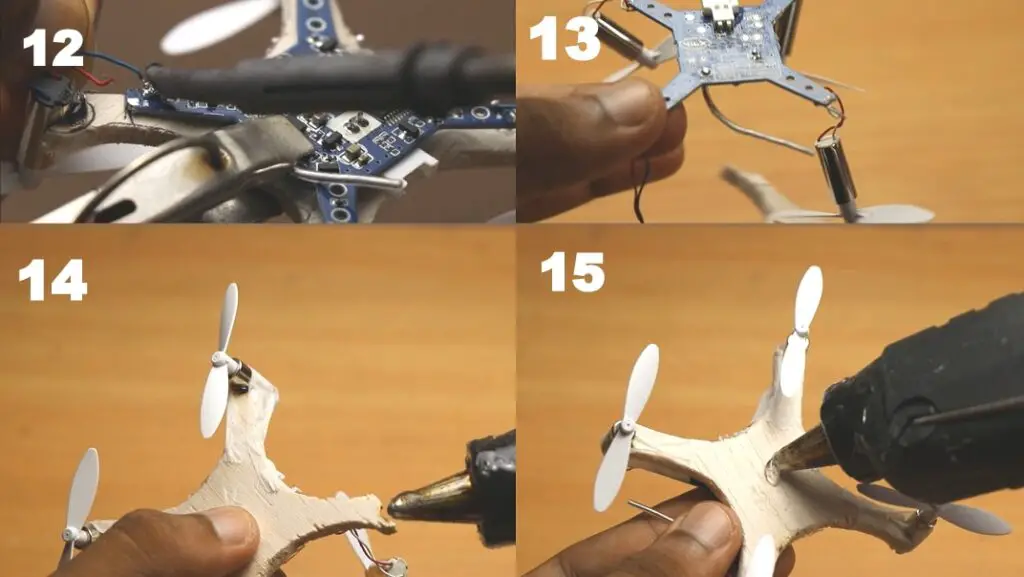
Once all the four core-less Motors are kept in their place solder the wires into the receiver board make sure the positive and negative terminals are connected to exact required terminals on circuit board
If the terminals are connected wrong drone behaves in very weird way! It shouldn’t happen so care must be taken before soldering
Once everything is in place double check the connections
Make sure rotations of opposite sided motors remain same
For example if i number motors as 1,2,3 and 4 in clockwise directions, number 1 and 3 propellers should rotate is same directions where as 2 and 4 should also be same , this will be same principle for all kind of quadcopters
To power this mini motors I will be using 450ma mini li-po battery pack
It gives backup of 5-8min when mini drone runs with full speed
Using finger find out exact Mid point of our mini drone
Use hot glue to stick small li-po battery onto frame
Connect battery to receiver board
To Charge the battery simply disconnect battery from board and connect it to charging cable
That’s it with the steps to make this drone now let’s see how to use this mini Quadcopter
How To Fly Mini Toy Drone
Plug in batteries into your Transmitter and switch on power button
Keep drone on flat surface
Switch on receiver(drone) using switch provided in receiver board
You should hear little beeeep sound
Pull left and right joystick to it’s right bottom ends until drone is calibrated, confirm same when lights from drone blinks for few seconds
Moving throttle stick up and down makes all four propeller to rotate
Slowly increase the throttle to get your drone airborne
Use right sided joystick to move the drone on different directions
Slowly lower the throttle stick to get our drone on the ground
Now we have built and flew our very first mini drone! Also this is an mini toy drone despite of its size and safety in terms of usage, since the propellers are made of plastic and overall weight of drone is very less which is much suitable to use in indoors
If you are complete beginner to making drones it’s better to develop drone flying skills using such small scale selfbuilt drones as this comes with a very cheap price and with all the flying functions of actual drone
Pro Tip! Flying actual drones without any prior experience leads to some disaster in most of the cases.
I am talking about self built larger scaled drones with very big propellers and brushless motors which can carry some payloads, common payloads used are cameras and additional batteries for longer flying time
As I mentioned earlier larger the payload more the risk level In flying drones, in other hand if you have money there are lot’s of other options in market to purchase high quality drones which has all types of sensors equipped inside it so that even a complete beginner can manage to use.
Advantages after make mini drone
Easy to build
Comes on a budget
Enhances learning of basic principles in building and flying drones
Safer to use
Can survive minor crashes
Disadvantages
Payload can’t be added
Shorter flying time
Shorter flying distance( 5 to 10metres)
Very low strength
VIDEO LINK
Watch here flying of this Mini Drone
Hope you enjoyed building this drone. if you have any suggestions for making any improvements your advice is always welcome, Drop down your suggestions in the comment box let’s talk about it!