How to Make LED Cube 4x4x4 using Arduino Nano with Project Report
Hi folks in this article we will see How to Make LED Cube 4x4x4 type in a very simple way.
Also, we will go through many of the useful information you might find useful for your project.
If you are looking for a cool science project you can have this as a 4x4x4 led cube project report pdf.
As all the circuits and programs are covered.
To begin with, let’s see what is led cube and what are the uses of a led cube.
Bonus You may also like our recent project on Gas Leakage detection and alerting system
What is Arduino LED cube
Led cube is nothing but an arrangement of led in a 3d space so that we have access to light control in x,y, and z directions.
Led cube comes in various sizes, it can be 3x3x3, 4x4x4, or 8x8x8.
These are the most popular versions that many think of building.
There can be a cube of 5x5x5 also but after 4x4x4 size, we need additional drivers and power sources to run the led cube.
Hence it would be worthy to consider making up to 4x4x4 cubes and below if you are a beginner.
Building 4x4x4 led cube might be time-consuming as you might need to put some effort into soldering.
As we need to take care of proper connections while the soldering process and its a bit tricky, we’ll find it going on!
Uses of LED Cube
There is no specific reason to build a LED cube, but if you want to learn programming consider experimenting with your codes here.
With the multiple numbers of led there is a need for a proper set of codes to generate specific light patterns on the cube.
The results of light display from an led cube are satisfying so that they can be used as a table decor thing!
These were some of the basic info about what are LED cubes.
Let’s dive into the building phase and the supplies necessary to build this.
Materials Required to Build an LED Cube
- 64 clear LED I chose Blue
- Soldering lead and iron
- Arduino Nano
- High-Quality PCB From Next PCB
- Empty PCB or few call it as Universal prototyping PCB
- Jumper wires 20 pieces
- 3V battery to test the LED
- Sandpaper to diffuse
- Wirecutter
- Arduino IDE and Programming cable
Preparing LED to Make Cube
As we are making 4 cube we will require 64 LED bulbs.
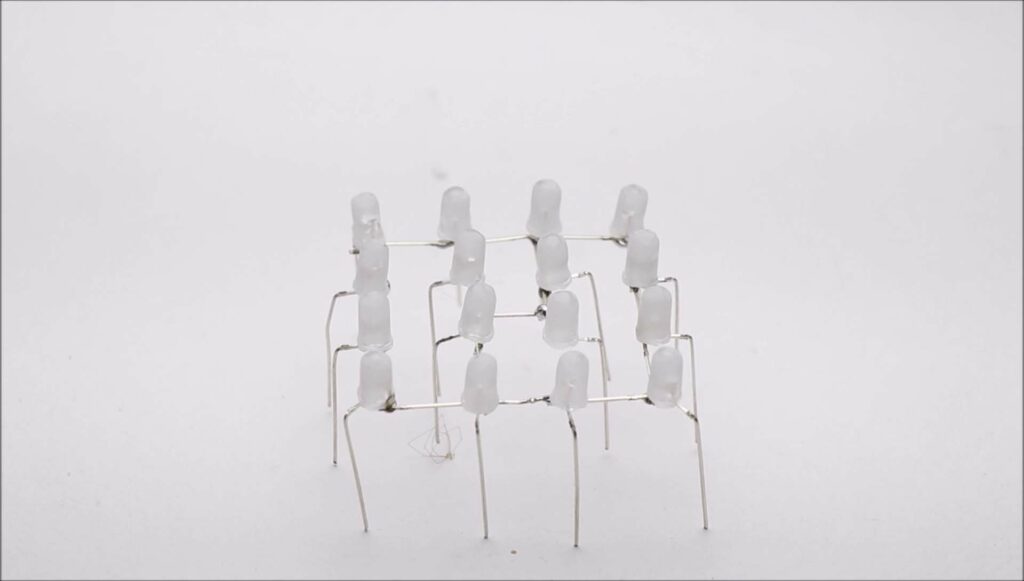
These are the clear LEDs that give out very dim light so we need them to be diffused.
Diffusing helps the LED to be much brighter so that the cube looks cooler.
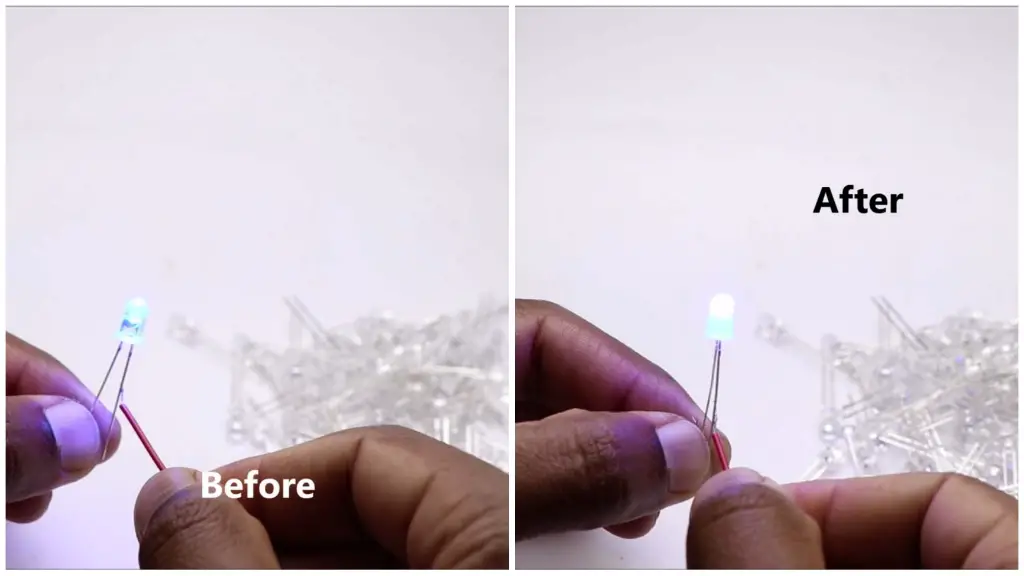
From the above visual you can see the differences.
The first image shows before diffusing process and the second is the after diffusing process.
Now you may wonder, How do i diffuse?
How to Diffuse LEDs
Just rub the sandpaper over the top surface of the bulb.
I made a small setup that speeds up the process, you can in video here.
I added a small wheel to the shaft of a small dc motor.
Later sandpaper was glued to the top surface.
Now we have a low-cost grinder!
The process is very simple yet it may take a while to diffuse all the 64 LEDs.
I would recommend testing all the LEDs before diffusing process.
After its completion, we can start to bend the legs of LED bulbs.
You can bend using a wire cutter, but I made use of 3d printed jigs.
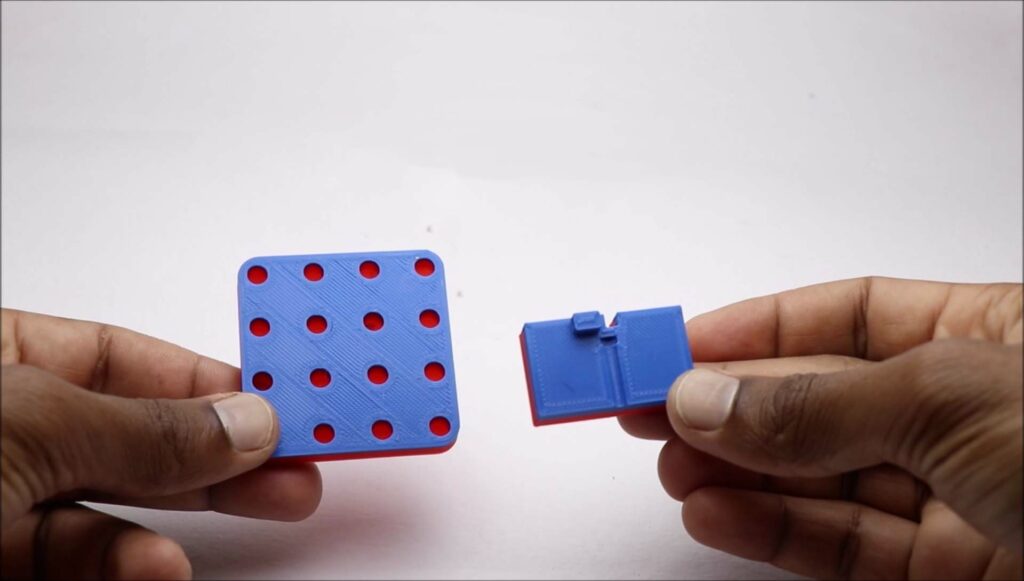
These are the jigs I was talking about if you have a printer you can print them.
This is for 4x4x4 spacing Jig and these are for LED bending Jig
You can make your own jig using cardboard too, make sure to take care of proper spacing.
Bending LEDs
Follow this simple step to bend the LED.
You will now know the use of jigs.
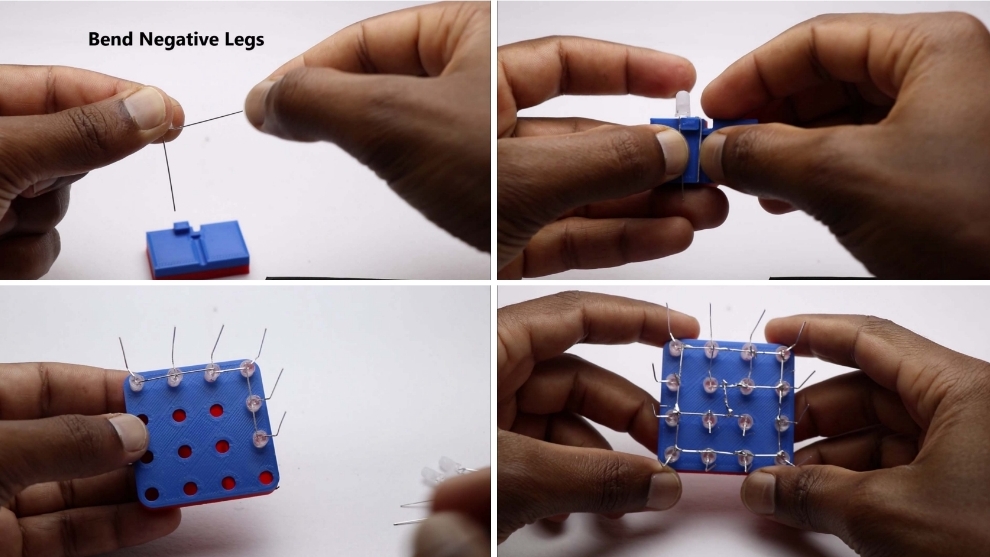
Note that the LEDs come with 2 legs or pins.
The longer leg is for positive and the short leg for negative.
In our project, we are bending negative Legs.
Without a jig, it is difficult to retain a uniform shape across all the LEDs.
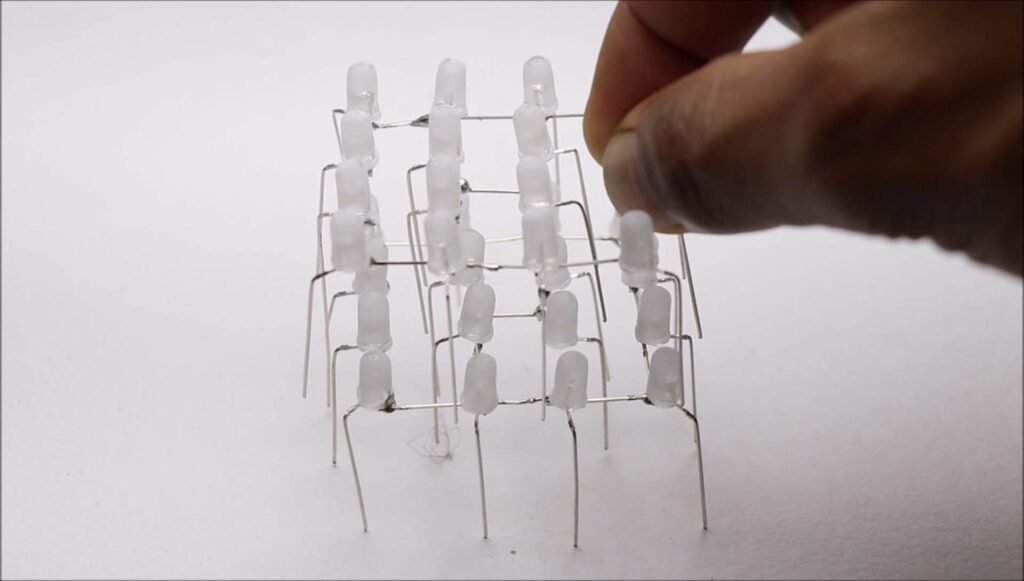
Once you bend all the 64 bulbs we can arrange them as layers of cube.
You can see from the above image the simple step and after the soldering process.
Once you remove them from the jig we will end up with this layer.
Don’t worry about the minor bends we will fix those in upcoming steps.
Once we have our first surface ready make 3 more of these
Once we end up with all the 4 layers test the circuit.
As said earlier we have all the positive legs connected to one another.
Just connect the 3v battery positive side to the common connection legs and touch the other end within the negative side of the battery.
Just touch all the legs using the negative side of the battery.
Adding Layers
Once everything is working fine start to solder another layer on top of the first layer.
Repeat the same step for the other pair too.
Handle all the legs with care as we shouldn’t miss out on soldering any of those.
Now make a pair of other 2 layers too.
End of the process we will have two separate layers of 2 pairs each.
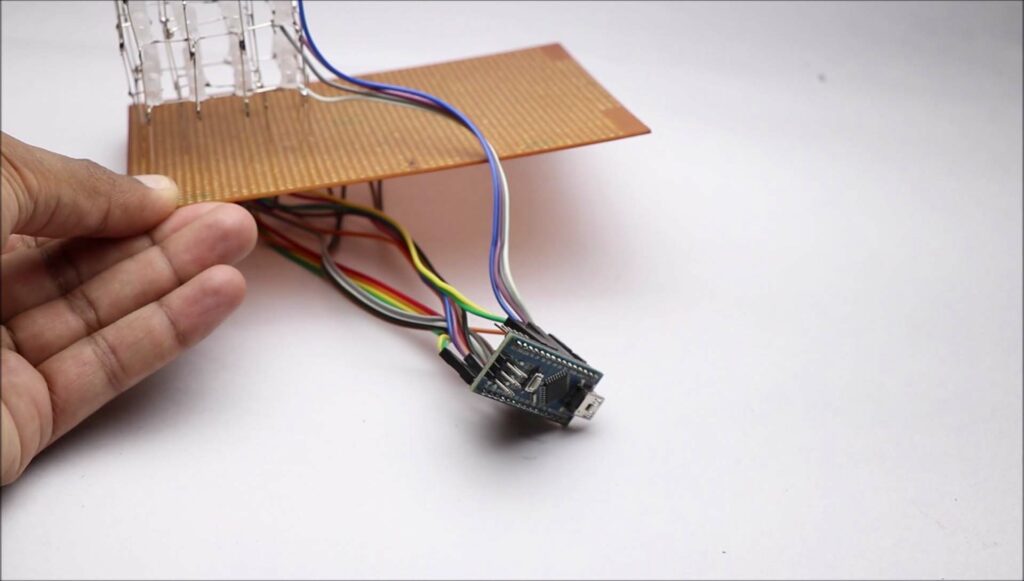
Now use an empty PCB to support the first pair.
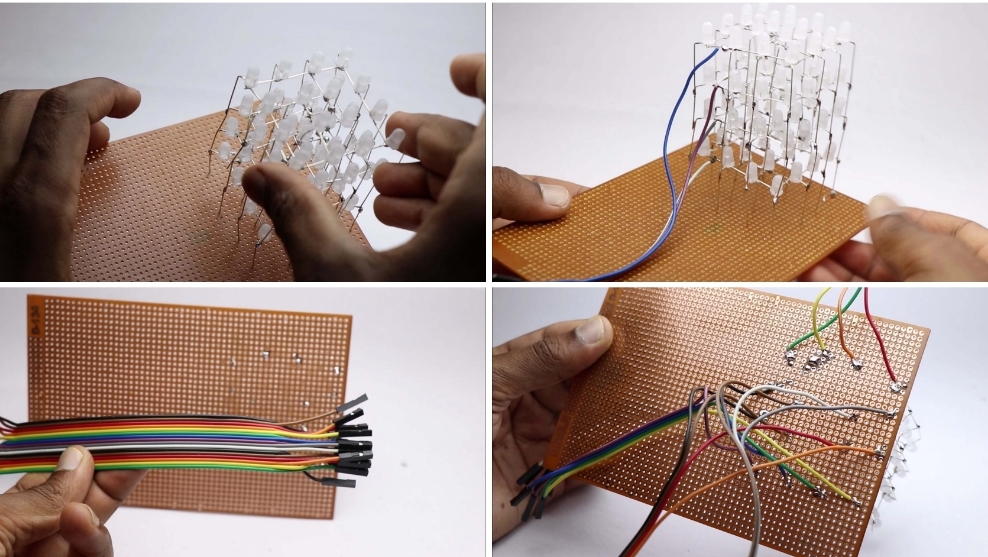
When you look at the base we will have 16 legs from the LEDs.
Solder all these to the PCB later to the individual 16 jumper wires.
These complete bottom layer circuits.
The top layer we will add 4 jumper wires that is layers.
As spoken earlier we have 4 layers and you see the same from the above image.
Now it is the circuit that needs to be done.
LED Cube 4x4x4 Circuit Diagram
This helps you to make all the circuits with ease.
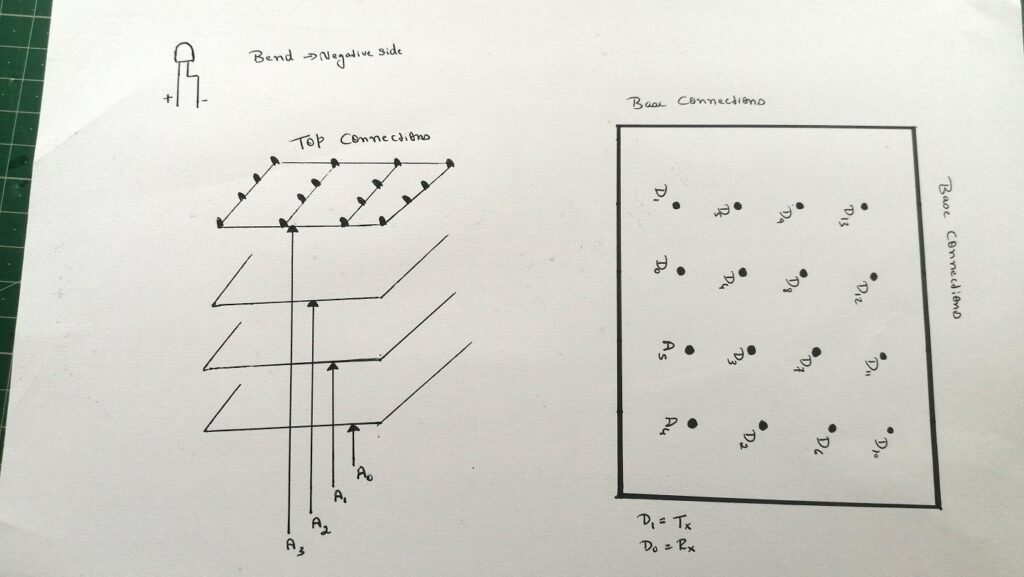
I have given a layer-wise connections diagram.
The top layer has only 4 connections which are shown in the first image.
The base layer has 16 wire connections.
I have given the names of the pins that need to be connected to Arduino nano.
Ardino nano is perfect for making these kinds of led cubes as we don’t need any additional drivers.
All the wires fit in place with the number of pins available on board.
Once you finish the circuit we can upload the instruction to run our cube.
LED Cube 4x4x4 Code
Use these 4x4x4 led cube Arduino code in your IDE
No need to install any library.
Just connect nano to your computer, open Arduino IDE
Use these codes and dump them to your nano.
After upload, your LED cube starts to work with awesome colorful patterns.
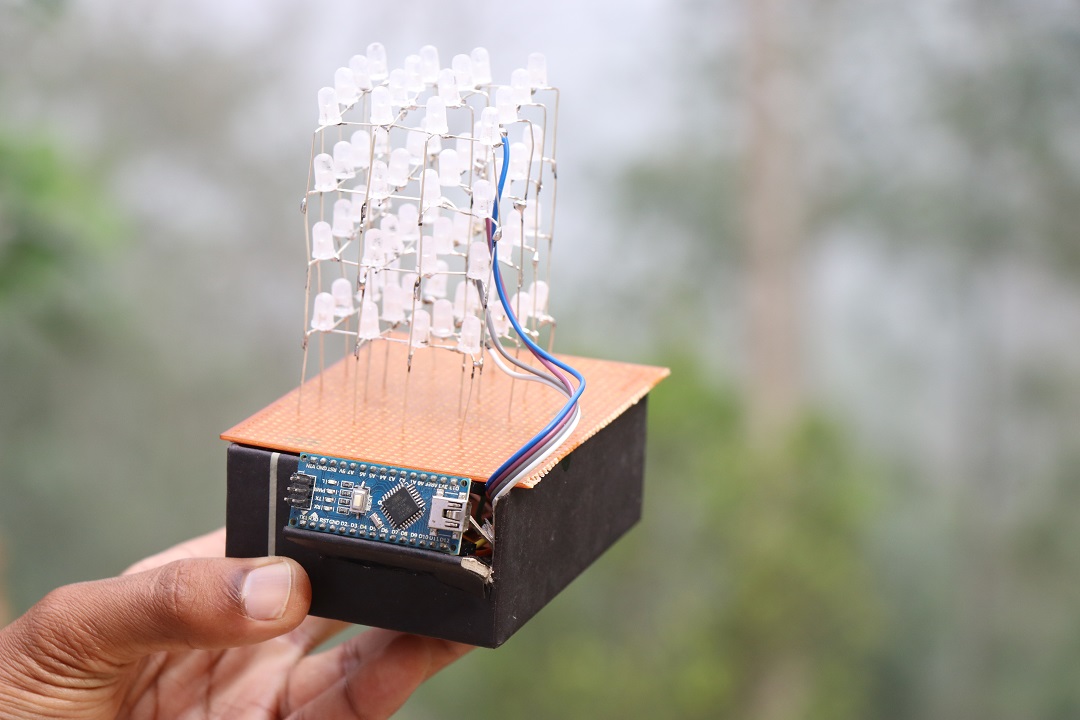
Now we can cover all the wires inside a small box so the work looks neat.
I made use of old cardboard box as a base for this project circuit.
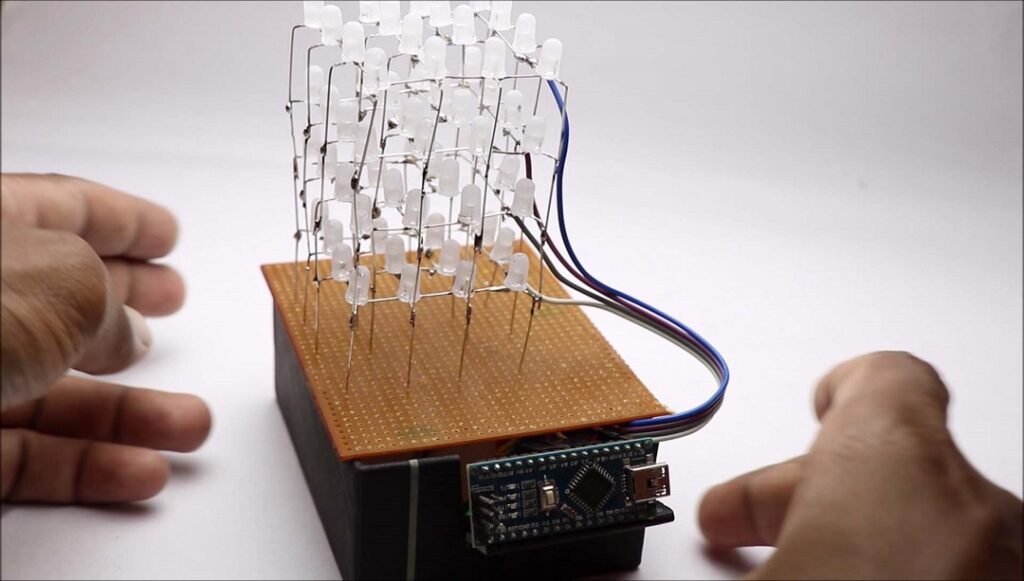
This is the final project looks, isn’t that cool.
It is cooler when it displays various colorful light patterns.
You can watch this working Video of this Project.
Don’t miss to check our interesting science projects too, Thanks.


