Make Shuriken from cardboard
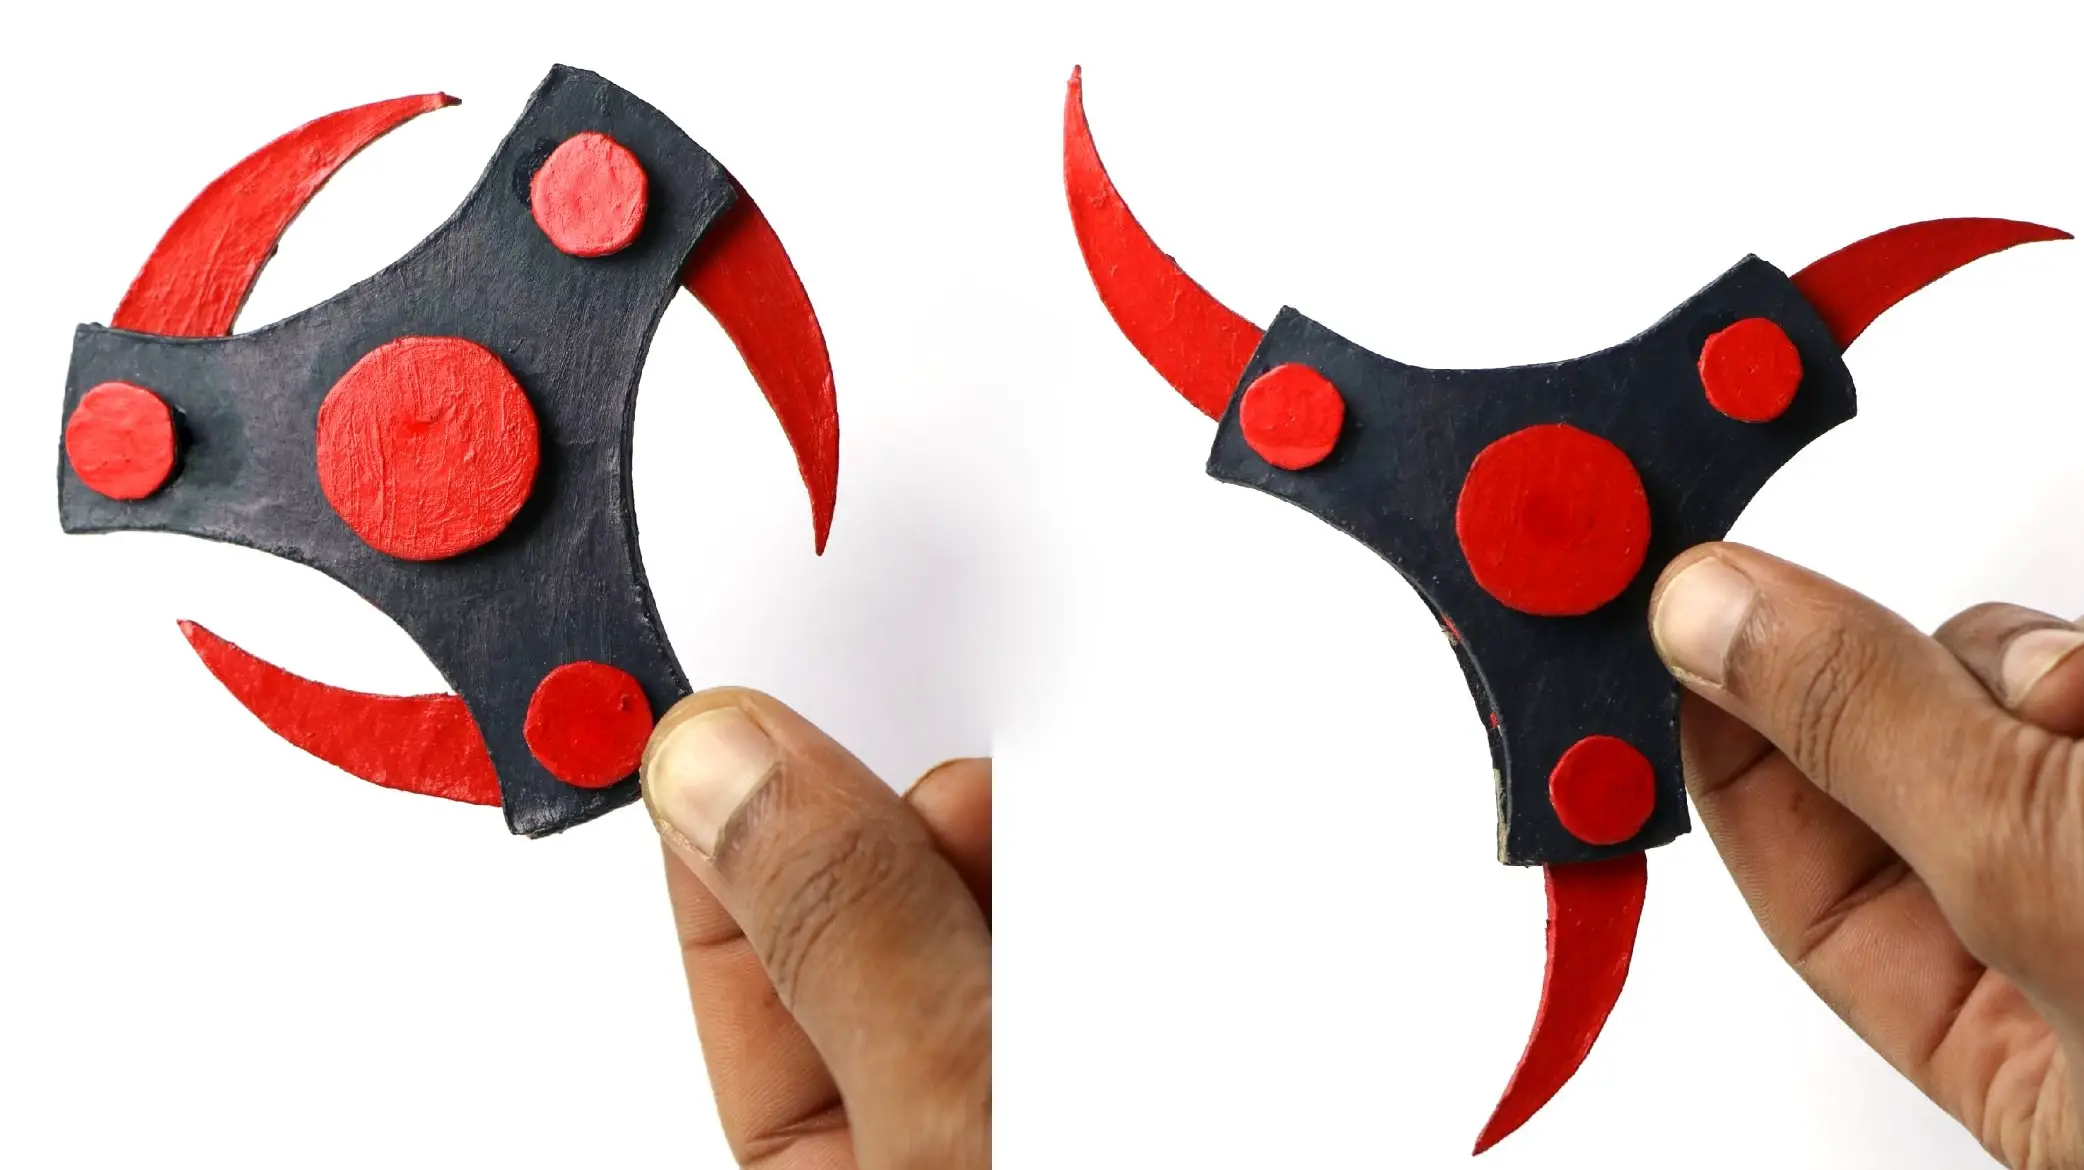
Hey Creators love to show this idea of making Cool shuriken from cardboard, There are lots of video on internet which shows how to make shuriken out of popsicle sticks or shuriken out of paper.
Problem here is shuriken made from Popsicle sticks are hard to work while from paper it is fragile, So cardboard eliminates those problems!

What is shuriken
Those who watch Naruto have pretty much good idea on what shuriken actually is. Those who doesn’t know what is that cool looking gadget is and what are it’s purpose let me tell you!
Shuriken is a kind of weapon which was and being use in some parts of earth especially by so called ninjas, in reality i haven’t seen any except in Naruto! It comes in different shapes and sizes i managed to create my own shape !
Note: Video link for this project will be given at bottom of this article
Requirements to Make Shuriken from Cardboard
- Cardboard
- Super glue
- Cutters, Ruler and pencil for markings
- Protractor for angle measurements
- Spray paint of any other paint for coloring cardboard
- Time!
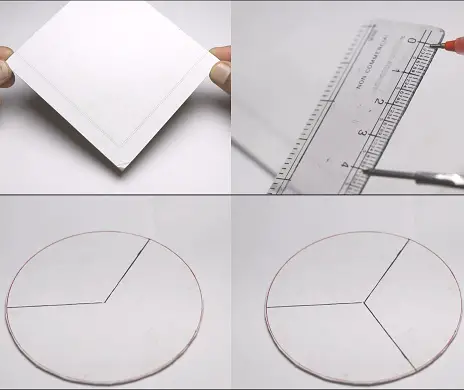
Steps for making shuriken
Choose your type of cardboard, make sure not to use corrugated type
I used from notebook cover they are hard and thin
Mark 4cm on compass and draw a circle of 8cm diameter Later divide circle into 3 parts (120 degrees each)
Further steps to make shuriken from cardboard
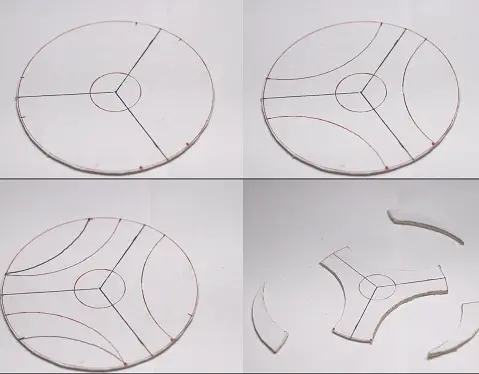
Measure 1cm in compass and draw 1cm on either side at end of divided lines(120 degree lines)
Using protractor draw arcs, Refer visuals for much more detail info
Later draw arcs by proceeding 1cm measured line or by your own measurements
Using cutter cut the marked shuriken body Refer last image to know how
Finishing steps for shuriken

Color the cut pieces using fabric paint or any other coloring alternatives
Spray paint looks better but it’s not suitable to perform same in confined space Add extra parts everything as shown in first image above
Make holes on blade part and main frame Using toothpick i coupled everything together
Super glue works fine for instant coupling Trim off extra toothpick using plier
At this point basic version of shuriken is ready to make it functional i added mechanism as shown in last image
To make this i used leftover pieces from first part
Double check the edges before installing this to main frame This works for retraction of shuriken blades
Once everything is made clear install this to main frame and couple it use toothpick and superglue
Almost our shuriken is ready Left over work is to give it a final touch
Actual image of Shuriken made from cardboard
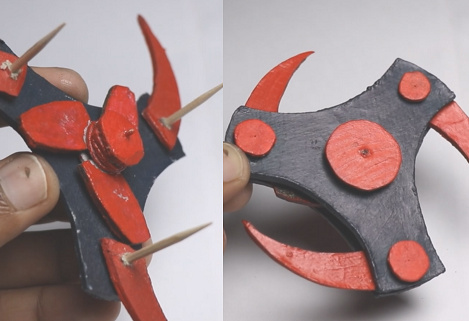
For better understanding i have added close-up shot of internal mechanism
Added pieces to cover everything up and give it a neat look Second image shows finished shuriken made out of cardboard
How to use Shuriken
To use this shuriken just twist the back side plate part which opens the blade to close the blade this mechanism is not much accurate, iam working on the mechanism for better open and closing of blades once it’s finished ill post it !
Hope that helped you in making your own shuriken from cardboard, any questions which might arise while building this will be solved from my end but only on one condition! Just comment it on the comment box that is our bridge for communication, Thanks have a good day.
Video tutorial on how to make shuriken
As mentioned above check this VIDEO to watch how to make cool shuriken out of cardboard, also don’t forget to check out other videos and posts related to Arduino and science projects.
