Control Multiple Servo Motors With Joystick and Arduino
Hi people in this post we will see how to Control Multiple Servo Motors With Joystick and Arduino.
This is very useful when we are building robots with arms.
It’s very feasible sometimes where the use of the joystick eases the struggle to control the servo as per our needs.
We will also go through Arduino 4 servo joystick code and circuit diagram with the explanation that we are using in this project.
To begin with, let us go through some of the basics bound to this project.
What is the need to control servos with a joystick?
There is no straightforward answer to this question as the answer depends upon the situation.
Let us assume that you are making a model Scara robot with a teaching function.
Here if we are using a joystick the task becomes much simpler.
Another example is where there is a need to control the steering of an RC car.
To steer an RC car joystick is much better compared to some other controlled devices.
Here the usage of the joystick with servos simplifies a lot of work in some areas.
So controlling multiple servos would be useful.
Without much explanation let’s directly dive Into the materials required.
You might also like our popular post on Raspberry Pi based obstacle avoiding robot
Now we will love on with this project.
Supplies Necessary to build this project
- Micro servos x 4 from amazon
- Arduino UNO board from here
- Analog joystick modules x 2
- Jumper wires M to F and M to M
- Half Breadboard
- 18650 battery holder
- 2 Lithium ion batteries
- Arduino IDE and Programming cable
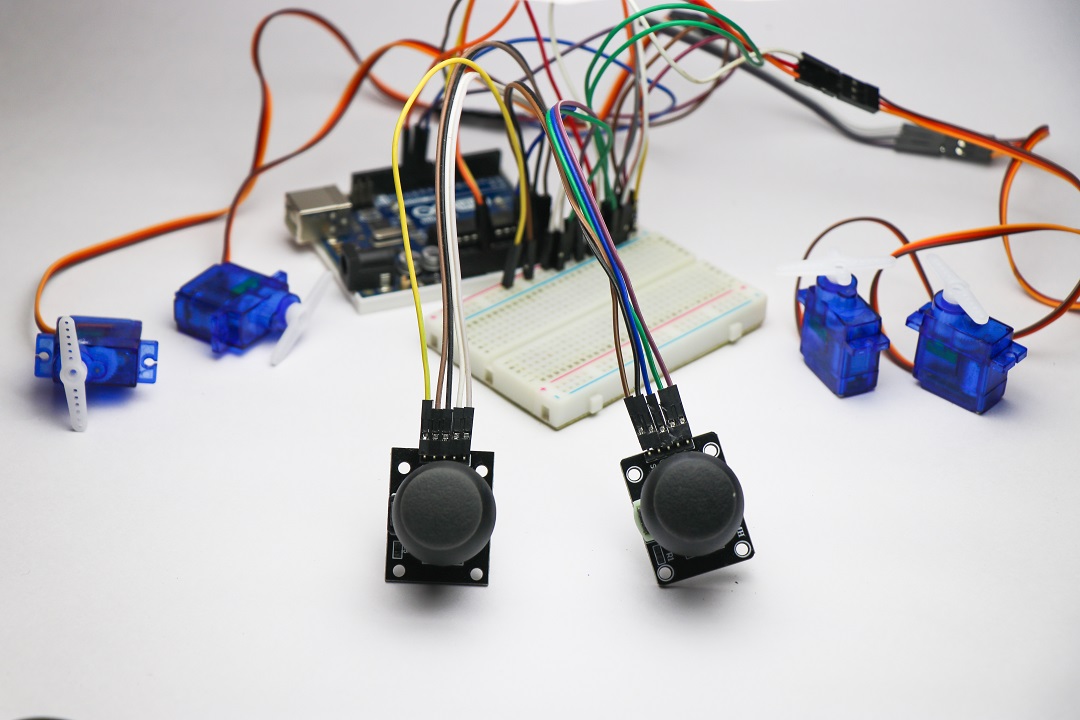
With all these materials in one place, we can start to build the circuit.
Use this very simple circuit diagram to make the connections.
If you have trouble understanding the diagram I have given an explanation below.
Control Multiple Servo Motors with Joystick Circuit Diagram
A circuit diagram to control 2 servos simultaneously or 4 servos using an analog joystick and Arduino is given below.
To make it very simple ill split the diagram and explain it below.
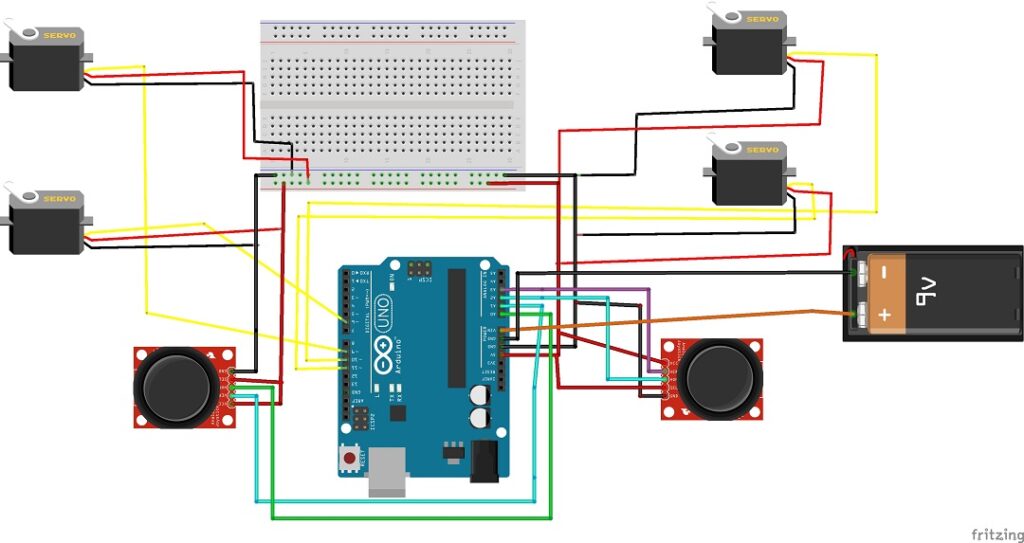
Analog Joystick connections
We are using 2 analog joystick and each of them control 2 servo motors.
The Joystick module has 5 pins Gnd, 5v, Vrx, Vry and Sw
We will name each as Joystick 1 and Joystick 2
Both the joysticks Gnd and 5v will be connect to positive and negative rails on the breadboard
Likewise, Sw from both modules will go to positive rails on the breadboard.
Vrx and Vry of Joystick 1 to A1 and A0 on Arduino Uno.
Now Vrx and Vry of Joystick 2 to A3 and A2 on Uno.
Micro servo connections
We here have 4 micro servos, Set of 2 pairs.
We will name as S1, S2, S3, and S4.
As we know servo has 3 pins.
Vcc, Gnd, and Signal.
Vcc and Gnd of all servos will be connect to positive and negative rails on Breadboard.
Whereas the signal pin of S1 and S2 will be connected to Digital pin D6 and D9 on Uno.
S3 and S4 signal pins to D10 and D11 pins of Uno.
Now Gnd and 5v pins from Uno to plus and minus rails on the breadboard
These complete our circuit, make sure not to miss any wire connections.
Multiple Servo control with Arduino and joystick code
You can just use these codes on your Arduino IDE to control many servos at once using Arduino.
If you are new to using Arduino IDE you might need to add a servo library.
Do not worry it’s easy as it seems.
- Just add this servo library zip to your IDE.
- To do this after you have this zip file open IDE.
- Goto sketch->include library->add.zip library.
- Click on the file that you just got from the above link.
- Now add the Codes given above.
- Check for the proper port number and finally hit on run code.
- Now the Arduino board has a program that can control 4 servos with the joystick.
After the code is on the board disconnect the programming cable from UNO.
Now add the power source from the battery to the board.
I am using dual 18650 battery holders, Output voltage is 7.4v in my case.
Using rechargeable batteries is much more feasible in this project.
Arduino 4 servos at once working video
You can just watch this video on how to control servo motors with Arduino and a joystick.
Just plug into the power source and you are ready to control servos with a joystick.
Applications of 4 servo joystick Arduino project
There are numerous applications from this project
This being the base can be used on 3d printed robotic arm kits.
Robotic arm gripper can be made with 2 servo and joystick control from same circuit.
Interactive games can be made as we can have multiple-axis movements.
In drones, Robots, and RC cars.
About our Sponsor PCB WAY
PCB WAY has been offering high-quality PCBs at very budget-friendly prices so that we can build interesting projects.
They are now offering FR-4 & Aluminum boards along with their advanced tech PCBs like Flexible & Rigid-Flex boards, Rogers, and HDI at a very reasonable price.
More info about the same is given below
They always come up with some useful competitions.
If you don’t want to miss winning a Raspberry Pi pico try your luck Click here
We are very happy to inform you that we have Technical cooperation with FreeCAD and kicad
Check the details for freecad and Kicad here you will definitely like them.
Glad you read this article on 4 servo control using Arduino and analog joystick modules.
Check out our other amazing project on Wireless electricity transfer project


