Easy LED Chaser using Arduino

How to make an Easy LED chaser using Arduino Uno, If you are in search of making cool led patterns with Arduino you are at the right spot!
In this article, we will discuss everything related to Arduino based LED chaser, Arduino codes, LED chaser circuit diagrams, and videos.
To begin with, let us quickly get to know what are these led chasers.
In simple words running led creates wonderful patterns and to run multiple LEDs we need a microcontroller.
In our project, we are using an inexpensive and programmable microcontroller that everybody knows is Arduino Uno.
We provide a set of instructions for the microcontroller and accordingly, it will run LEDs.
The combination of changes implemented in code varies timings and power supply to each led.
This results in a pattern of lights which we call chasers or running lights.
Must check this article if you want to control an entire LED strip using Arduino.
Note: Don’t miss the working video given at the bottom.
How many LEDs can Arduino control
I would say it depends and I will say why.
Consider an Arduino led cube 4x4x4 or 8x8x8 in this case we are using more than 200 LEDs.
A set of led bulbs can be connected in a row and can be controlled from a single output pin.
So we can understand that you can use a large number of LEDs but the problem arises with the power supply for these LEDs.
In my case, I can easily work with 13 LEDs and I used a USB power supply from the board itself.
We will have a look at the basic principle behind our project.
Working of LED chaser using Arduino
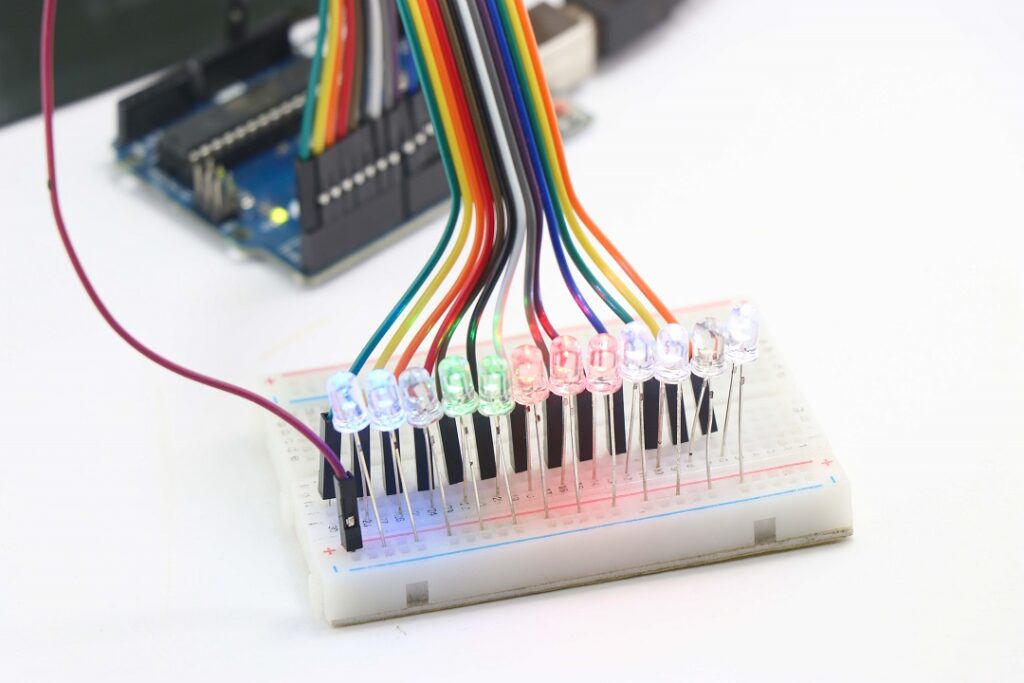
There is no complex working theory, just some codes, and you are all set to go.
The above shown is an actual image from our project.
Arduino led chasers works with the same principle.
Digital output pins are use to control the LEDs given at specific intervals by a rated power.
The variations in these patterns can be altered using codes.
Components required to make Arduino LED chaser
- Arduino Uno
- Few jumper wires
- Small or long breadboard
- 220ohms resistor
- LEDs of your choice
- Programming cable
- Arduino ide to upload instructions to Arduino board
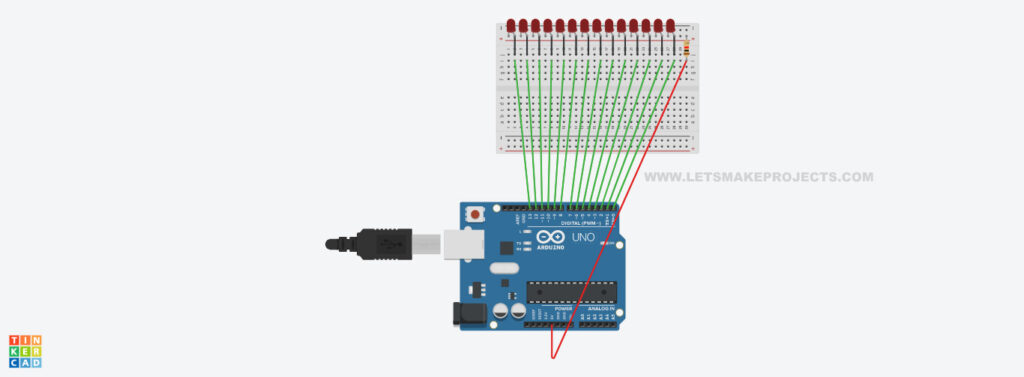
LED chaser circuit using Arduino
This circuit diagram for the led chaser can run 13 LEDs.
However, I had to face some issues with D13 output hence it’s better not to use that pin.
One keynote to be taken care of here is adding a 220ohm resistor at the supply end from the board will prevent burnouts.
Note: You can make the same project using 10 LEDs or lesser but I recommend using at least 8 bulbs to have a decent effect.
From the 14 LEDs, all positive legs will go with the positive rail on the breadboard via a resistor.
If you don’t have any resistor you can run this project for some time without a resistor.
But I don’t recommend doing this as you might be aware that power usage of led bulbs depends on the color they produce.
Negative legs are connect to digital pins up to D12 including Rx and tx as said earlier I eliminated the use of the D13 pin.
LED chaser using Arduino code
Use this Arduino led chase effect code in your Arduino ide.
Simply copy this on your Arduino ide.
Connect Uno board to your computer via the programming cable.
Click on tools then board to select uno later select the proper port number.
Now you can upload code to your board.
Once it is upload you can see the LEDs that start to play some amazing patterns.
You can play with codes by changing various parameters that contribute to changes in light effects.
Working video
Check these clips from working on a led chaser project that creates a variety of patterns/ effects.
Note: It has more than 5 effects and these numbers can be made even higher if some changes are made in code.
That was all about the led chaser Arduino project don’t miss this Arduino tachometer project.
If you have any suggestions for improvements comment box is always open for you! Happy making.


