Make POV Display using Arduino or Rotating LED Display in Easy Way
How to make pov display using arduino or few call it as a spinning led screen or rotating screen, Well the correct name is POV display.
In this article, we will see how to make an Arduino POV display that can display up to 8 different texts.
To help everyone to make this project all the instructions are given in a very simple way with POV display Circuit diagram and codes.
It is a very good pov display project report if you need it.
What is POV and why make Arduino POV Display?
POV display full form is persistence of Vision and it works in a very simple way, there will be LEDs that blink multiple times every second and the resulting rotation helps us view those characters.
Because of the rotation, the characters appear as if it is in the air.
There are already lots of POV displays in the market, those which are very cheap will not be programmable and it’s boring to view the same again and again.
So we are going to make it on our own.
The POV display which we are making is easy to build and along the build process we will learn how to operate led bulbs using Arduino and how does it form texts.
Before starting we will see some of the features of our Pov display.
Specifications of Arduino POV Display
We are using Arduino Nano which comes at a very less price and most of all it is very small and lightweight.
Not to mention it is slightly larger than mini but the difference is not much.
The display is programmable meaning you can add or change existing characters with your favorite ones and view the same.
All you need is to make some changes in the code inside Arduino IDE.
We are using a toy dc motor that controls the spin, and we are using a separate power supply for this.
These were some of the features, there are a lot more other cool features that you will know along with this article.
To build this we require a few simple materials.
Required Materials
- Arduino Nano from Here
- 8x LED’s at offer
- Empty PCB to hold 8 Led’s buy
- Small lithium polymer battery or Mobile phone battery
- Jumper wires
- Soldering lead and iron
- Rubber band, double side tape and hot glue
- Counterweight(in my case 9v battery)
- Ruler of 15cm
- Programming cable and IDE
Building LED Circuit
First we are making the LED, to make this we will be using an empty PCB board. If you are newly hearing this, I have given the image of the empty PCB below.
There is nothing special about this, it has a pre-drilled hole with minute solder lead so that when we are soldering any component it accumulates on the board.
If you don’t have this you can make the circuit on other materials like on the piece of wood.
But it comes with lot of other extra work like drilling and cleaning.
So I would suggest getting an empty PCB for this project as it doesn’t cost much.
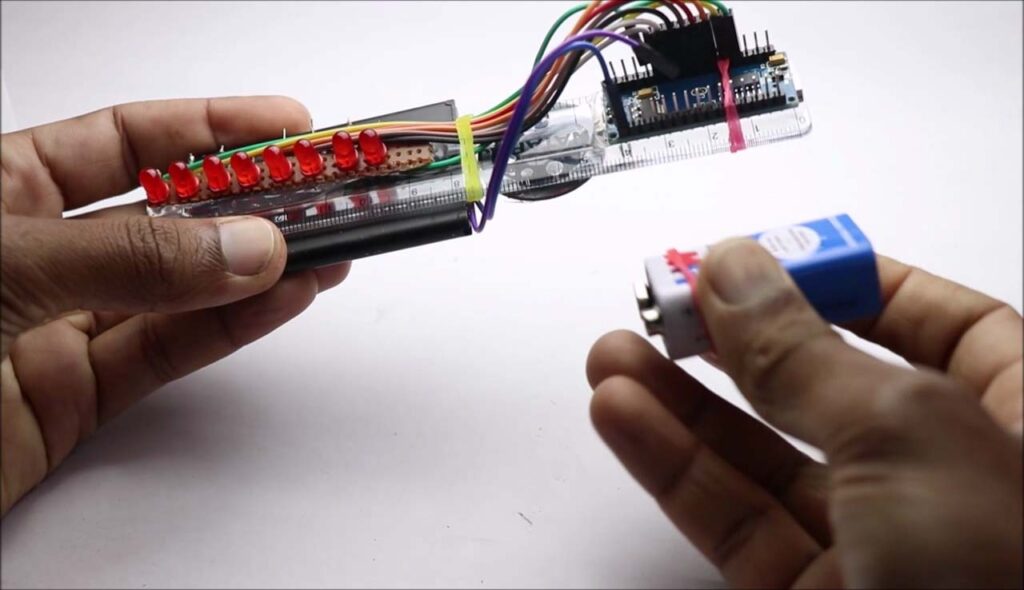
Once you have the PCB add the LED’s,
Since there are chances of missing the terminals I have cut all the Negative legs of the LED, if you think you will not miss any terminals you can skip this part.
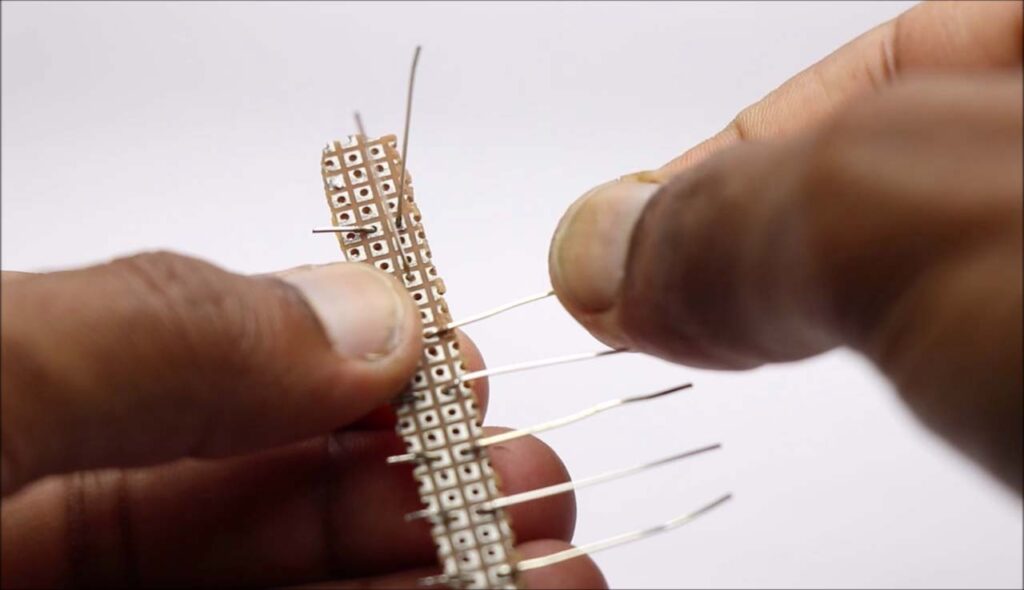
We are making a common connection or in short, all the negative legs are connected by a single wire.
This will be connect to Gnd of the Nano.
Use lines on the PCB as a reference to solder the wire, after everything is complete we can start to make the main circuit.
POV Display Circuit Diagram
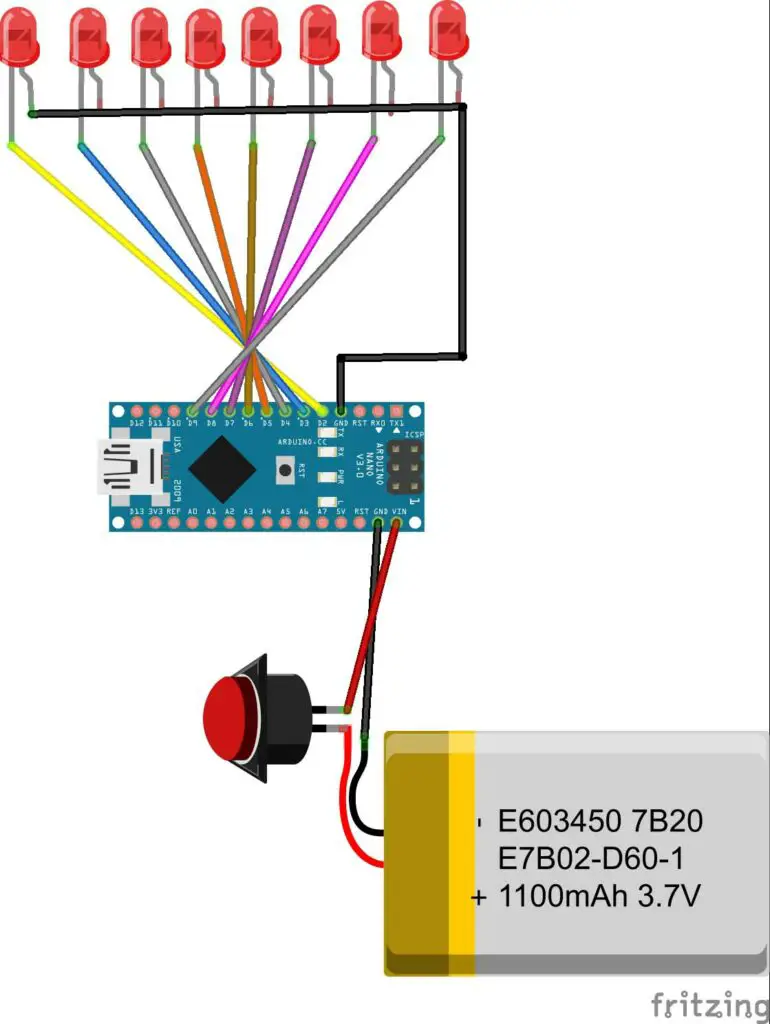
We are using this easy diagram to make the circuit, I have explained this circuit diagram below.
As said earlier LED comes with 2 terminals one is anode/negative and other is cathode/positive.
We are using the negative leg for common gnd meaning all the negative legs of 8 LED’s are connected to one terminal(Gnd of Nano).
Whereas for the signal or in other words commands from the Nano we are using Positive legs of LEDS,
These legs are connected from D2 to D9 pin on the Nano.
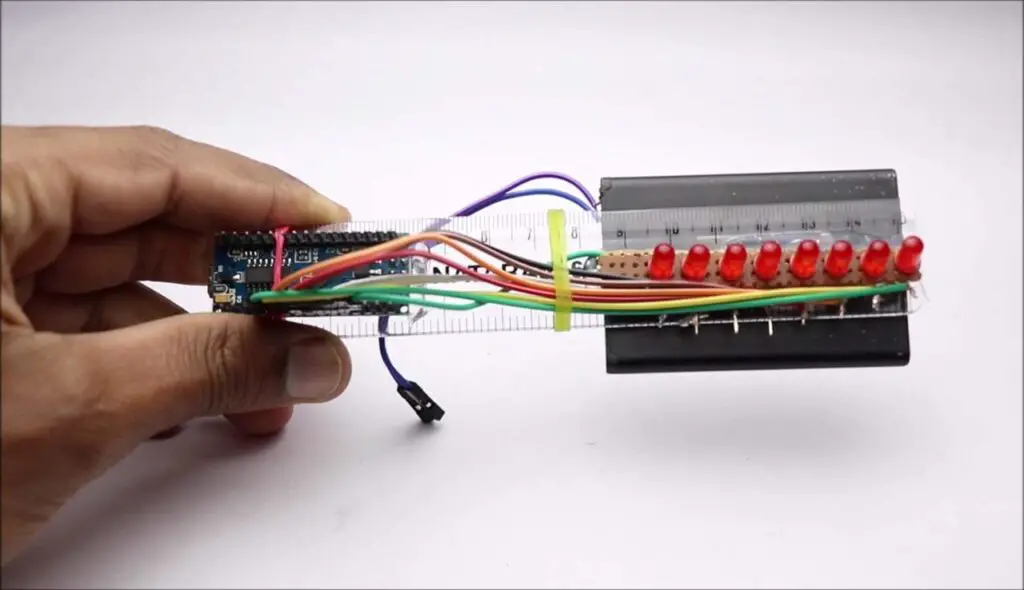
The LEDs are numbered from 1 to 8 from left to right, and the connections are made from D2 to D9 following the same direction.
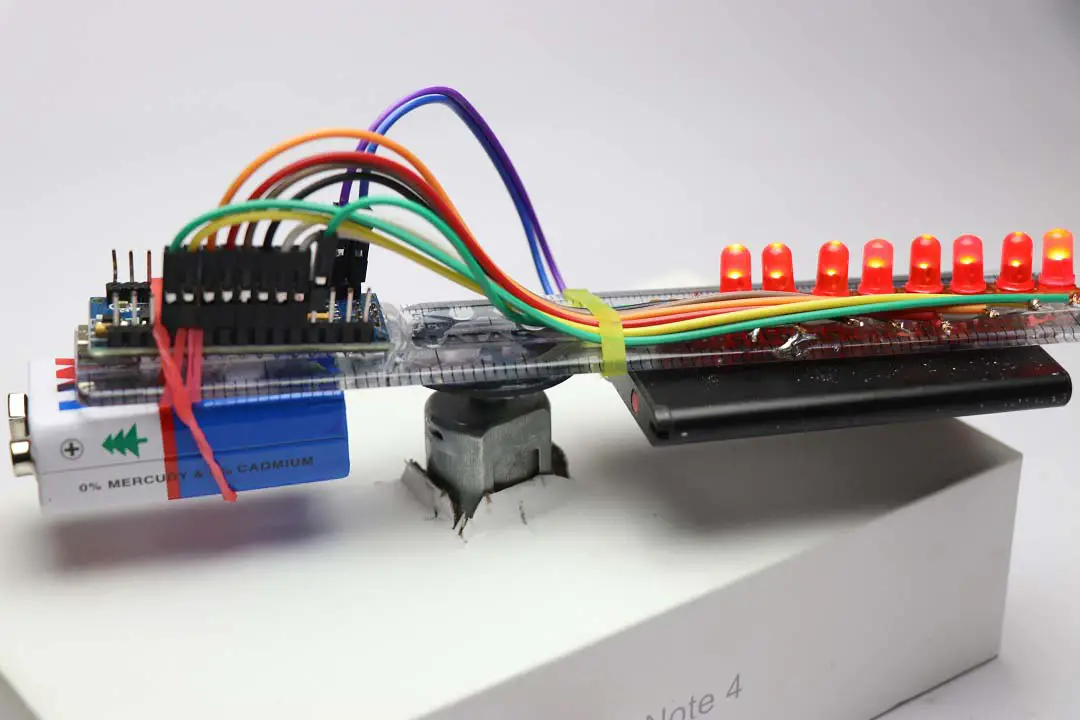
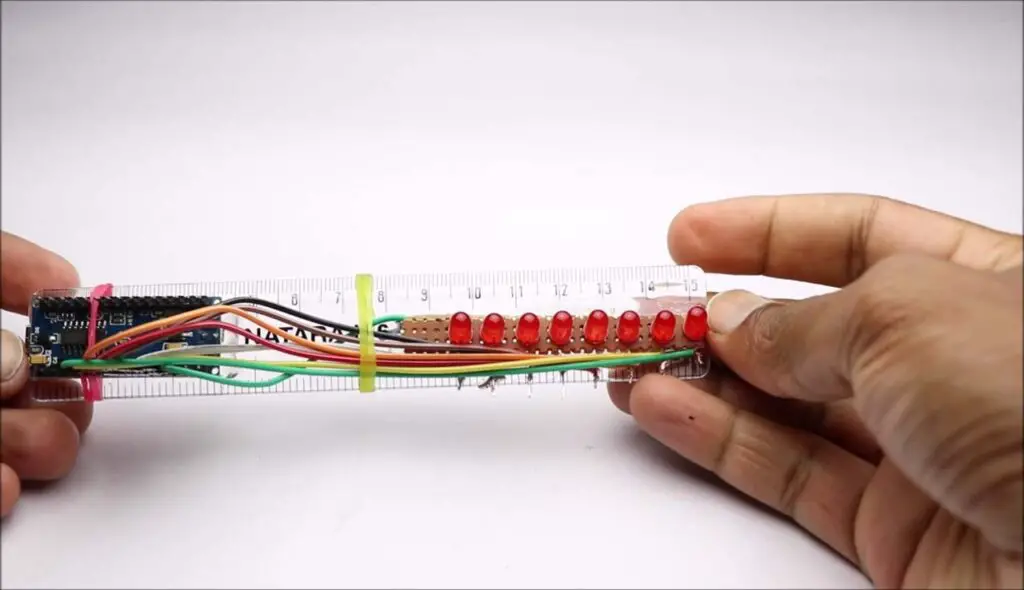
I have kept all the components on a transparent ruler, which is strong enough to hold the circuit.
I used a rubber band wherever necessary.
To power the Nano in my case I used battery from my old cell phone which works fine,
You can use lithium polymer too.
Make sure you have the terminal of the battery accessible so that you can charge it when it goes down.
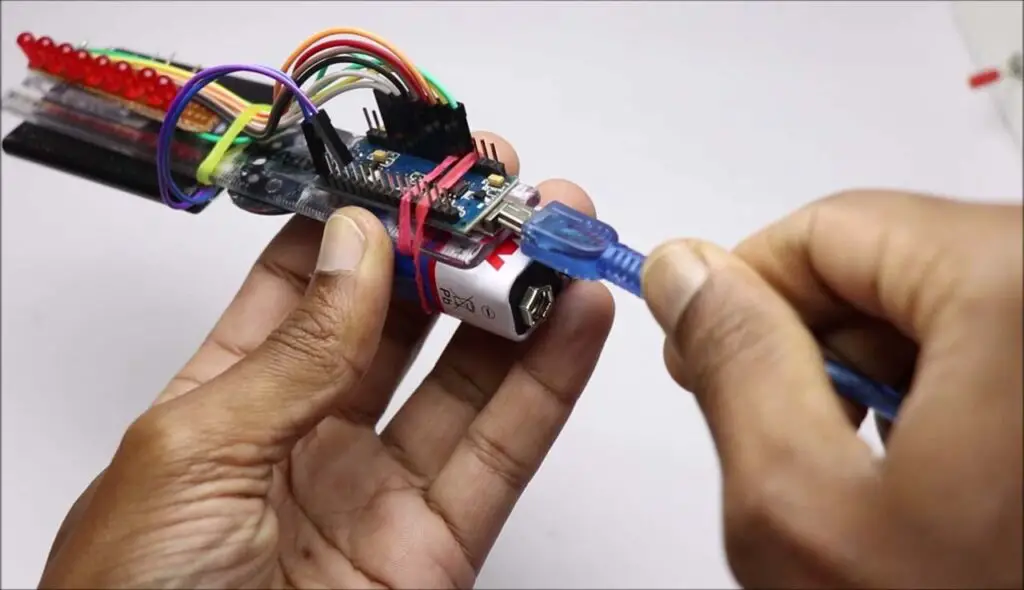
After this is done, you can upload the code.
POV Display Project Code
Use these CODES and paste it on your IDE.
You need to take care of some points before pushing code to your nano.
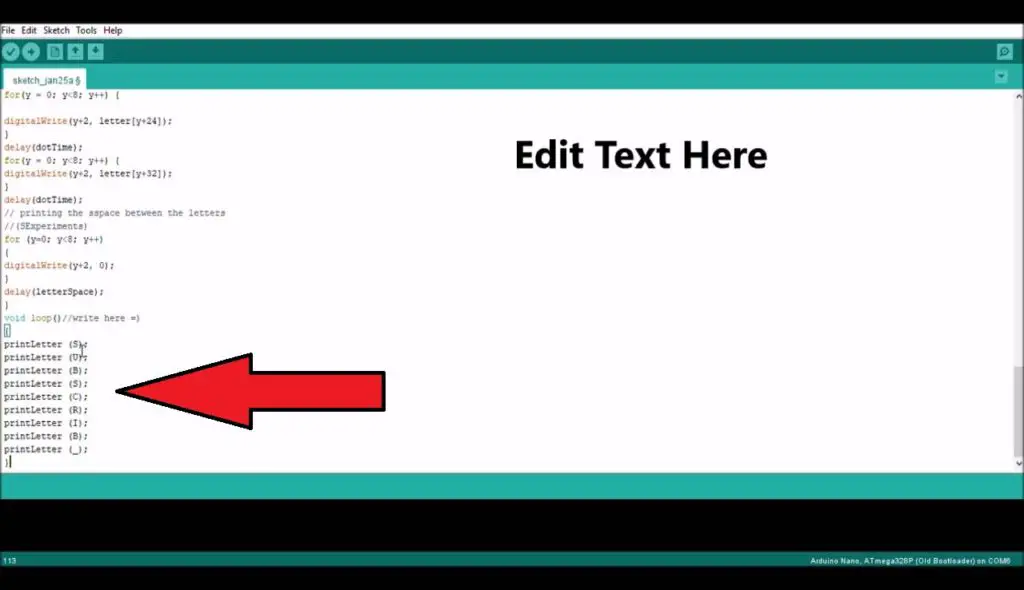
By default our code displays SUBSCRIBE, you can change the code at your convenience.
Before uploading make sure to check the type of board and port and later click on upload.
You don’t need any additional drivers for this project.
This finishes part 1 of the circuit,
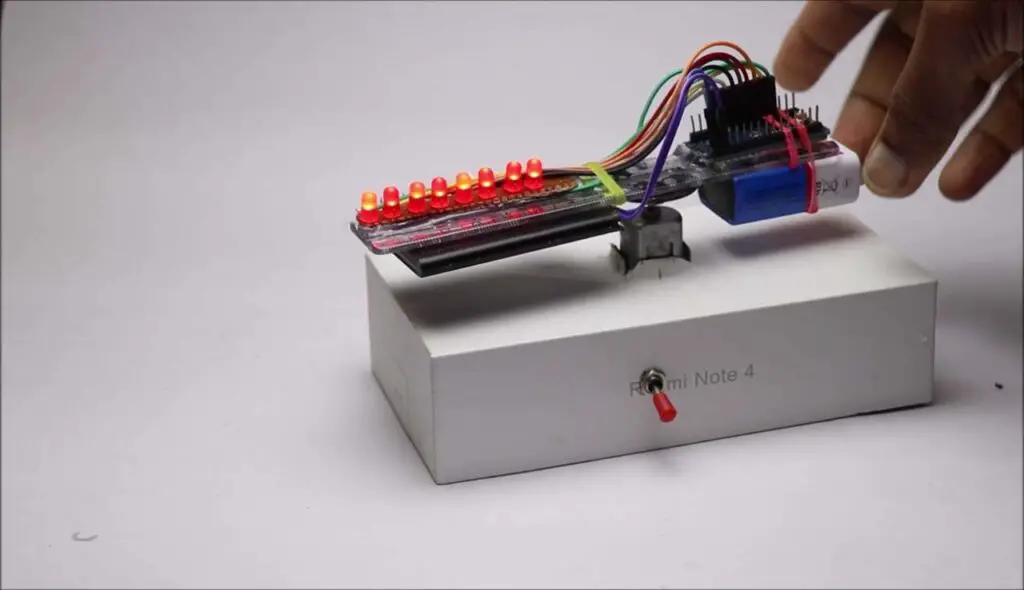
Building Rotational Base
Now part 2 is rotational mechanism For this we are using a basic circuit, switch control of dc motor that runs on a single lithium-ion battery.
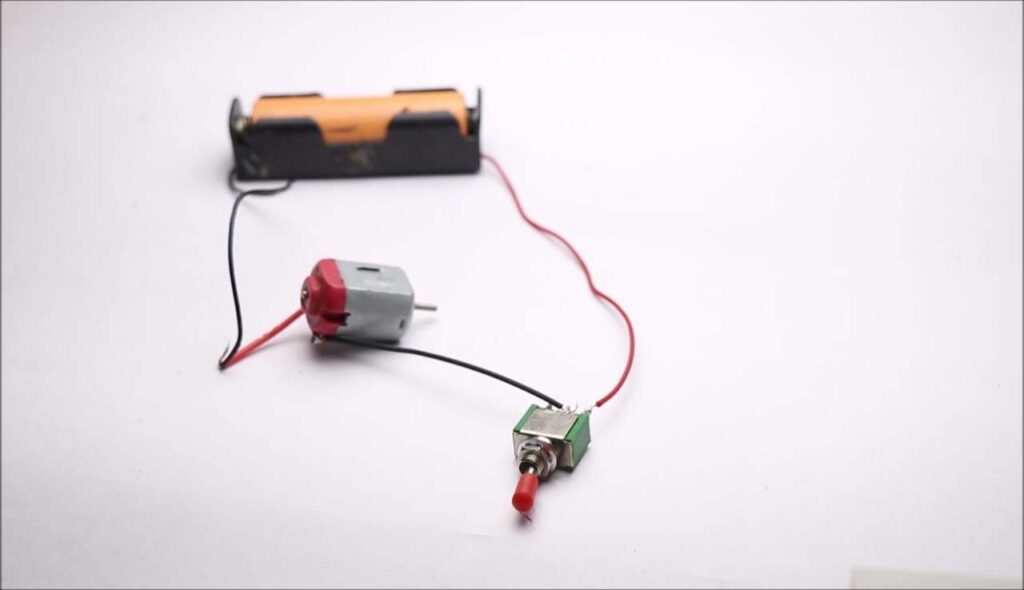
Now, this becomes the part that gives us the pov view, our entire setup of LED will stand on this motor shaft.
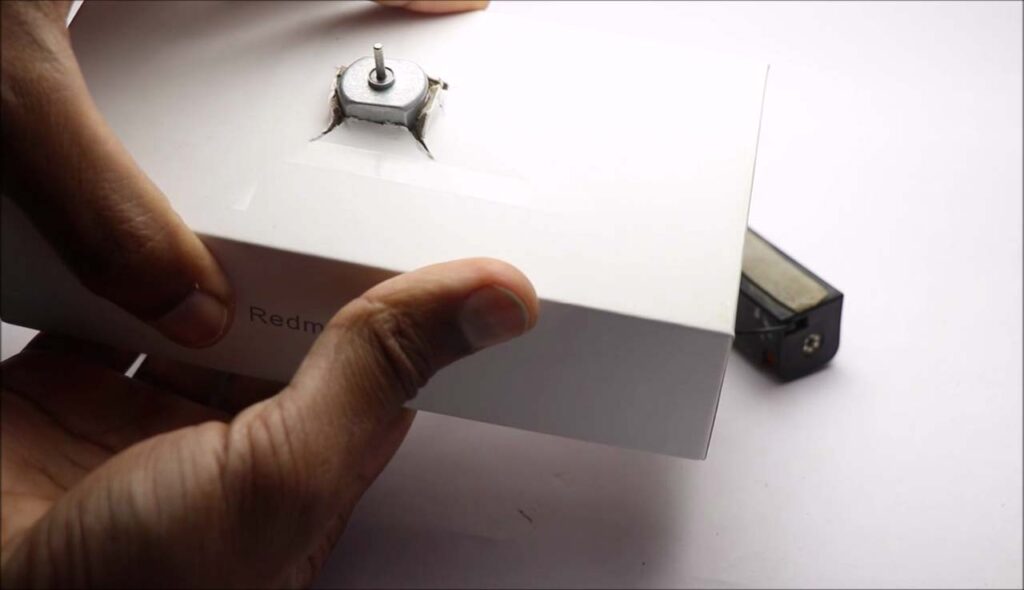
So we need a good base.
I found that the hard box cover from the cell phone suits best to hold these parts.
You can see how I made a simple stand using those materials.
Now we can place or circuit.
Before placing make sure to check the center point or known as CG of the ruler where all the parts are kept.
In my case, it was near to the cellphone battery.
So to make the CG come in the middle of the scale I used a counterweight(9v battery)
This counterweight eliminates unnecessary vibrations, hence the rotation is more stable.
After gluing the battery in place, we can test our project.
Just power on the Nano and you should see the lights that blink multiple times a second.
Now you can turn on the bottom switch that rotates the system, when it starts to spin switch of the lights and observe the rotation.
If you start to observe any vibrations as you might use a different material for counterweight,
Try to adjust the weights before you give a full spin.
You can see the words as given in the IDE.
In my case LIKE and secondly SUBSCRIBE are the view which can be seen.
If you want to change to other text, just connect your board to ide and change the text’s given at bottom of the code.
That completes this project, hope you liked the project, you can check the working video of this project below.
Video tutorial of Rotating LED Display using Arduino
Check this Video for the working on this Project.
Don’t forget to show support by liking and sharing this video with others.
You May also like our previous post on Gas leakage detection system


